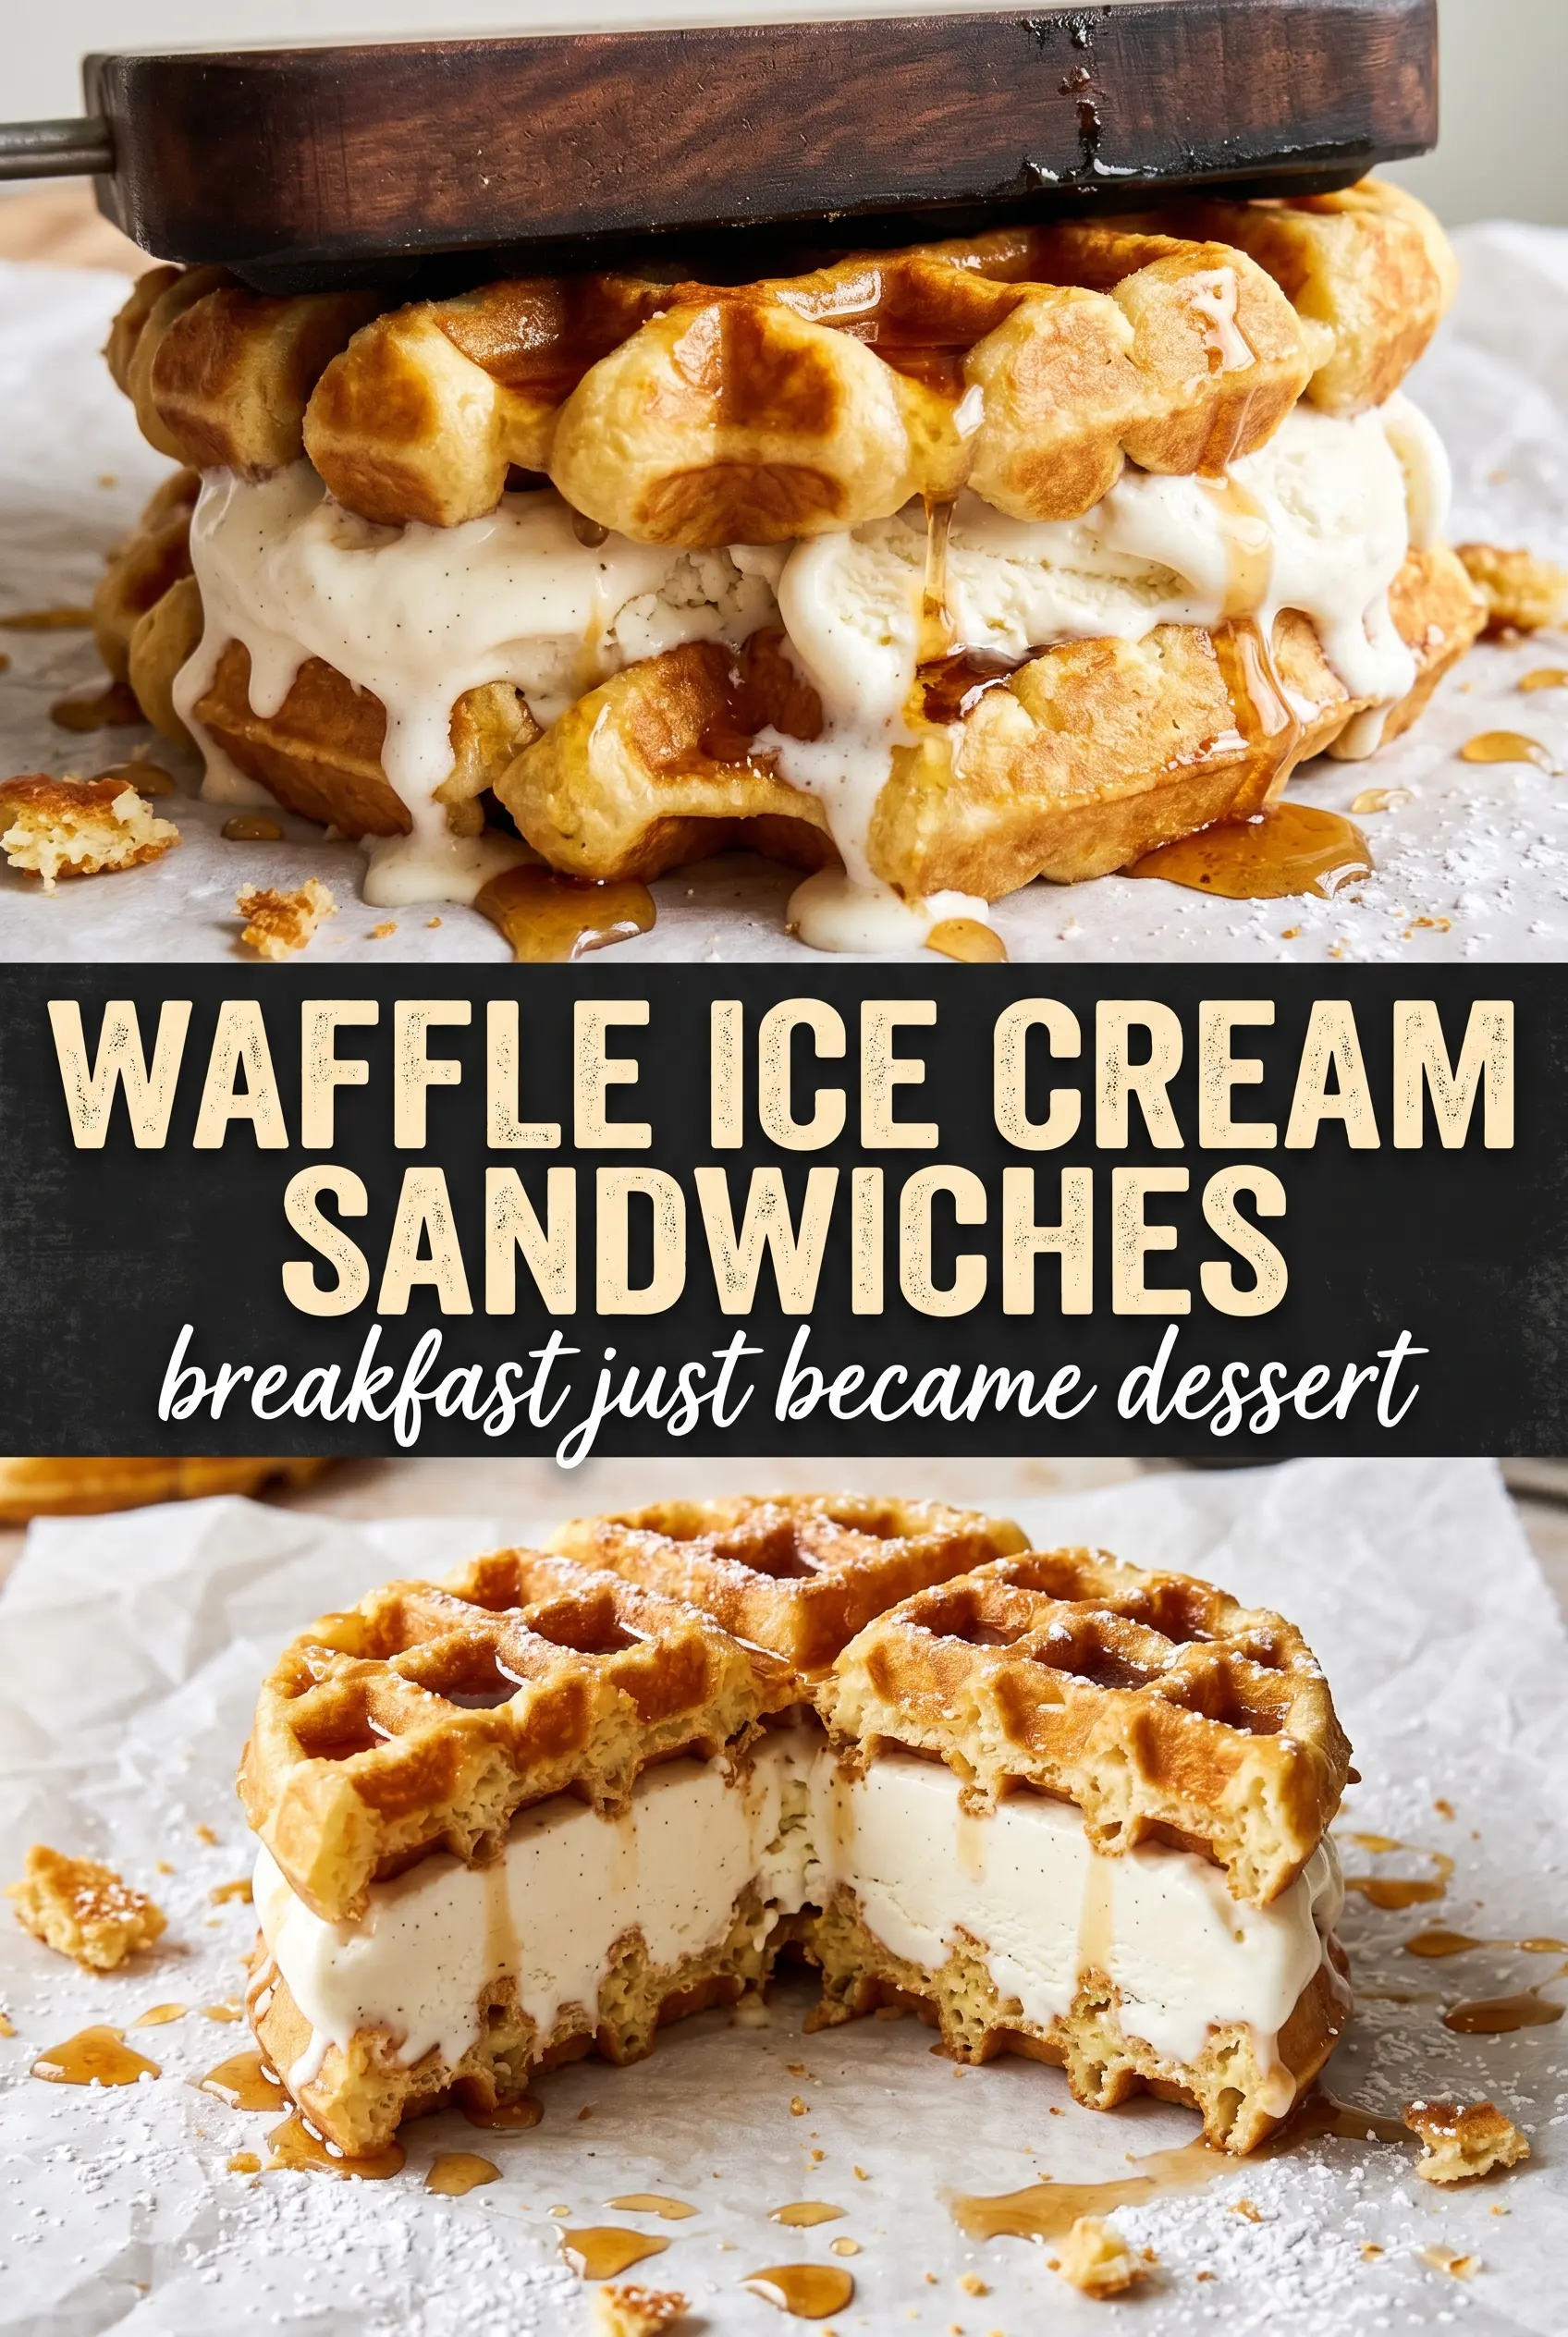
Golden waffle squares with a scoop of vanilla bean ice cream in the middle have a way of disappearing faster than almost any dessert I make. The magic is in the contrast: crisp edges, a soft center, cold ice cream, and that little maple finish that makes the whole thing taste more intentional than it has any right to be. When the waffles are cooked dark enough to stay sturdy, every bite holds together instead of collapsing into a sticky mess.
The trick here is treating the waffles like a structure, not just a breakfast base. A touch of sugar helps them brown, but the real insurance is cooking them until the steam drops off and the exterior feels set. Then they need to cool completely on a rack so the trapped heat doesn’t soften the ice cream before you even get to the table.
Below you’ll find the timing that keeps the waffles crisp, the best way to soften the ice cream without melting it, and the one storage move that gives you a firmer sandwich if you want to make these ahead.
The waffles stayed crisp even after I added the ice cream, and the maple syrup on top pulled everything together. I froze them for about an hour like you suggested and they held their shape perfectly.
Like these waffle ice cream sandwiches? Save the crisp, maple-drizzled version for the next time you want a dessert that eats like a diner splurge but feels homemade.
The Part That Keeps the Waffles Crisp After the Ice Cream Goes In
The mistake with waffle ice cream sandwiches is usually impatience. Warm waffles melt the ice cream from the outside in, and even a great waffle will turn limp if it traps steam. Cook them until they are deeply golden with crisp edges, then move them straight to a wire rack so air can circulate underneath.
That cooling step matters as much as the cooking. If the waffles sit on a plate, the bottoms soften and you lose the contrast that makes the sandwich worth eating. A sturdier waffle also gives you cleaner cuts, which means the finished sandwich looks neat instead of slumping apart in your hands.
What the Ingredients Are Doing Here

- Buttermilk — This gives the waffles a tender interior and a slight tang that keeps the dessert from tasting flat. Regular milk works in a pinch, but the waffles will be less plush. If you need a substitute, stir 2 tablespoons of lemon juice or vinegar into 2 cups of milk and let it sit for 5 minutes.
- Baking powder and baking soda — The two work together for lift and browning. The baking soda reacts with the buttermilk, while the baking powder adds extra rise so the waffles stay light enough to bite through even after freezing.
- Vegetable oil — Oil keeps the waffles flexible instead of dry and brittle, which matters once they’re chilled. Melted butter brings flavor, but it can make the waffles a little more delicate and less sturdy for sandwiching.
- Vanilla bean ice cream — This is the center of the whole dessert, so use one with a strong vanilla flavor and a creamy texture. Slightly softened ice cream is easier to scoop and press into place, but if it gets too soft it will squish out the sides when you sandwich it.
- Maple syrup — A light drizzle gives the finished sandwich its breakfast-dessert personality. Use the good stuff if you can, because the maple flavor is noticeable against the cold ice cream and plain waffle.
Building the Sandwich Without Losing the Crunch
Whisk the Dry Ingredients First
Start with the flour, sugar, baking powder, baking soda, and salt in a large bowl. Whisk them well so the leavening is evenly distributed; if the baking soda lands in one spot, you can end up with a bitter bite or uneven browning. This is also the easiest point to break up any flour clumps before the wet ingredients go in.
Mix the Batter Just Until It Comes Together
Whisk the buttermilk, eggs, oil, and vanilla in a separate bowl, then pour them into the dry ingredients. Stir only until no dry streaks remain. A few small lumps are fine, and overmixing will tighten the waffles and make them chewy instead of crisp at the edges.
Cook Until Deeply Golden and Set
Pour the batter into the preheated waffle iron and cook according to the machine’s directions. You want a deep golden color and a surface that feels crisp when the steam starts to slow down. If you open the iron too early, the waffles can tear before they’re ready; if you pull them too pale, they won’t hold up once frozen.
Cool, Cut, and Fill Fast
Set the waffles on a wire rack until they’re completely cool, then cut each one into four squares. Add a thick scoop of softened vanilla bean ice cream between two squares and press just enough to seal the edges. Work quickly here, because the longer the waffles sit next to the ice cream, the more the edges soften.
Finish With Maple and Serve or Freeze
Drizzle the tops with maple syrup and eat them right away if you want the full contrast of warm-waffle flavor and cold cream. For firmer sandwiches, wrap each one and freeze for about an hour. That short freeze helps the ice cream set around the waffle without turning the waffles into hockey pucks.
How to Make Them Fit the Mood You’ve Got
Chocolate version
Swap 1/4 cup of the flour for unsweetened cocoa powder and use chocolate or vanilla ice cream. The waffles will bake a little darker and taste less like breakfast, more like an ice cream parlor dessert.
Dairy-free version
Use a thick non-dairy milk with a splash of vinegar in place of the buttermilk, and choose a rich dairy-free vanilla ice cream. Coconut-based ice cream gives the closest creamy texture, though it will add a little coconut flavor of its own.
Gluten-free version
Use a cup-for-cup gluten-free flour blend that includes xanthan gum. The waffles will still crisp up, but they may be a touch more delicate when you cut and fill them, so let them cool completely before handling.
Storage and Reheating
- Refrigerator: Not recommended. The waffles soften quickly once the ice cream starts to melt.
- Freezer: Wrap assembled sandwiches individually and freeze for up to 1 week. The waffle will firm up more the longer it sits, so eat them sooner for the best texture.
- Reheating: These are meant to be eaten cold, not reheated. If the waffles soften, a short trip back to the freezer is better than any warm-up method, which will melt the filling and ruin the contrast.
Answers to the Questions Worth Asking
Waffle Ice Cream Sandwiches
Ingredients
Equipment
Method
- Preheat a waffle iron. Whisk all-purpose flour, granulated sugar, baking powder, baking soda, and salt in a large bowl.
- Whisk buttermilk, eggs, vegetable oil, and vanilla extract together until smooth. Fold the wet mixture into the dry ingredients until just combined.
- Cook waffles according to waffle iron instructions until golden and crispy. Cool completely on a wire rack until no longer warm.
- Cut each waffle into 4 even squares. Sandwich a thick scoop of vanilla bean ice cream between two waffle squares and press gently.
- Drizzle maple syrup over the sandwiches for serving immediately. The syrup will soak into the waffle pockets and look glossy.
- For a firmer waffle ice cream sandwich, wrap the sandwiches and freeze for 1 hour. Keep them frozen until ready to eat, and note the ice cream will be scoop-stable and less messy.