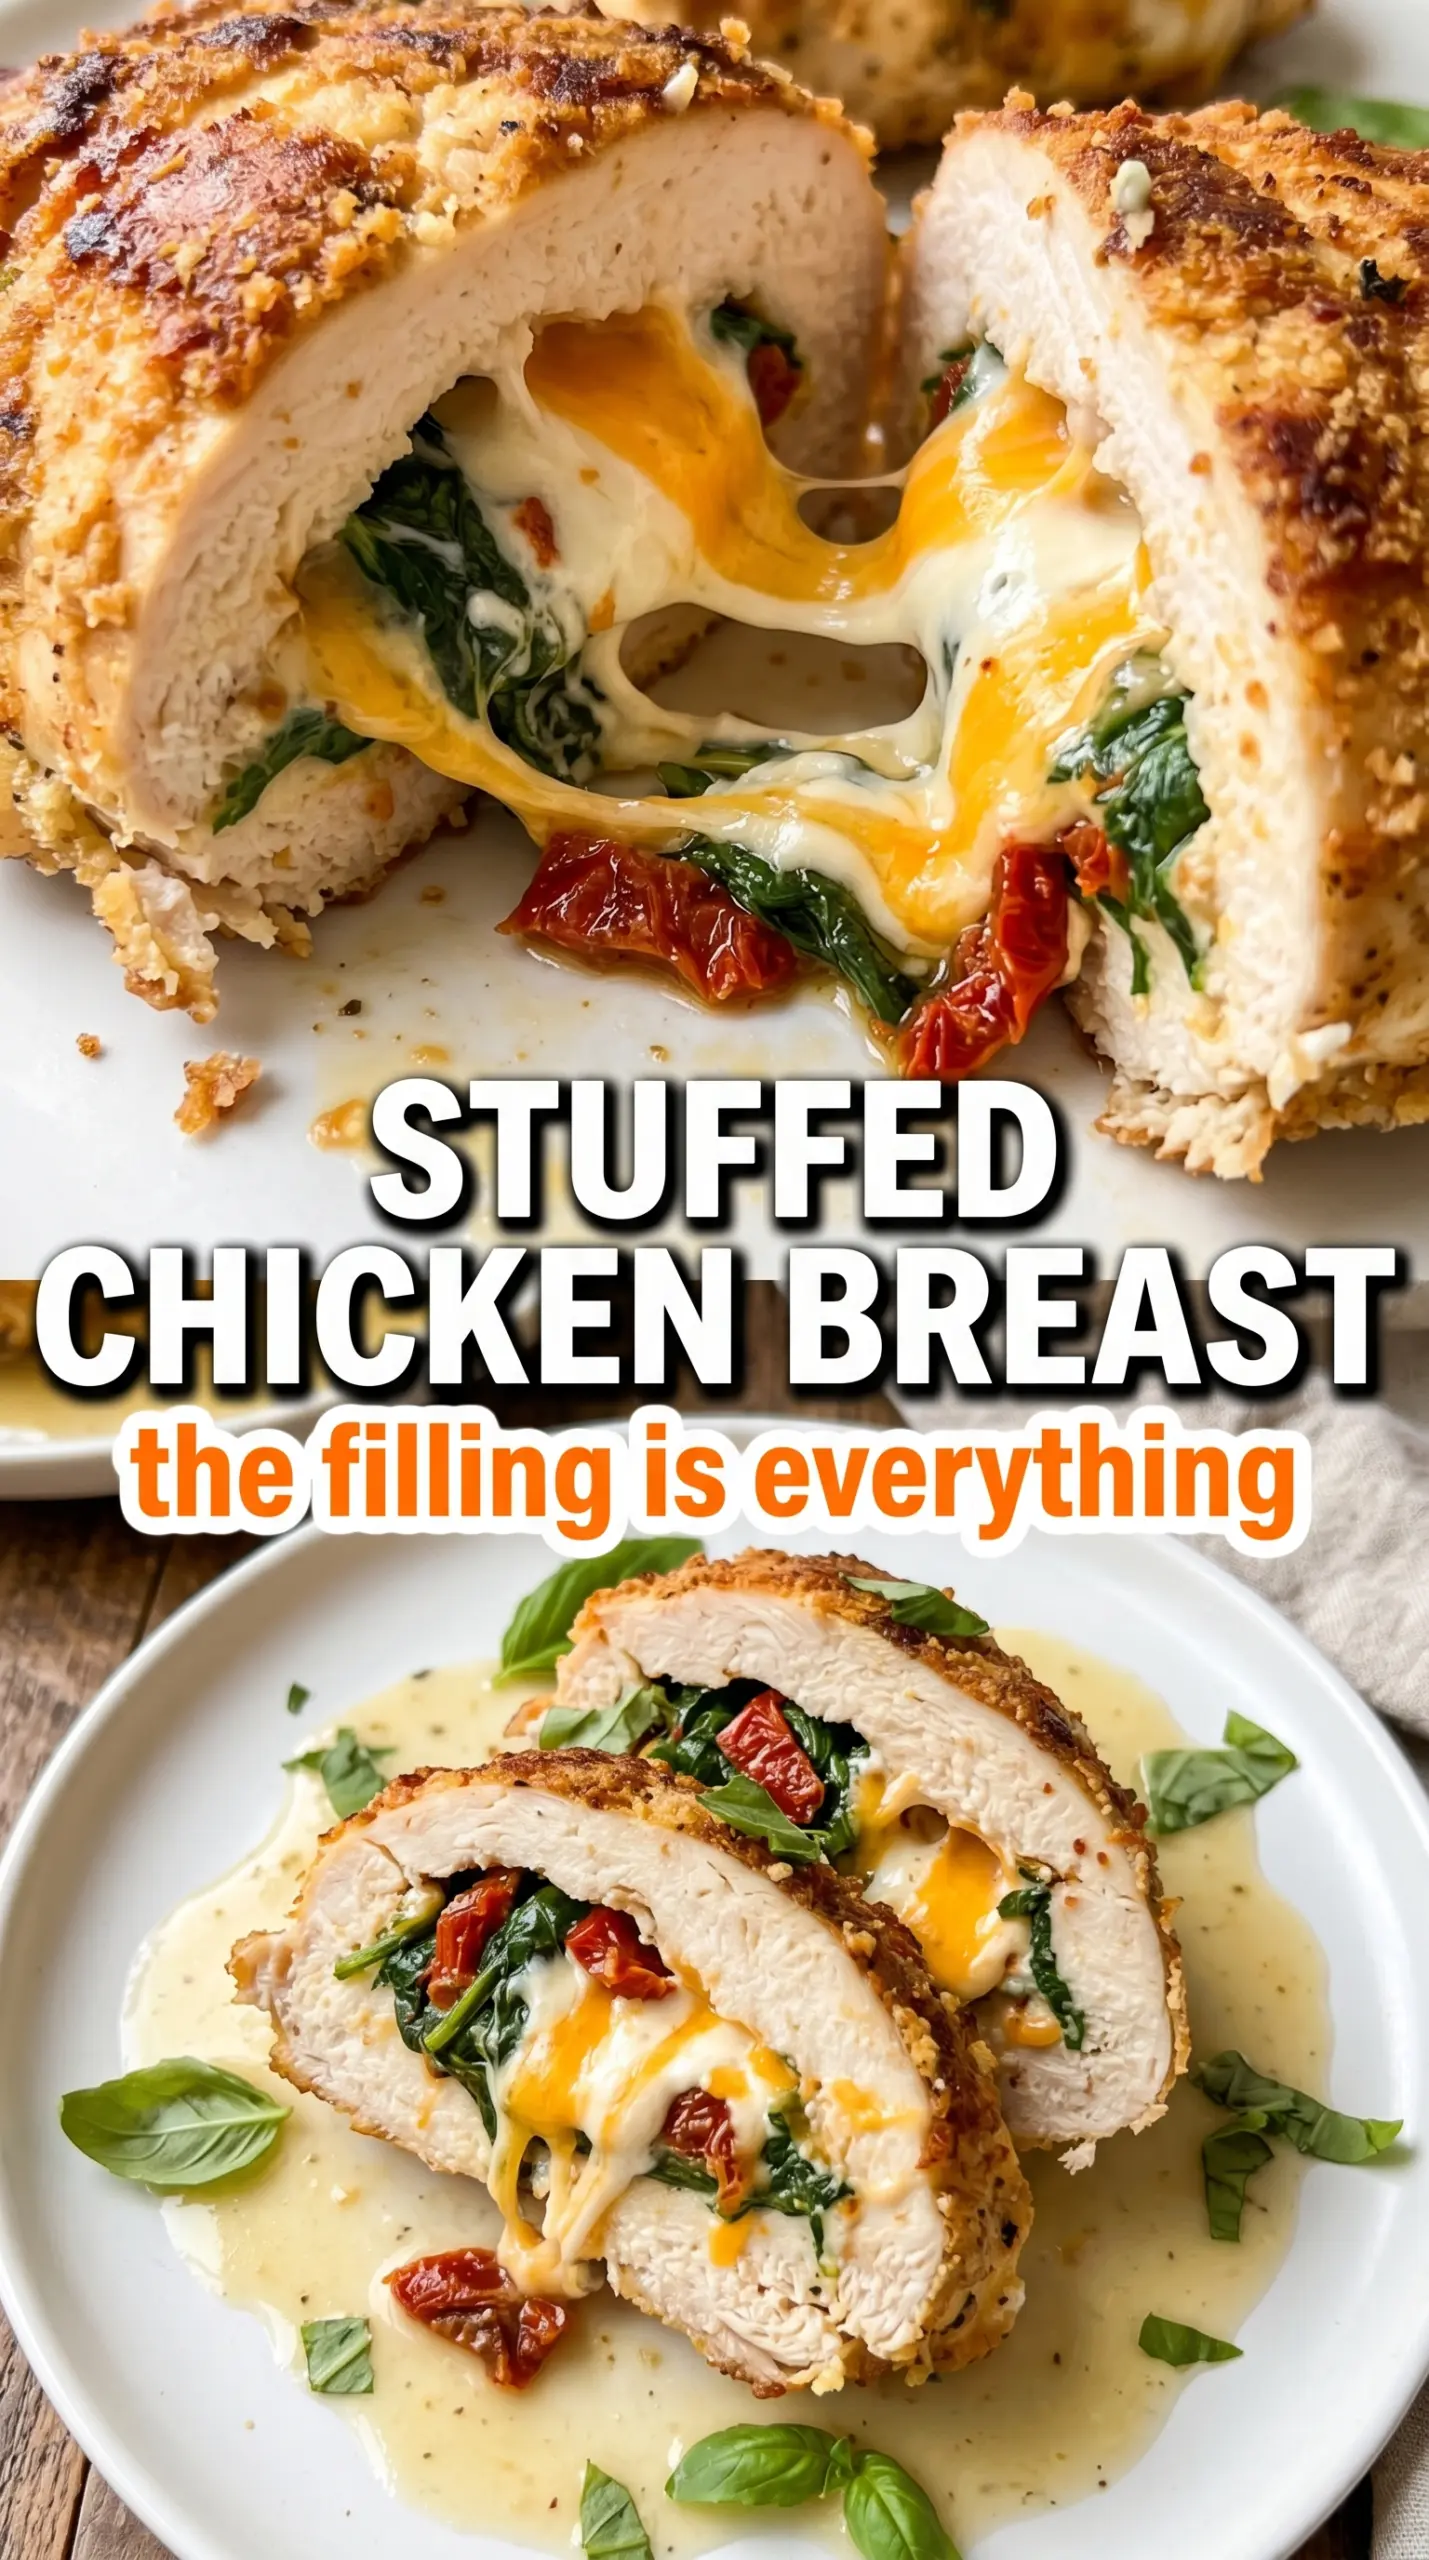
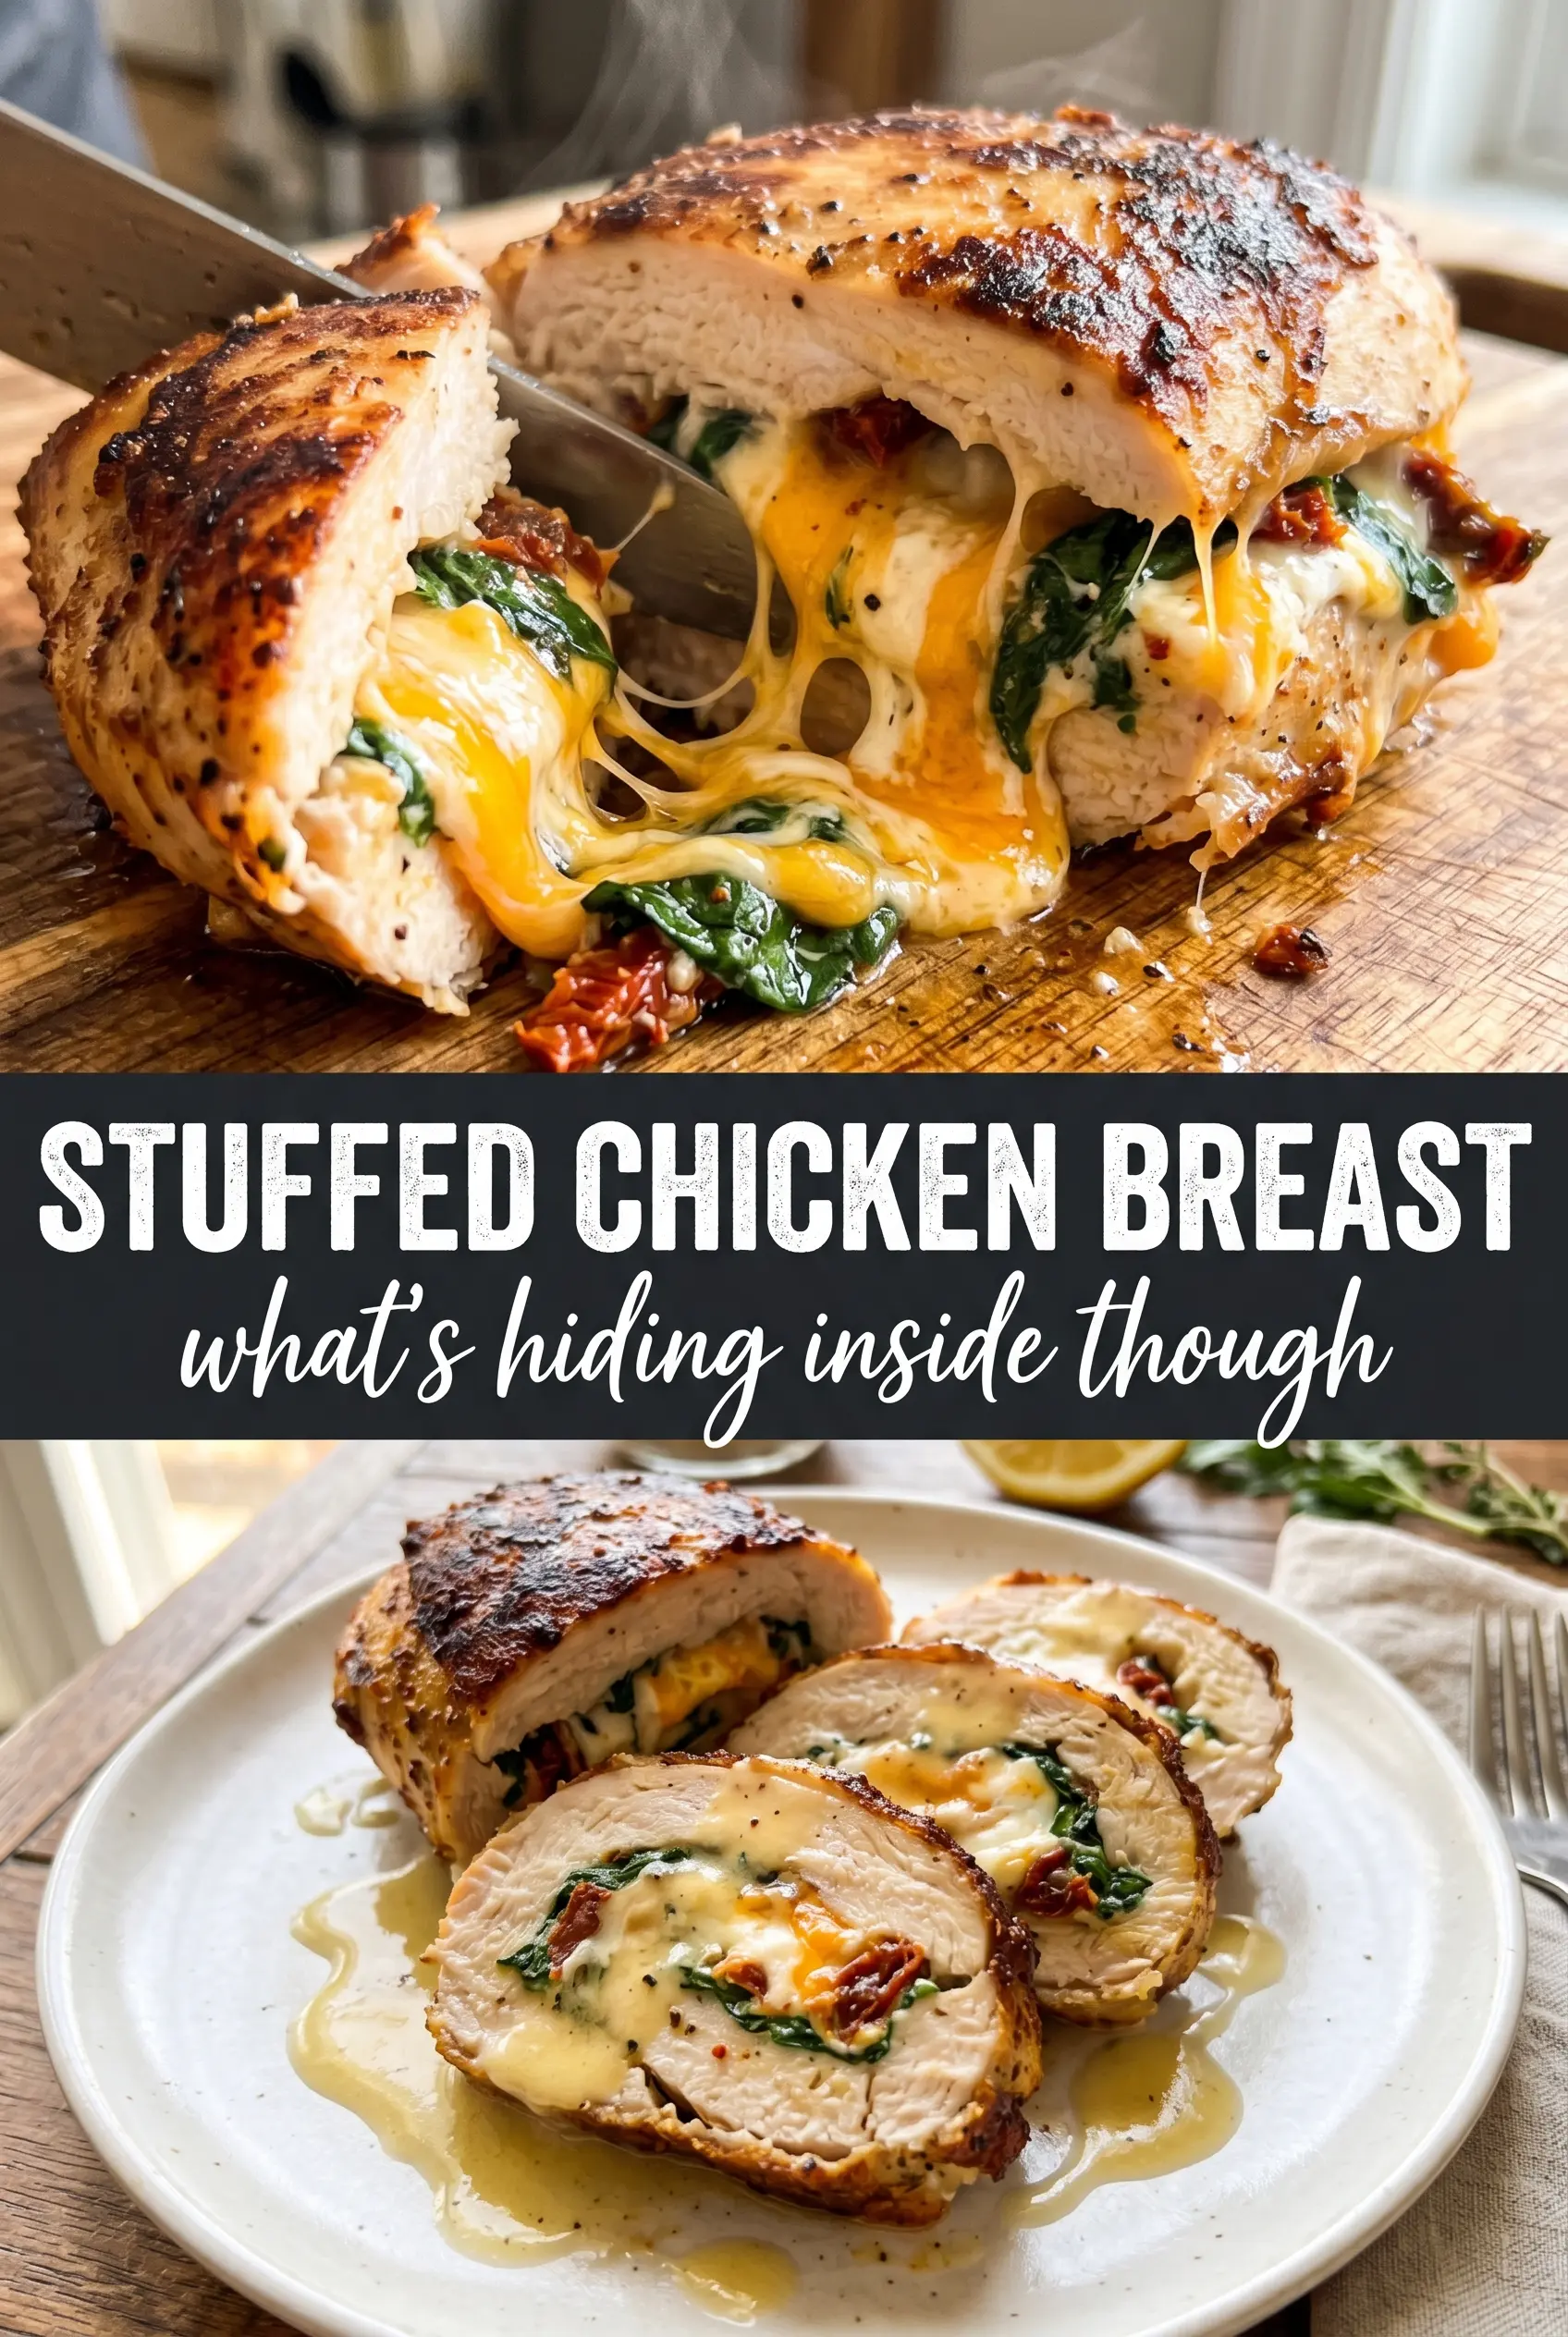
Golden stuffed chicken breast earns its place on the dinner rotation when you want something that looks restaurant-level but still cooks like a practical weeknight meal. The outside gets a deep, savory crust, and the first cut releases a creamy spinach filling that stays lush instead of leaking all over the pan. When it’s done right, each slice holds together neatly and gives you that satisfying contrast between the seasoned chicken and the molten center.
The trick is in the pocket and the sear. A deep cut gives you enough space for the filling without slicing the breast in half, and a hot skillet sets the outside before the oven finishes the middle. Cream cheese carries the filling, mozzarella gives it stretch, and the sun-dried tomatoes add enough salt and sweetness to keep the whole thing from tasting flat. I use baby spinach chopped fine so it blends into the cheese instead of tearing the filling apart.
Below, I’ll walk through the part that matters most: how to keep the filling inside the chicken, how to tell when the sear is ready, and what to change if you want to swap cheeses or make the dish ahead.
The filling stayed inside the chicken and the mozzarella got perfectly melty without running everywhere. I baked mine for 20 minutes and the center was creamy, not dry at all.
Save this stuffed chicken breast for the night you want a crisp sear, a creamy spinach filling, and an elegant dinner without extra fuss.
The Pocket, Not the Oven, Is Where Most Stuffed Chicken Fails
Stuffed chicken breast dries out when the pocket is too shallow or the breast is cooked from the outside in with no head start. The oven only finishes the job. The real work happens when you build a pocket deep enough to hold the filling and then sear the chicken hard enough to seal the surface before baking.
If the breast is cut all the way through, the filling escapes as soon as it warms. If the pan isn’t hot enough, the chicken sits there steaming in its own juices and never gets that browned exterior. The goal is a sturdy shell with a creamy center, not a split-open chicken cutlet with cheese on the pan.
- Even-sized chicken breasts — thicker breasts give you room for a proper pocket. If one side is much thicker, lightly pound the fatter end so it bakes more evenly.
- Hot skillet — the sear sets the outside so the filling has less chance to leak. Medium-high heat is the sweet spot here.
- Rest time — cutting too early sends the cheese filling running. Five minutes gives the juices a chance to settle and the cheese a chance to thicken back up.
What Each Ingredient Is Doing Inside the Filling
- Cream cheese — this is the base that binds everything together and keeps the filling soft. Full-fat cream cheese works best because reduced-fat versions can turn loose and grainy when baked.
- Fresh baby spinach — chop it finely so it melts into the mixture instead of pulling apart in strings. If you use frozen spinach, thaw it completely and squeeze it dry or the filling will get watery.
- Mozzarella — this gives you the stretch and the melty pull when you slice into the chicken. Pre-shredded works fine, though freshly shredded melts a little smoother.
- Sun-dried tomatoes — these punch through the richness with concentrated sweetness and acidity. If yours are packed in oil, blot them a bit before chopping so the filling doesn’t get greasy.
- Garlic and Italian seasoning — they season the filling from the inside, where the chicken itself won’t bring much flavor. Fresh garlic gives the best bite, but jarred minced garlic will work in a pinch.
- Chicken breasts — boneless, skinless breasts are the right choice here because they hold the pocket cleanly. Try to buy pieces that are similar in size so they finish at the same time.
Building the Fill, Sear, and Bake Sequence
Mix the filling until it holds together
Beat the cream cheese first so it loosens before you add anything else. Once the spinach, mozzarella, tomatoes, garlic, and seasoning go in, stir until the mixture looks thick and scoopable, not runny. If you see a pool of moisture in the bowl, the spinach wasn’t dried enough and the filling will try to escape during baking.
Cut a pocket that leaves the chicken intact
Use a sharp knife to slice horizontally into the thickest side of each breast, stopping before you cut through the far edge. You want a deep pocket, not two separate pieces. Open the chicken gently with your fingers and season inside the pocket as well as on the outside so every bite tastes finished.
Pack the filling and seal the opening
Spoon the filling into each breast and press it in without overstuffing. A little overflow is fine, but if the chicken is stretched to the limit, the seam will burst in the pan. Secure the opening with toothpicks so the filling stays put while the outside browns.
Sear first, then finish in the oven
Heat the oil until it shimmers, then place the chicken in the skillet and leave it alone long enough to form a crust. If it sticks, it’s not ready to turn yet. Once both sides are golden, move the skillet to the oven and bake until the thickest part reaches 165°F. Pull it out when the center is done, not when the filling looks firm, because the cheese will continue setting as it rests.
How to Adapt This for Different Kitchens and Different Eaters
Dairy-Free Version
Use a dairy-free cream cheese and a meltable plant-based mozzarella-style cheese. The texture will be a little softer and less stretchy, but the filling still holds together well if you keep the spinach dry and don’t overfill the pockets.
No Sun-Dried Tomatoes
Leave them out and add a small spoonful of finely chopped roasted red peppers or a pinch more Italian seasoning. You’ll lose some tang and sweetness, so the filling will taste milder, but it still works.
Make-Ahead Assembly
You can stuff and secure the chicken up to a day ahead. Keep it covered in the refrigerator and sear it straight from the fridge, then add a couple extra minutes in the oven if the center is still cold when it goes in.
Gluten-Free by Default
This recipe is naturally gluten-free as written. Just check the labels on your seasoning blends and sun-dried tomatoes if you’re using packaged versions, since some contain hidden additives.
Storage and Reheating
- Refrigerator: Store leftovers in an airtight container for up to 3 days. The filling will firm up as it chills, which makes the slices hold together even better the next day.
- Freezer: It freezes well after baking. Wrap each breast tightly and freeze for up to 2 months, then thaw overnight in the fridge before reheating.
- Reheating: Warm it in a 325°F oven, covered loosely with foil, until heated through. The common mistake is blasting it in the microwave, which makes the chicken rubbery and can split the filling.
Answers to the Questions Worth Asking
Stuffed Chicken Breast
Ingredients
Equipment
Method
- Preheat oven to 400°F. In a bowl, beat together cream cheese, spinach, mozzarella, sun-dried tomatoes, garlic, Italian seasoning, salt, and pepper until fully combined.
- Cut a deep horizontal pocket in each chicken breast. Season inside and out generously with salt, pepper, garlic powder, Italian seasoning, and smoked paprika.
- Spoon filling into each chicken pocket and secure with toothpicks. Heat olive oil in an oven-safe skillet over medium-high heat and sear chicken for 3-4 minutes per side until golden.
- Transfer the skillet to the oven and bake for 18-22 minutes, until internal temperature reaches 165°F. Remove toothpicks, rest 5 minutes, then slice and serve.