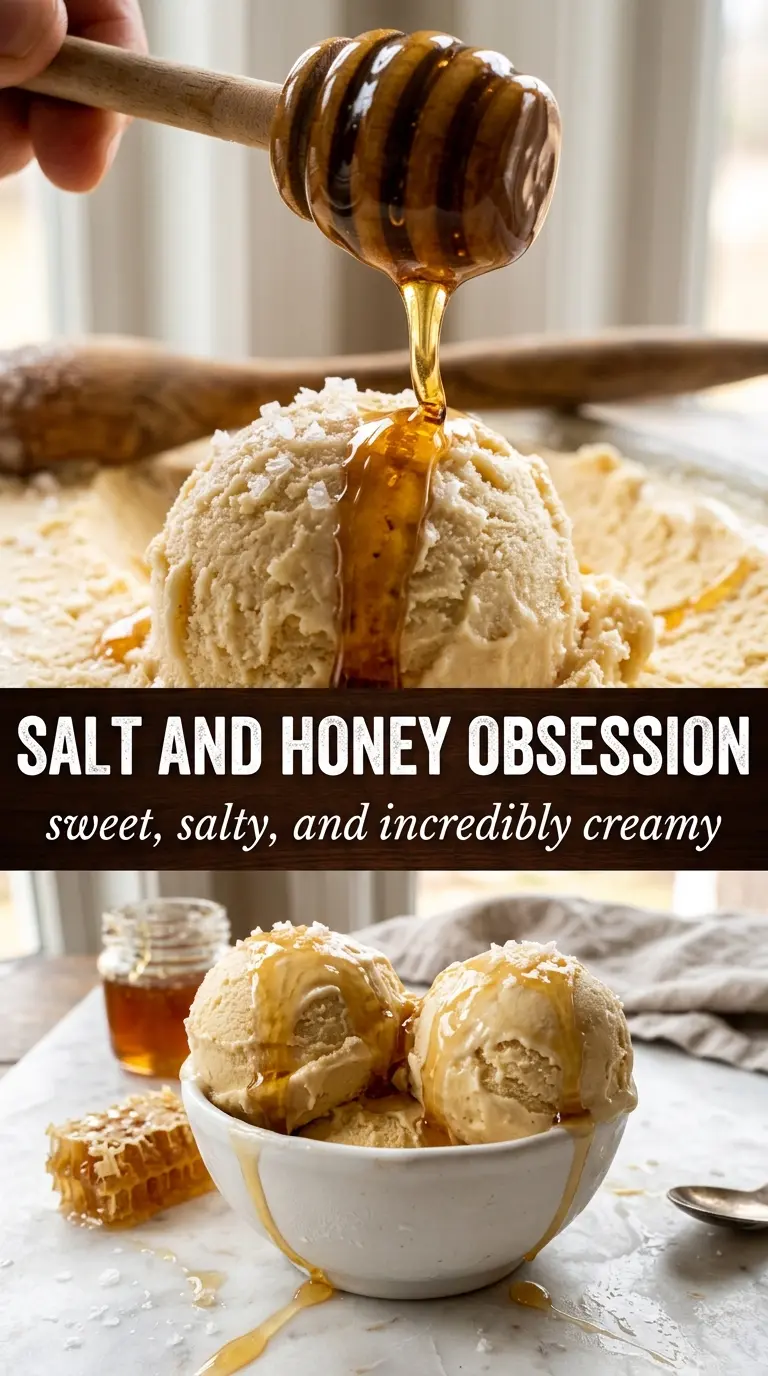
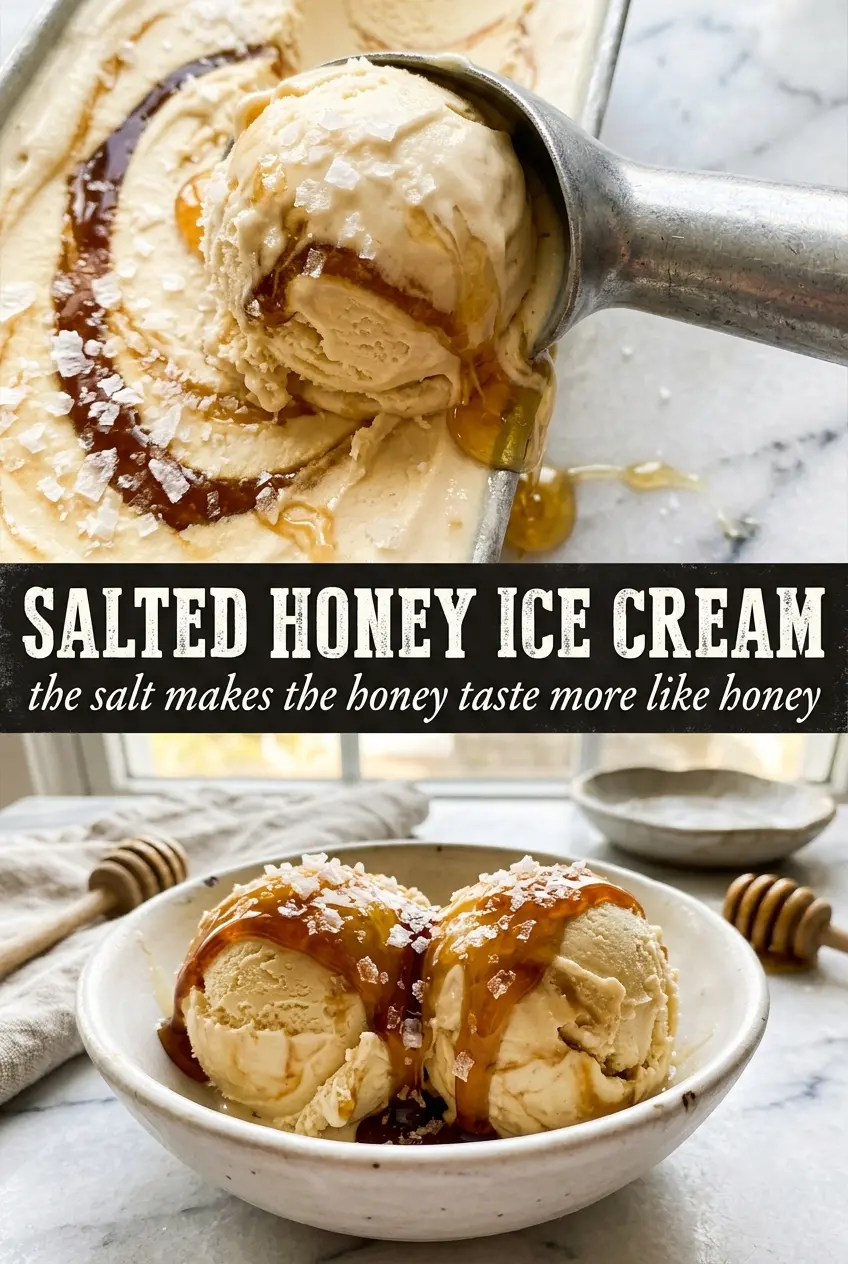
Salted honey ice cream lands with a clean, floral sweetness first, then finishes with that little spark of salt that keeps each spoonful from feeling flat. The custard base gives it a dense, luxurious texture that scoops beautifully after a proper chill, and the honey brings more than sweetness — it adds depth, almost like warm wildflowers folded into cream.
What makes this version worth making is the way the honey is handled. It gets dissolved into the dairy while the mixture heats, so the flavor runs all the way through the custard instead of tasting like a syrupy swirl on top. The egg yolks give the ice cream body, while the sea salt sharpens the honey and keeps the finish lively. If you’ve ever had honey ice cream turn out muted or icy, this method fixes both problems.
Below, you’ll find the exact temperature to pull the custard, why a good strain matters, and a couple of smart swaps if you want to adjust the sweetness or make it dairy-free without losing that creamy bite.
The custard churned up smooth and the honey flavor stayed clear instead of getting lost. I loved the salty finish on top — it made the whole pint taste richer.
Save this salted honey ice cream for the day you want a floral, custard-rich dessert with that perfect sweet-salty finish.
Why This Custard Stays Creamy Instead of Turning Grainy
The biggest risk with honey ice cream isn’t the honey. It’s overheating the custard after the yolks go in. Egg yolks thicken beautifully around 175°F, but if you push much past that, the texture turns from smooth and velvet-like to slightly scrambled. Stir constantly and keep the heat at medium-low so the custard thickens evenly and coats the back of a spoon without bubbling.
Honey also changes the texture of ice cream in a good way. It lowers the freezing point a bit, which helps the finished scoop stay softer straight from the freezer. That means the balance matters: enough honey for flavor and scoopability, but not so much that the custard gets loose or overly sweet. The salt keeps the honey from reading one-note and gives the whole dessert a sharper finish.
What Each Ingredient Is Actually Doing in This Ice Cream
- Heavy cream — This is what gives the ice cream its lush body and slow melt. Lower-fat dairy won’t give the same plush texture, and the finished scoop will freeze harder.
- Whole milk — It lightens the base just enough so the honey comes through clearly. You need the fat from the cream, but the milk keeps the custard from tasting heavy.
- Good-quality honey — This is the flavor of the dessert, so this is where quality matters most. Wildflower or clover honey works best because it tastes bright and rounded; strongly flavored buckwheat honey can overpower the custard.
- Egg yolks — They thicken the base and make it churn into a true custard ice cream. There isn’t a direct substitute here if you want the same silky result.
- Vanilla extract — Just a little softens the edges of the honey and rounds out the finish. It shouldn’t take over.
- Sea salt — The measured salt inside the custard wakes up the honey, and the flaky salt on top gives each bite a final pop. Fine table salt works in a pinch, but flaky salt at the end is what gives the right texture.
How to Cook the Custard Without Scrambling the Yolks
Warming the Dairy and Honey Together
Start by heating the cream, milk, and honey until the honey dissolves completely and the mixture is steaming. You don’t want a hard boil here, just enough heat to blend everything smoothly. If the honey isn’t fully dissolved before the yolks go in, you can end up with uneven sweetness and a slightly slick texture.
Tempering the Yolks Slowly
Whisk the hot dairy into the yolks in a thin stream, not all at once. That gradual addition raises the yolk temperature without shocking them, which is what keeps the custard smooth instead of lumpy. Once the yolks are warmed, return everything to the saucepan and keep stirring.
Cooking to the Right Point
Cook over medium-low heat until the custard reaches 175°F. It should thicken enough to coat a spoon and leave a clean path when you drag your finger through it. If it boils, pull it off the heat immediately; boiling is the fast lane to grainy custard.
Straining, Chilling, and Churning
Strain the custard to catch any little bits of cooked egg, then stir in the vanilla and sea salt. Chill it over an ice bath before refrigerating, because warm custard takes forever to cool in the fridge and can pick up a dull flavor if it sits too long while warm. Let it chill fully before churning, or the texture will turn soft and icy instead of dense and creamy.
How to Adapt This for Different Freezers and Different Diets
Dairy-Free Version
Use full-fat coconut milk in place of the cream and milk, but expect a subtle coconut note in the final ice cream. The texture will still be rich, though not quite as clean and custardy as the dairy version because coconut fat behaves differently in the freezer.
Using a Stronger Honey
If you want a deeper, more floral finish, swap in an orange blossom or chestnut honey in place of some or all of the clover honey. Those honeys bring more character, but they can dominate fast, so the result will taste more assertive and less mellow.
Lower-Sugar Adjustment
You can reduce the honey slightly, but don’t cut it by much or the ice cream will freeze harder and lose that soft scoop. Honey isn’t only flavor here; it also helps keep the texture supple straight from the freezer.
Storage and Reheating
- Refrigerator: The churned base needs to be chilled for at least 4 hours before freezing, but once frozen, store the ice cream in an airtight container for up to 2 weeks for the best texture.
- Freezer: It freezes well. Press parchment or plastic wrap directly on the surface before sealing the container to limit ice crystals and keep the top from getting leathery.
- Reheating: Not applicable. For serving, let the container sit at room temperature for 5 to 10 minutes so the scoop softens just enough. Don’t microwave it; that melts the edges and leaves the center icy.
Questions I Get Asked About This Recipe
Salted Honey Ice Cream
Ingredients
Equipment
Method
- In a saucepan, heat the heavy cream, whole milk, and honey over medium heat until steaming and the honey dissolves completely, about 5 to 7 minutes. Visual cue: the mixture looks smooth and glossy with no honey granules visible.
- In a bowl, whisk the egg yolks until smooth, then slowly whisk in the hot cream mixture to temper the yolks. Visual cue: the mixture thickens slightly but remains pourable.
- Return the custard to the saucepan and cook over medium-low heat, stirring constantly, until it reaches 175°F. Visual cue: it coats the back of a spoon and a clean line remains when you draw a finger through the custard.
- Strain the custard and stir in the vanilla extract and sea salt, then cool completely over an ice bath. Visual cue: the custard turns from warm to cool and looks uniform with no streaks.
- Cover and refrigerate at least 4 hours, until very cold. Visual cue: the custard is chilled through and feels thick when you stir it.
- Churn the chilled custard in an ice cream maker according to the manufacturer’s instructions. Visual cue: it expands and thickens to soft-serve consistency.
- Transfer to a container, freeze until firm, then serve with a pinch of flaky sea salt on top of each serving. Visual cue: the surface looks set and scoopable with visible salt flakes.