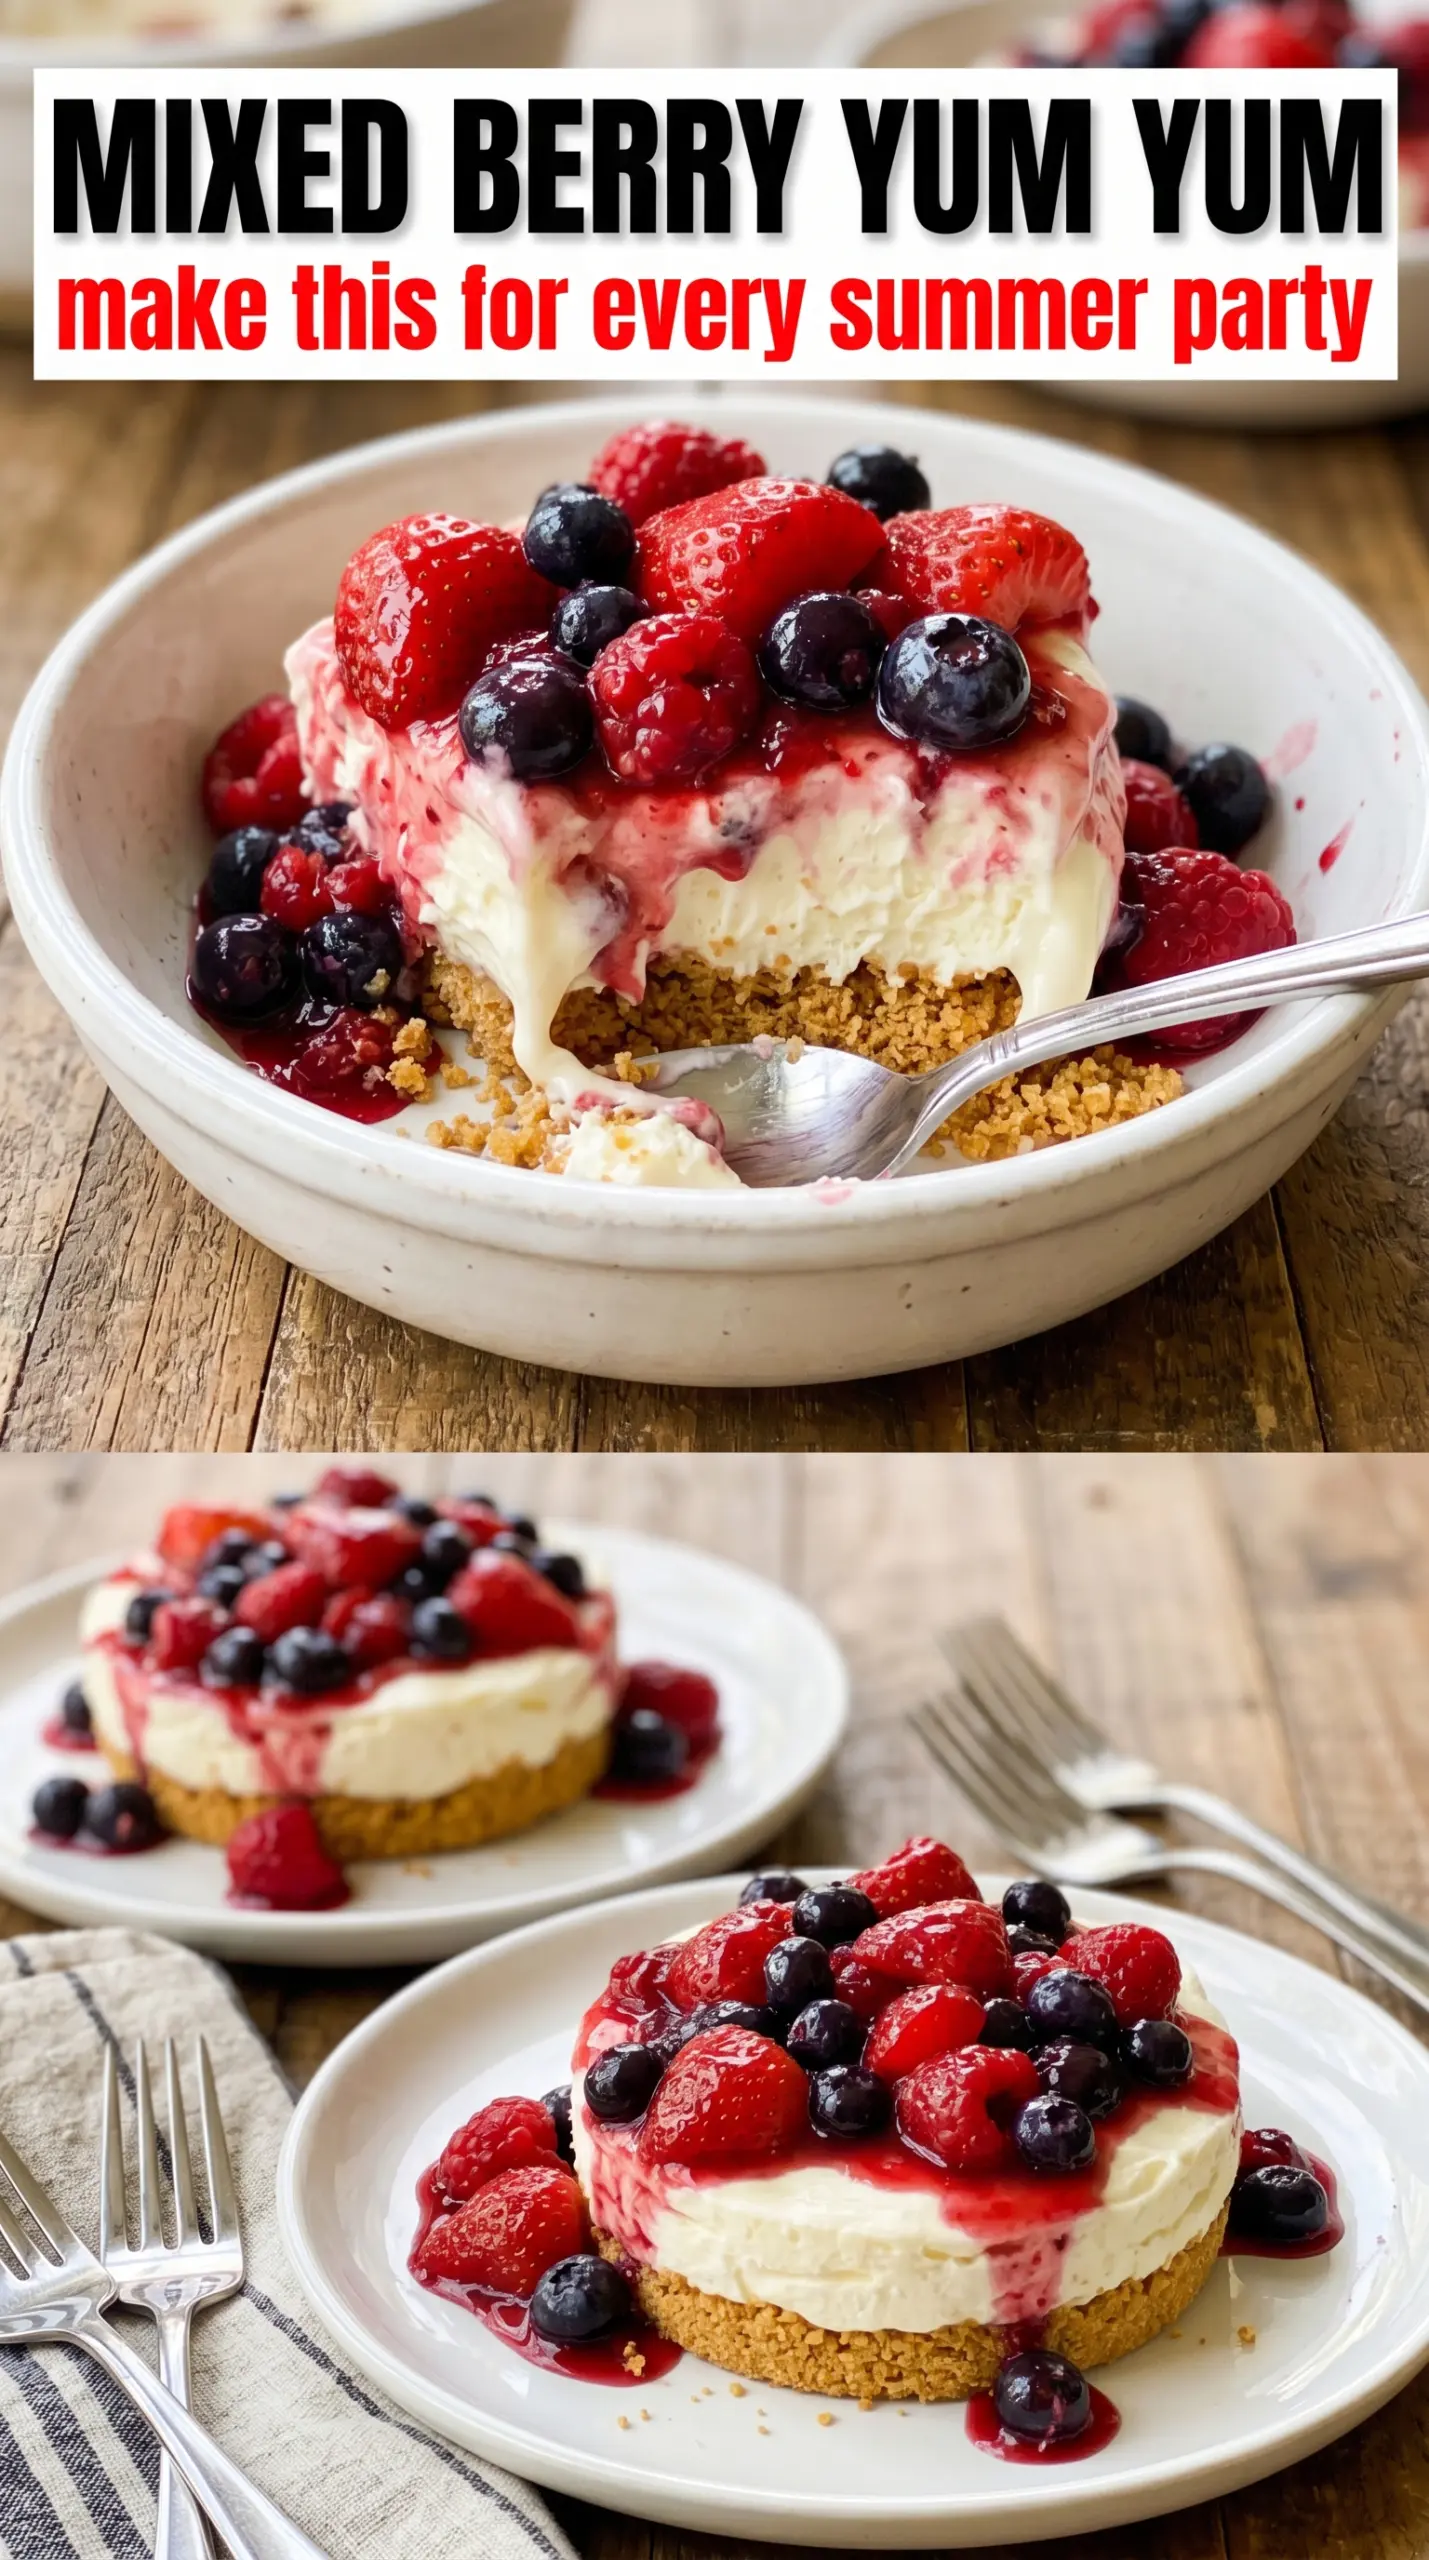
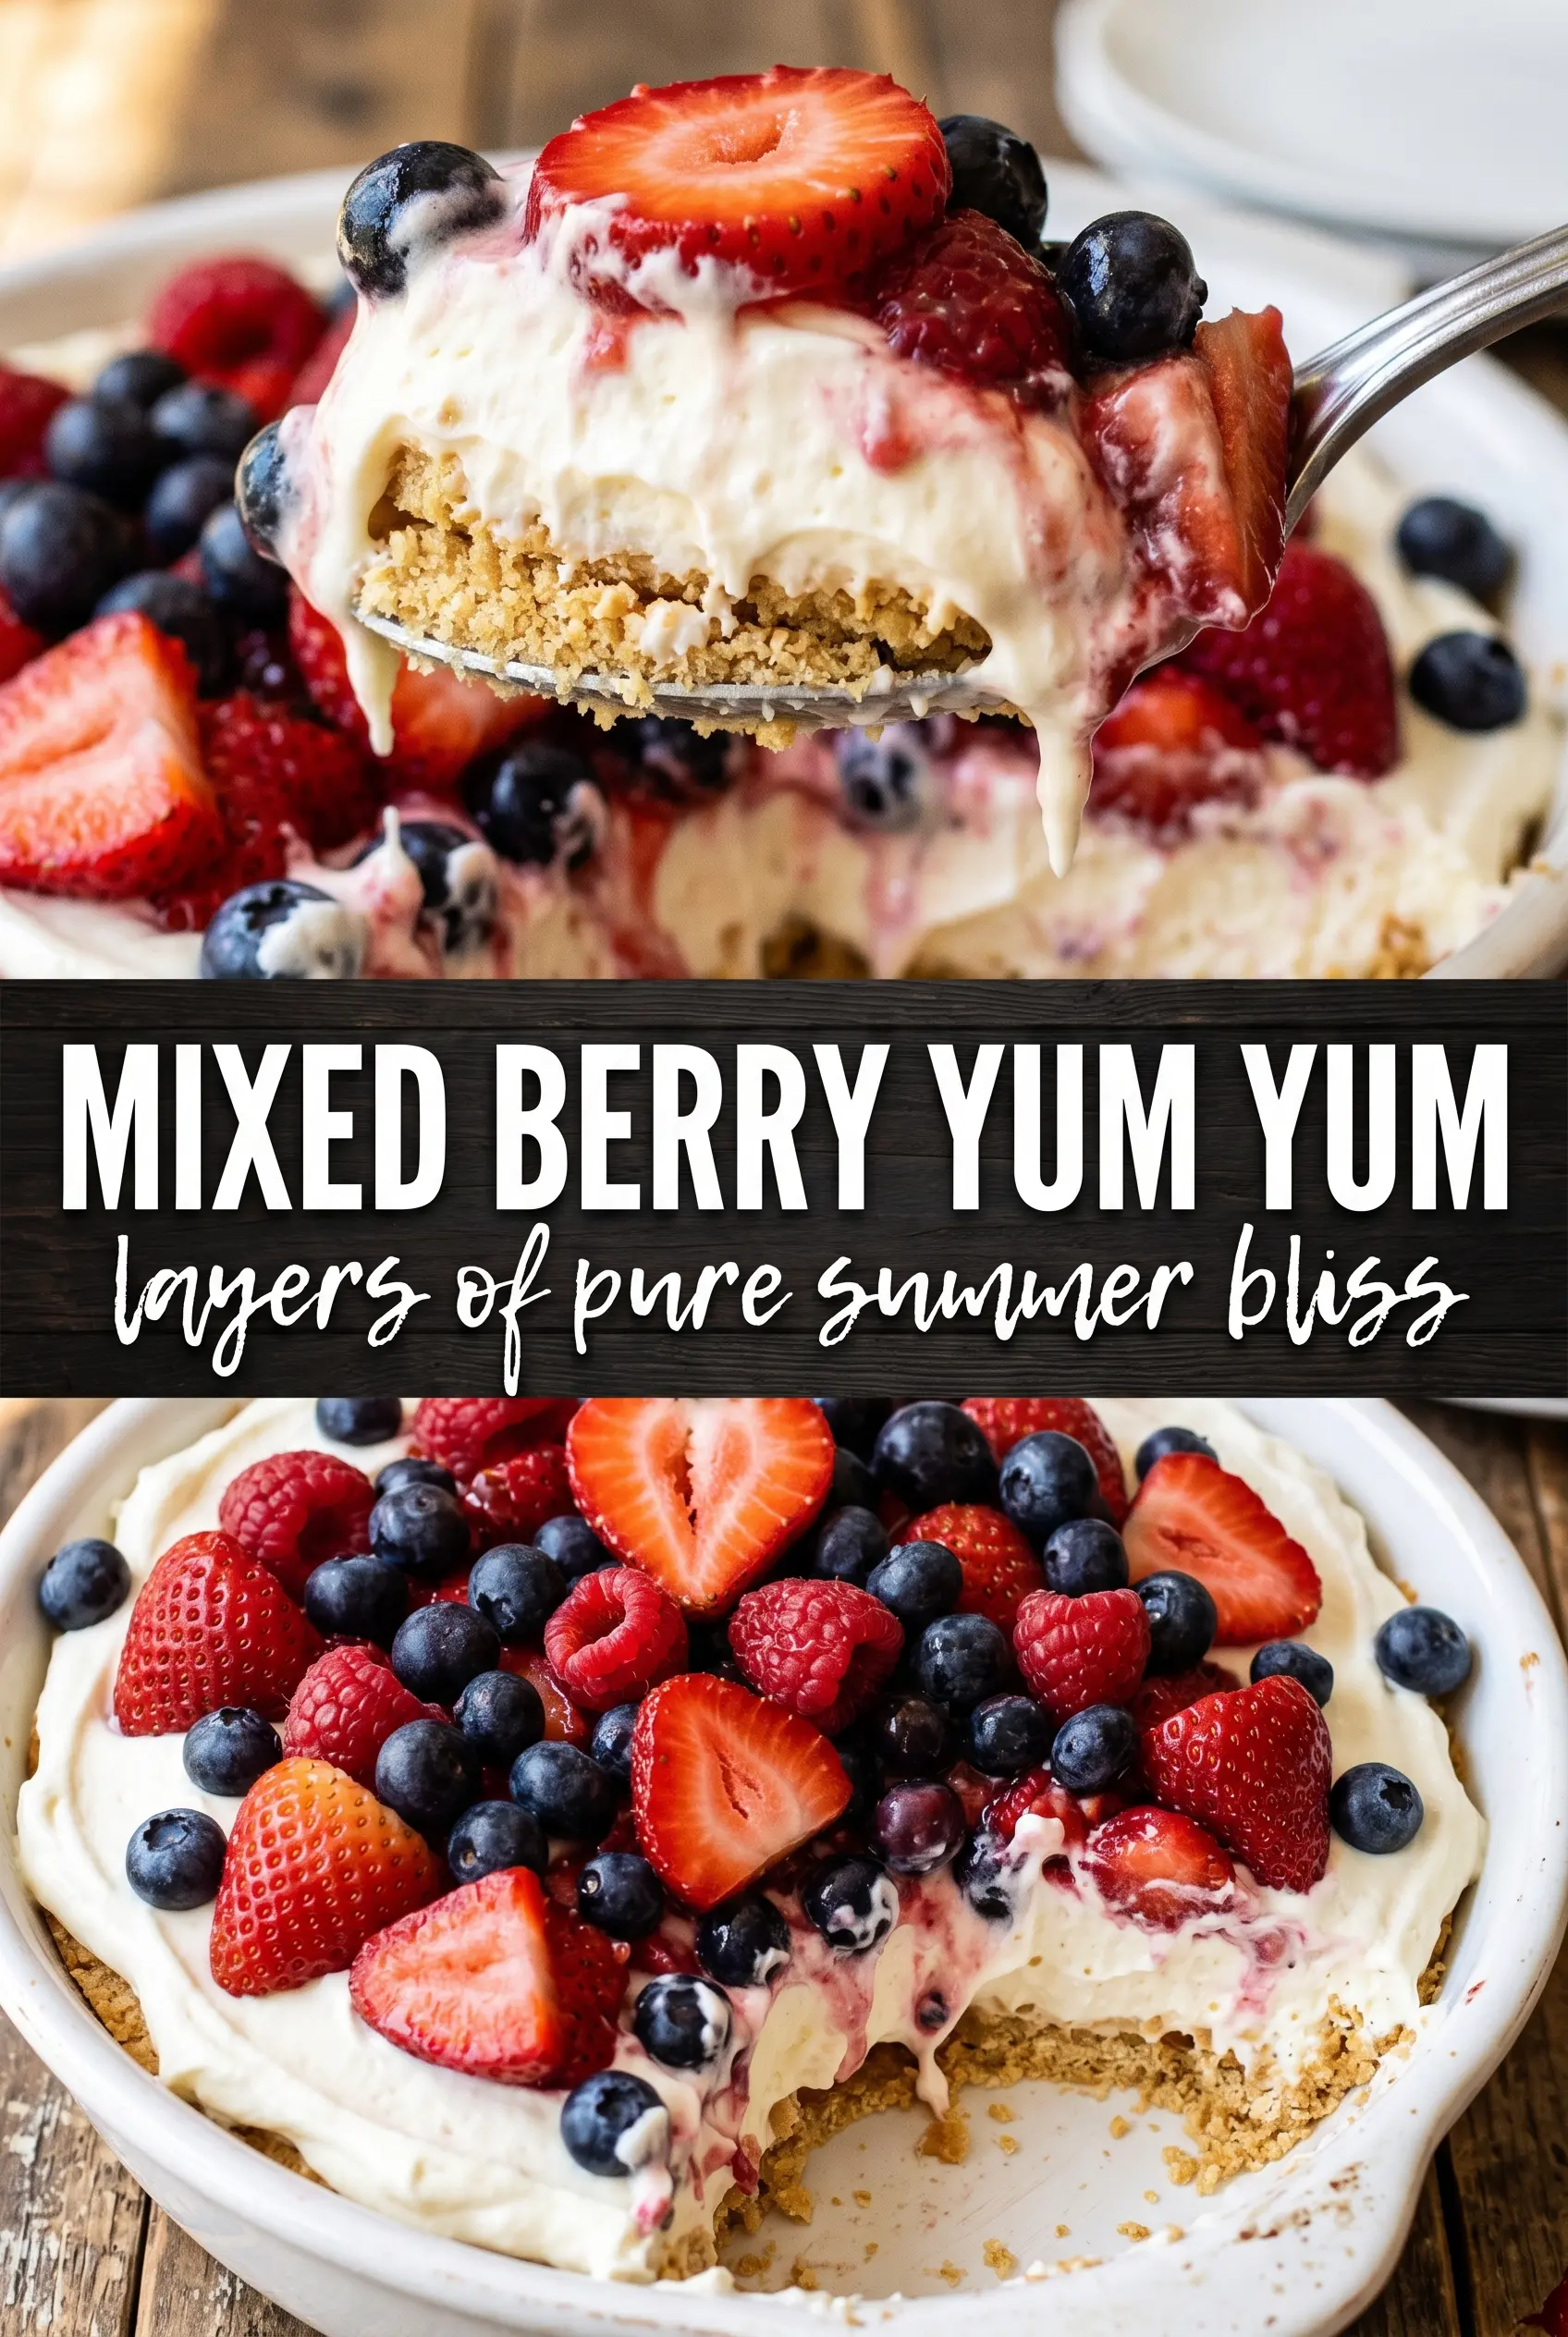
Red, white, and blue mixed berry yum yum is the kind of chilled dessert that slices cleanly, looks festive without fuss, and disappears fast once it hits the table. The crust stays buttery and a little nutty, the cream cheese layer turns fluffy instead of heavy, and the berries on top bring just enough brightness to keep each bite from feeling rich or flat. It’s the sort of dessert people remember because it serves neatly and tastes even better after a long chill.
What makes this version work is the balance of texture. The crust gets pressed firmly enough to hold together without turning dense, and the cream cheese layer is beaten smooth before the whipped topping goes in, which keeps it light and spreadable. The berries go on last so they stay fresh-looking and don’t bleed into the top layer before the dessert has time to set. That resting time matters here more than any stove work would.
Below, I’ve included the little details that make the layers slice cleanly and the topping stay pretty, plus a few smart swaps if you need to adjust the dessert for what’s in your kitchen.
The crust held its shape after chilling, and the cream cheese layer was light instead of dense. I cut it into clean squares after four hours, and the berries stayed bright on top.
Like this red, white, and blue mixed berry yum yum? Save it for the next potluck when you need a no-bake dessert with clean layers and a patriotic berry topping.
The Chilling Time Is What Gives You Clean Layers
The biggest mistake with layered no-bake desserts is rushing the chill. If the crust hasn’t firmed up before the filling goes on, it softens at the edges and the slices slump when you cut them. The same goes for the cream layer: it needs time to set all the way through, not just feel cold on top. Four hours is the minimum if you want neat squares instead of a spoon dessert.
Pressing the crust in firmly also matters more than people think. The butter has to coat the flour and pecans evenly, and the mixture needs enough pressure to hold together once it’s cold. If it looks sandy and loose in the pan, it will crumble when served. A solid, even press gives you that clean base you can lift a spatula under without breaking apart.
- Firm chilling keeps the cream cheese layer from sliding when you cut into it.
- Even pressure on the crust helps it slice instead of crumble.
- Cold berries stay brighter and less juicy than berries left sitting at room temperature.
What Each Layer Is Doing in the Pan
- All-purpose flour gives the crust structure. It’s one of the few ingredients here that doesn’t have a real stand-in, because the texture depends on that baked-cookie-style base once it chills.
- Pecans add flavor and help the crust feel substantial. Chop them finely so the crust packs tightly; large pieces make it harder to cut clean squares.
- Cream cheese is what gives the middle layer its tang and body. Use it fully softened or you’ll end up with little lumps that don’t smooth out, no matter how long you beat them.
- Whipped topping keeps both the filling and the top layer light. Homemade whipped cream can work for the top, but it won’t hold as long in the refrigerator, so the dessert softens faster.
- Strawberries and blueberries bring the red and blue, but they also give the dessert its fresh finish. Slice the strawberries so they sit flat and don’t roll around when you portion the pan.
Building the Layers So They Cut Cleanly
Mixing the Crust
Stir the flour, chopped pecans, melted butter, and powdered sugar until every dry spot disappears and the mixture looks evenly moistened. It should clump when pressed between your fingers, not puddle with butter at the bottom of the bowl. Press it into the dish in a firm, even layer and get it all the way into the corners. If the crust is uneven now, that hump will show up in every slice later.
Making the Cream Cheese Layer
Beat the cream cheese, powdered sugar, and vanilla until the mixture is completely smooth before folding in the whipped topping. If the cream cheese is still even a little cold, you’ll see tiny bits that won’t disappear later. Fold gently once the whipped topping goes in so the layer stays airy. Spread it over the chilled crust with an offset spatula or the back of a spoon, nudging it into the corners without dragging up the base.
Finishing the Top and Chilling
Spread the last layer of whipped topping in an even blanket, then arrange the strawberries and blueberries across the surface. You can make a neat patriotic pattern or scatter them evenly; either way, keep the fruit in a single layer so the top doesn’t collapse under its own weight. Cover the pan and chill until the dessert is fully set and the top feels firm when you tap it lightly. If you slice too early, the middle will ooze and the berries will slide out of place.
How to Adjust This Dessert Without Losing the Texture
Make it nut-free
Leave out the pecans and replace them with the same amount of extra flour. The crust will be less rich and a little more cookie-like, but it still sets up nicely. If you need a truly nut-free dessert, this is the cleanest swap because it keeps the crust from turning greasy or loose.
Use homemade whipped cream
You can replace the whipped topping with whipped cream, but the dessert will soften faster and won’t hold its shape as long in the refrigerator. Whip it to medium-stiff peaks so it can support the filling and top layer without weeping. For the best slices, serve it the same day you make it.
Make it gluten-free
Swap the all-purpose flour for a good 1:1 gluten-free baking blend. The texture will be a little more delicate, but the crust still holds if you press it firmly and chill it long enough. Don’t use almond flour here; it changes the crust so much that it won’t behave like the original.
Storage and Reheating
- Refrigerator: Store covered for up to 4 days. The crust softens a little as it sits, but the dessert still slices well.
- Freezer: Freeze in tightly wrapped squares for up to 1 month. The berries soften after thawing, so the texture is best if you freeze without the fruit topping and add fresh berries after thawing.
- Reheating: No reheating needed. Serve straight from the refrigerator and let it sit for 5 to 10 minutes before slicing so the knife goes through the layers cleanly.
Questions I Get Asked About This Recipe
Red, White and Blue Mixed Berry Yum Yum
Ingredients
Equipment
Method
- Mix all-purpose flour, pecans, melted unsalted butter, and powdered sugar until evenly combined, then press firmly into the bottom of a 9x13 dish for a compact layer.
- Refrigerate for 30 minutes to set, until the crust looks slightly firm and holds its shape when you touch the surface.
- Beat cream cheese, powdered sugar, and vanilla extract until smooth, scraping the bowl as needed for no lumps.
- Fold in 1 cup whipped topping, then spread the mixture evenly over the chilled crust to cover it completely with a smooth top.
- Spread the remaining 1 cup whipped topping in an even layer over the cream cheese layer so the surface looks fluffy and level.
- Arrange sliced strawberries and blueberries across the top in a patriotic pattern or scatter evenly so the berries create a red-and-blue design.
- Cover and refrigerate for at least 4 hours until fully set, then slice into squares and serve cold, with layers visible from top to bottom.