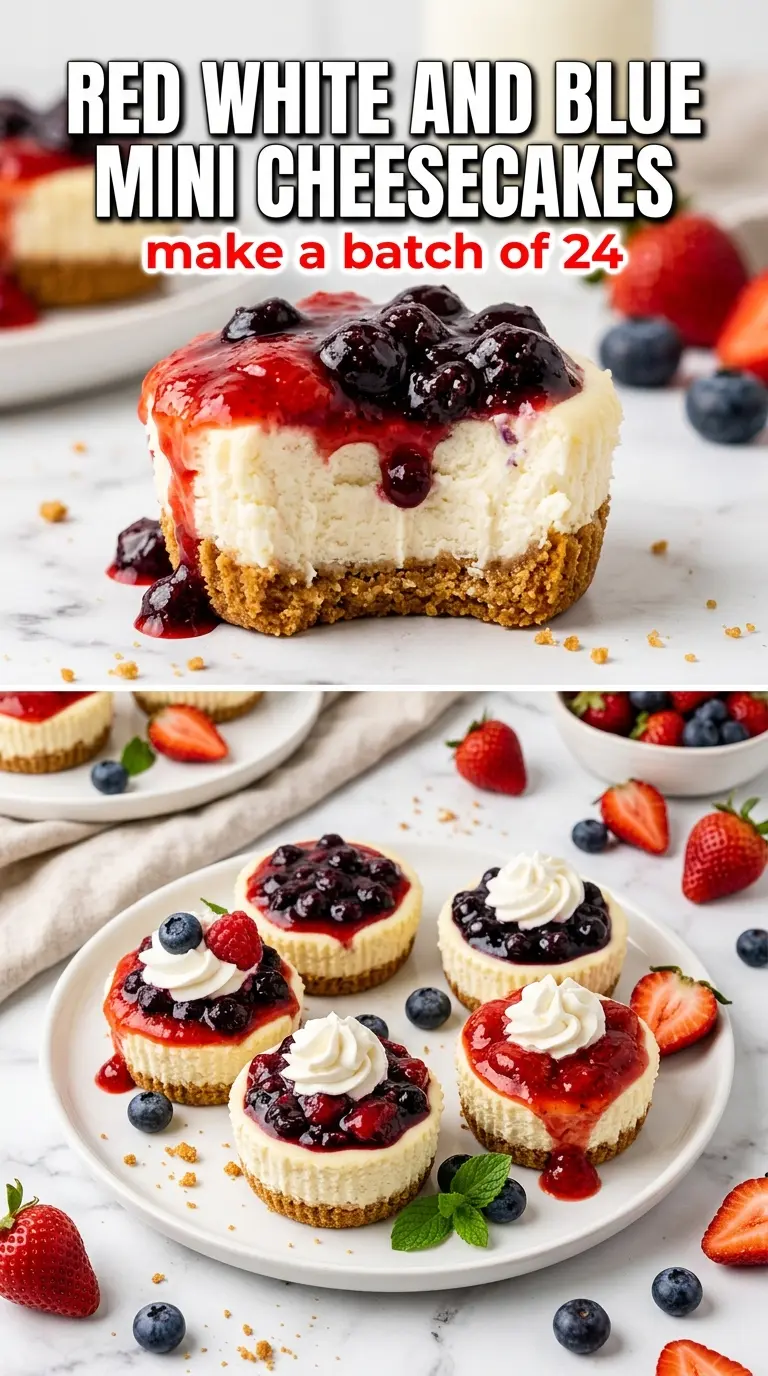
These red, white and blue mini cheesecakes bring the best parts of cheesecake into a neat little handheld dessert: a crisp cookie base, a creamy center, and a chilled finish that slices cleanly under fruit and whipped cream. The individual portions bake up with just enough structure to hold their shape, but they still stay soft in the middle, which is exactly what you want in a mini cheesecake.
The trick here is keeping the filling smooth and not overworking it once the eggs go in. Cream cheese needs to be fully softened, and the batter should be mixed only until it looks glossy and uniform. That keeps the texture dense and silky instead of airy and prone to cracks. The cookie at the bottom does double duty too — it gives you an easy crust without extra prep, and it stays firm enough to contrast with the filling.
Below, I’ll walk you through the small details that matter most, from the bake time that keeps the centers from overcooking to the best way to top them so the berries stay fresh and bright.
The centers set up perfectly and stayed creamy after chilling, and the Oreo base didn’t get soggy at all. I made these the night before a cookout and the strawberries and blueberries still looked fresh the next day.
Love these red, white and blue mini cheesecakes? Save them to Pinterest for your next patriotic dessert table or make-ahead summer party spread.
The Small Mistake That Makes Mini Cheesecakes Crack
The most common problem with mini cheesecakes is heat. A full-size cheesecake has more mass, so it can coast through the bake. Mini versions set fast, which means an extra minute or two can push the centers from creamy to dry and crack the tops as they cool. Pull these when the edges look set and the centers still have a slight wobble in the middle.
The other mistake is overmixing after the eggs go in. Once eggs are added, beat just until the batter turns smooth again. Whipping air into the filling makes it puff in the oven and fall as it cools, and that’s when the surface splits. A low, steady bake gives you the cleanest finish.
- Softened cream cheese — This has to be fully softened so the filling turns smooth without lumps. Cold cream cheese leaves little bits behind, and those bits don’t disappear in the oven.
- Sour cream — This adds a little tang and helps the texture stay creamy after chilling. You can swap in full-fat Greek yogurt if that’s what you have, but the result will be a touch less rich.
- Oreo or Golden Oreo cookies — These create the fastest possible crust. Golden Oreos give you a lighter vanilla base, while regular Oreos add a chocolate contrast; both work because they’re sturdy enough to hold up under the filling without needing melted butter.
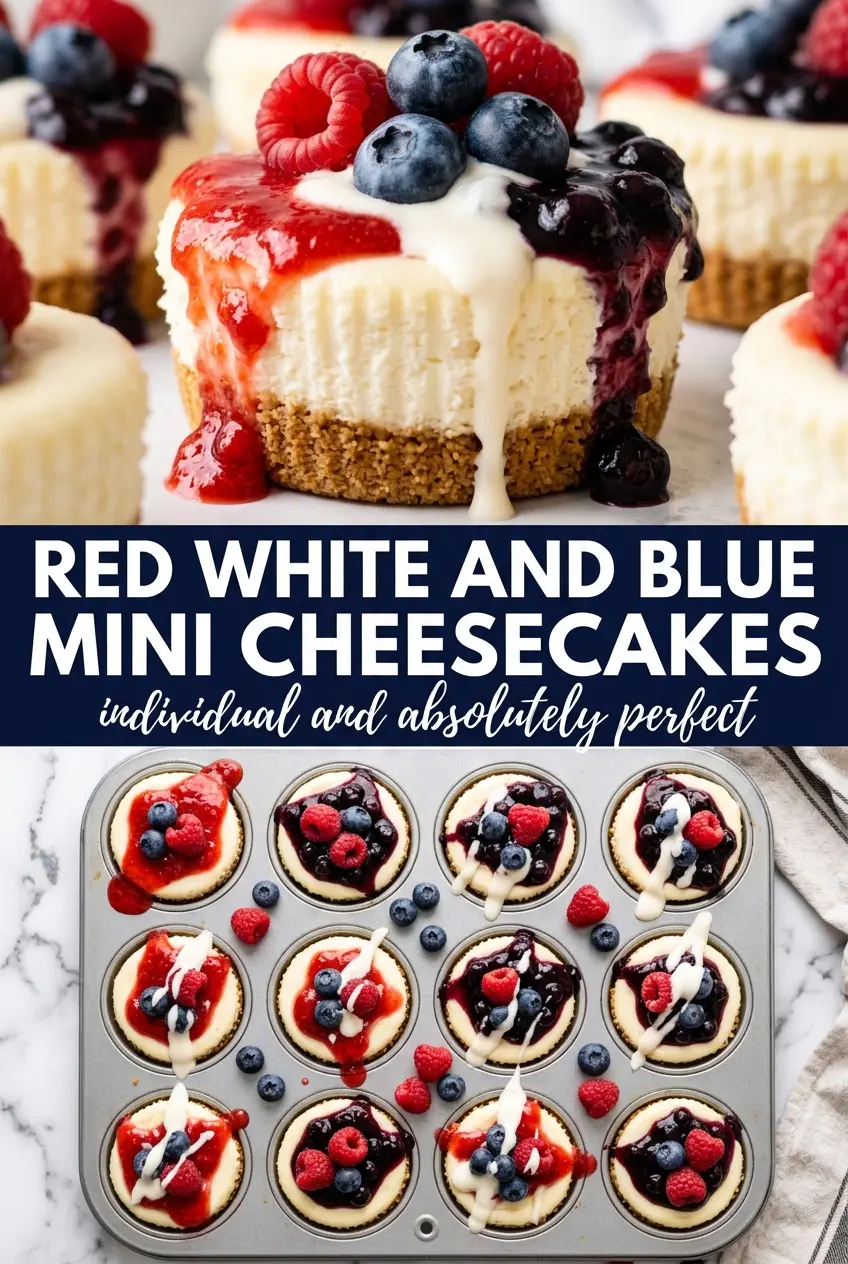
- Fresh berries — Save these for the top right before serving. If they go on too early, the fruit juices can bleed into the whipped cream and soften the cheesecake surface.
What Each Ingredient Is Actually Doing in This Recipe
- Primary ingredient (the star) — Quality matters most. Choose the best you can find.
- Cooking medium (oil, butter, or broth) — This carries flavors and prevents dryness.
- Seasonings (salt, pepper, spices, herbs) — Layer flavors so nothing overpowers. Build depth gradually.
- Aromatics (garlic, onion, herbs) — Cook with fat to bloom flavors. Become the foundation.
- Supporting ingredients — Complement the main ingredient without overpowering it.
- Sauce or liquid (if applicable) — Brings flavors together. Balance richness with acid.
- Acid (lemon, vinegar, wine, or other) — Brightens and prevents flat-tasting results.
- Final finish (garnish, glaze, or sauce) — Prevents one-dimensional taste and adds visual appeal.
Getting the Filling Smooth Before It Hits the Oven
Beat the cream cheese and sugar first until the mixture looks completely smooth and glossy, with no visible lumps around the bowl. Scrape the sides of the bowl, then add the eggs one at a time. That slow addition keeps the batter from breaking and helps it stay dense in the best way.
Building the Cookie Base
Place one cookie flat in each liner and press it down gently if it has shifted. That cookie is the crust, so there’s no need to crush or mix anything else. It will soften just slightly as it bakes, but it should still keep enough structure to give each cheesecake a clean bottom.
Mixing the Batter Without Adding Too Much Air
Once the cream cheese and sugar are smooth, add the eggs one at a time, mixing only until each one disappears into the batter. Stir in the vanilla and sour cream at the end. If the batter starts looking fluffy instead of silky, it has been beaten too long and may rise and fall unevenly in the oven.
Baking Until the Centers Barely Move
Divide the batter evenly among the liners, filling each about three-quarters full. Bake at 325°F for 18 to 20 minutes, watching for set edges and centers that still jiggle slightly when you move the pan. Let them cool in the pan for 30 minutes before chilling so they can settle without collapsing from a sudden temperature change.
How to Adapt These Mini Cheesecakes for Different Crowds
Gluten-Free Version
Use certified gluten-free sandwich cookies or golden-style cookies in place of the standard Oreos. The filling stays exactly the same, and the texture comes out nearly identical as long as the replacement cookie is sturdy enough to hold its shape under the batter.
Dairy-Free Swap
Use a dairy-free cream cheese alternative and a thick dairy-free yogurt in place of the sour cream. The flavor will be a little tangier and the filling may set slightly softer, so chill it well before topping and serving.
Chocolate Crust Variation
Use regular Oreos instead of Golden Oreos for a deeper chocolate base. That makes the cheesecake taste a little richer and gives the fruit on top a stronger color contrast, which looks especially nice for a patriotic dessert tray.
Make-Ahead Party Schedule
Bake and chill the cheesecakes a day ahead, then top them with whipped cream and berries right before serving. The centers need the full chill time to firm up, and waiting on the garnish keeps the fruit fresh and the whipped cream from sliding.
Storage and Reheating
- Refrigerator: Store uncovered or loosely covered for up to 4 days. The cookies may soften a bit, but the texture stays creamy.
- Freezer: Freeze the plain cheesecakes without toppings for up to 1 month. Wrap them well and thaw overnight in the refrigerator before garnishing.
- Reheating: These are meant to be served chilled, not reheated. Let them sit at room temperature for 10 to 15 minutes if you want a softer bite, but don’t warm them or the filling will lose its structure.
Answers to the Questions Worth Asking
Red, White and Blue Mini Cheesecakes
Ingredients
Equipment
Method
- Preheat the oven to 325°F and line a 12-cup muffin tin with cupcake liners.
- Place one Oreo cookie flat in the bottom of each liner.
- Beat the cream cheese and granulated sugar until smooth.
- Add the eggs one at a time, mixing well after each addition.
- Beat in the vanilla extract and sour cream until fully combined.
- Divide the batter evenly among the 12 cups, filling each about 3/4 full.
- Bake for 18–20 minutes, until the centers are just barely set and will firm up as they cool.
- Cool the cheesecakes in the pan for 30 minutes.
- Refrigerate for at least 2 hours until fully chilled and set.
- Before serving, swirl whipped cream over the top of each mini cheesecake.
- Top each with a strawberry slice and a few blueberries.
- Finish each with a pinch of red and blue sprinkles.