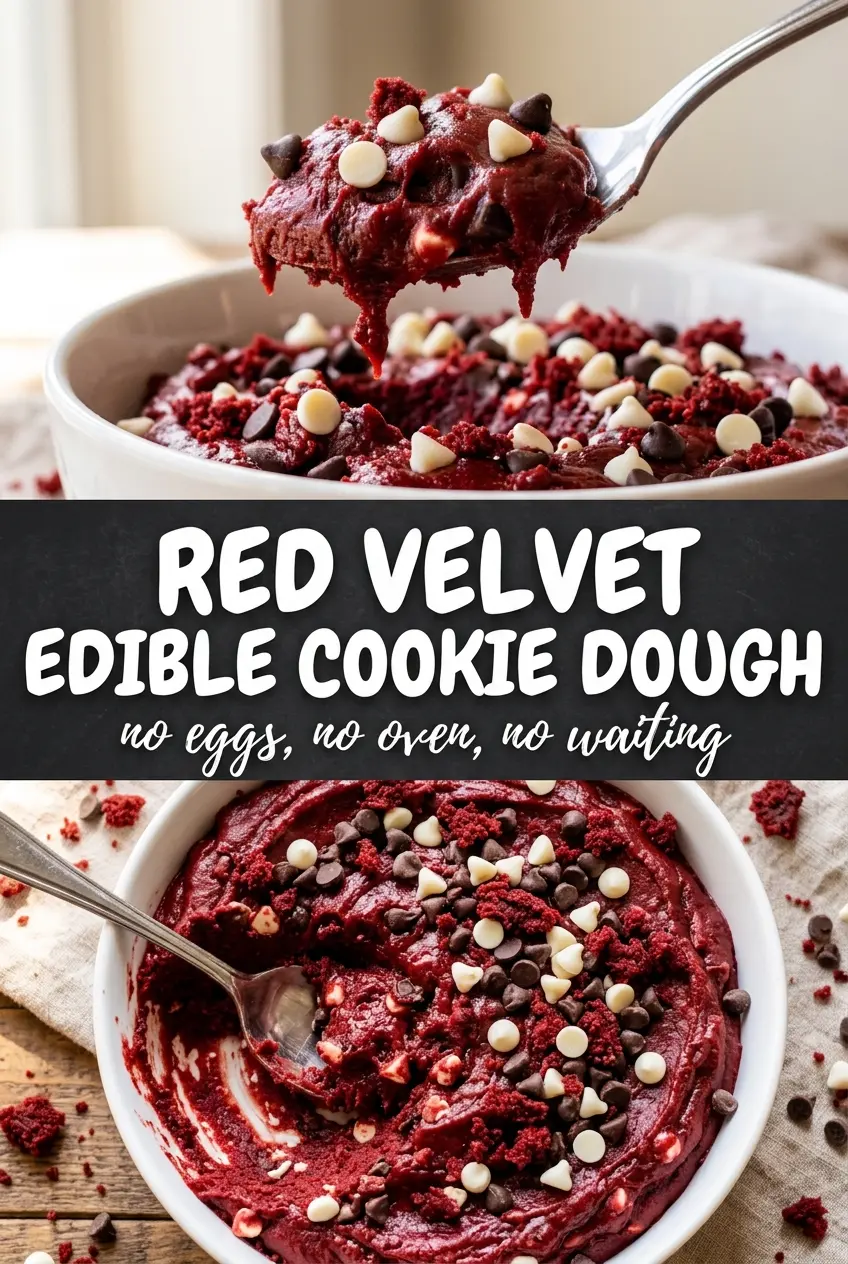
Vivid red velvet cookie dough is one of those desserts that gets people talking before they even take a bite. It’s soft, creamy, and spoonable with that familiar cocoa-and-vanilla red velvet flavor, but the best part is the texture: thick enough to scoop, tender enough to eat straight from the bowl, and studded with white chocolate chips for little sweet crunches in every bite.
This version works because the base is built like a real edible dough instead of a loose frosting. The flour gets heat-treated first, which takes the raw taste and safety issue out of the equation, and the cream cheese adds that classic red velvet tang without making the dough greasy. A short chill at the end matters too. It firms everything up just enough so the dough holds its shape on a spoon instead of turning sticky and soft.
Below, I’ve included the one step people skip that changes the whole result, plus a few ways to adjust the sweetness, color, and texture if you want to make it your own.
The cream cheese gave it that real red velvet tang, and after chilling it was thick enough to scoop without sticking to everything. My kids kept sneaking spoonfuls all night.
Save this red velvet edible cookie dough for the nights when you want a chilled, scoopable dessert with cream cheese tang and white chocolate chips.
The Heat-Treated Flour Is What Keeps This Dough Safe and Smooth
The biggest mistake with edible cookie dough is treating raw flour like it’s ready to eat. Flour can carry bacteria, and it also tastes dusty when it hasn’t been heat-treated. A quick bake at 350°F for five minutes solves both problems, but only if you let it cool completely before mixing it in. Warm flour melts the butter and cream cheese too early, and that’s how you end up with a greasy, loose dough instead of a thick scoopable one.
The other detail that matters here is balance. Cream cheese gives the dough body and tang, but too much would push it into frosting territory. The butter and sugars do the heavy lifting for sweetness and texture, while the cocoa and red food coloring build that classic red velvet look without making the dough taste like chocolate cookie dough in disguise.
What Each Ingredient Is Actually Doing in This Dough

- Heat-treated all-purpose flour — This gives the dough its structure. The short bake makes it safe to eat and gets rid of the raw flour taste, but it has to cool all the way down before you mix it in.
- Cream cheese — This is what gives the dough that subtle tang red velvet needs. Use full-fat cream cheese for the best texture; low-fat versions can make the dough softer and less rich.
- Butter — Softened butter helps the dough whip up light before the flour goes in. If it’s too melted, the mixture turns slick instead of fluffy.
- Brown sugar and granulated sugar — The brown sugar brings a little depth and chew, while the granulated sugar keeps the texture from getting too dense. Together they help the dough taste like cookie dough instead of sweetened spread.
- Cocoa powder and red food coloring — The cocoa gives the flavor that makes this taste like red velvet, not just vanilla dough dyed red. The food coloring is what delivers the bold color, and gel coloring gives a stronger result with less liquid if you want an even deeper red.
- White chocolate chips — They add creamy sweetness and a little bite. If you use chopped white chocolate instead, you’ll get melty pockets, but the chips hold their shape better after chilling.
Building the Dough So It Stays Thick and Scoopable
Whip the Base First
Beat the softened butter, cream cheese, granulated sugar, and brown sugar until the mixture looks pale and fluffy. This step matters because it dissolves some of the sugar and traps air, which keeps the finished dough from feeling heavy. If the mixture still looks grainy, keep mixing for another minute or two. A smooth base gives you a smoother final texture.
Add the Color and Cocoa Before the Flour
Mix in the milk, vanilla, cocoa powder, red food coloring, and salt until the dough turns evenly red. You want the color fully distributed here, before the flour goes in, because once the flour is added the dough thickens fast and gets harder to blend cleanly. If the red looks streaky, scrape the bowl well with a spatula. That’s the difference between a marbled dough and a bold, even color.
Fold in the Flour, Then Stop
Add the cooled heat-treated flour and mix only until a soft dough forms. Overmixing after the flour goes in can make the dough pasty and stiff. It should look thick, soft, and just a little sticky before the chips go in. Fold in the white chocolate chips by hand so they stay evenly distributed and don’t get crushed.
Chill Until It Scoops Cleanly
Refrigerate the dough for 30 minutes before serving. That rest firms up the butter and cream cheese and gives the flour time to hydrate, which improves both texture and flavor. If the dough still feels too soft after chilling, give it another 10 to 15 minutes. Warm kitchens can make a big difference here, and a little extra chill time fixes most texture problems.
How to Change the Flavor Without Losing the Red Velvet Feel
Dairy-Free Version
Use a plant-based butter and a dairy-free cream cheese alternative with a thick, block-style texture. The flavor stays close to the original, but the dough may be a little softer, so chill it a bit longer before scooping.
Less Sweet, More Cocoa
Drop the granulated sugar by 2 tablespoons and add an extra teaspoon of cocoa powder. The dough will taste a little more like classic red velvet cake and a little less like candy, while still staying soft and scoopable.
No Red Food Coloring
You can leave out the coloring and still get a good-tasting dough, but it will look more like cocoa cookie dough with cream cheese. If the bold red color matters, gel food coloring gives the strongest result without thinning the dough.
Storage and Reheating
- Refrigerator: Store in an airtight container up to 5 days. The dough firms up more as it chills, so let it sit at room temperature for a few minutes before scooping if needed.
- Freezer: It freezes well. Scoop into portions or press into a container with parchment between layers, then thaw in the fridge overnight.
- Reheating: No reheating needed. If it gets too firm, let it sit out briefly until it softens enough to scoop. Microwaving can melt the chips and make the texture greasy.
Answers to the Questions Worth Asking
Red Velvet Edible Cookie Dough
Ingredients
Equipment
Method
- Spread the heat-treated flour on a sheet pan in an even layer and bake at 350°F for 5 minutes. Visual cue: it should look dry and slightly toasted, then cool completely before mixing.
- Beat the softened butter, softened cream cheese, granulated sugar, and packed brown sugar until light and fluffy. Visual cue: the mixture becomes pale and airy.
- Mix in the whole milk, vanilla extract, unsweetened cocoa powder, red food coloring, and salt until evenly combined. Visual cue: the batter turns a vibrant crimson red.
- Stir in the heat-treated flour until a soft dough forms. Visual cue: the dough pulls together and holds shape when pressed.
- Fold in the white chocolate chips. Visual cue: chips are suspended throughout the red dough without overmixing.
- Refrigerate the dough for 30 minutes before serving. Visual cue: it firms slightly for easier scooping.
- Scoop the dough into bowls or cones and serve chilled. Visual cue: bold red dough with visible white chocolate chips throughout, eaten with a spoon.