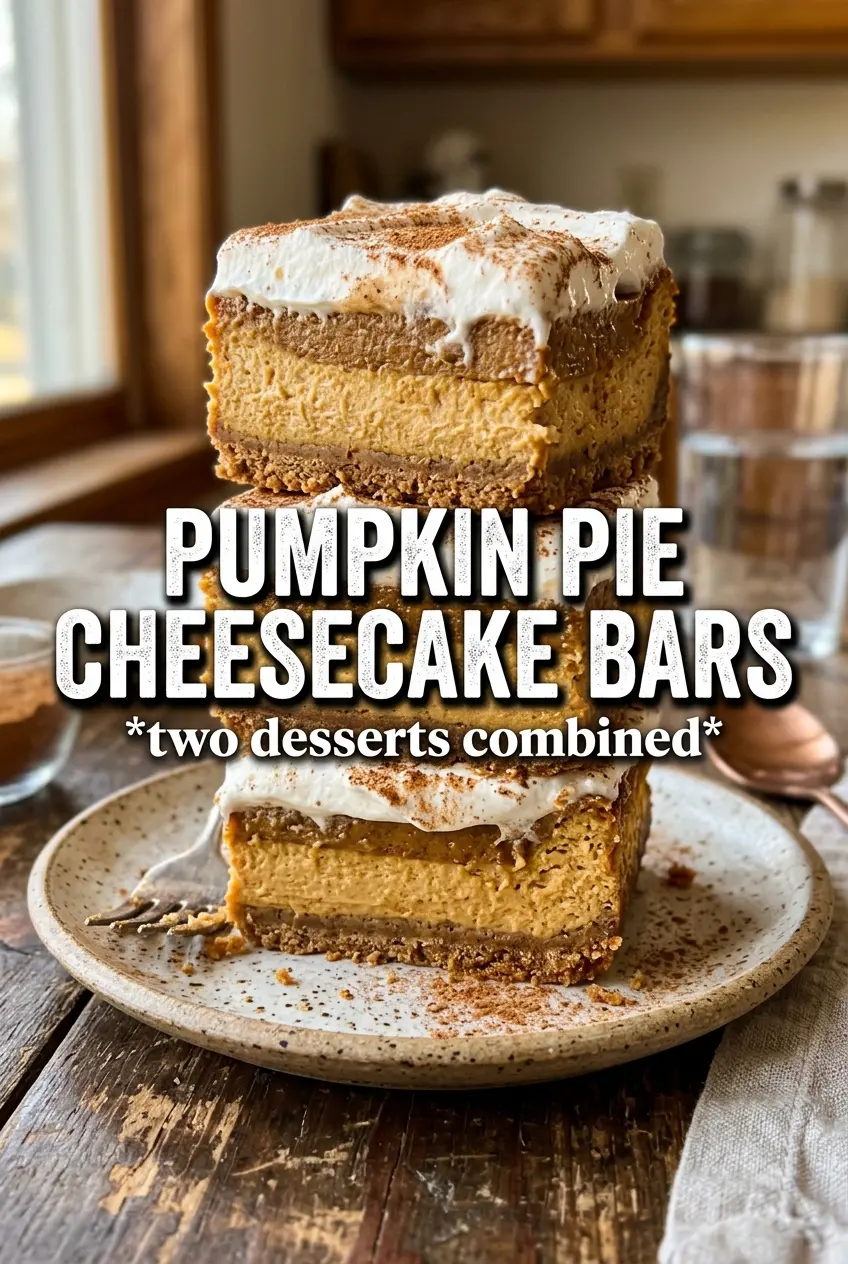
Pumpkin pie cheesecake bars hit the sweet spot between two desserts that already know how to win a crowd. You get a crisp, buttery gingersnap base, a smooth cheesecake layer that sets cleanly, and just enough pumpkin spice to taste like fall without turning muddy or heavy. The bars slice neatly once they’re chilled, which means you get clean layers instead of a gooey mess on the plate.
What makes this version work is the balance in the filling. Cream cheese and sour cream keep it tangy and rich, while the pumpkin gets mixed into only half the batter so the swirl stays defined instead of blending into one flat orange layer. The gingersnap crust matters too; it brings enough spice to stand up to the cheesecake and keeps the whole dessert from tasting one-note.
Below, I’ve included the small details that matter most: how to keep the filling from cracking, why the crust gets a quick bake first, and the easiest way to get those swirls looking bakery-level without overworking them.
The filling baked up silky and the swirl held its shape after chilling. I used a sharp knife and got clean bars instead of a soft mess, and the gingersnap crust had just enough spice to carry the whole dessert.
Save these pumpkin pie cheesecake bars for the holidays when you want a crisp gingersnap crust, a creamy swirl, and tidy slices that travel well.
The Reason the Swirl Stays Distinct Instead of Turning Muddy
The biggest mistake with cheesecake bars like this is overmixing after the pumpkin goes in. Once the batter is divided, each half needs only enough stirring to blend; if you work it too much, the pumpkin layer loosens and the swirl disappears into a single tan filling. The other trap is baking until the center looks completely firm. Cheesecake keeps setting as it cools, so the middle should still have a slight wobble when you pull it from the oven.
The crust gets a short head start for a reason. Gingersnap crumbs are more flavorful than plain graham crumbs here, but they can also stay sandy if you skip the pre-bake. Ten minutes in the oven gives them enough structure to hold up under the filling and keeps the bottom from tasting soft or doughy after chilling.
What Each Part of the Filling Is Doing
- Cream cheese — This is the backbone of the filling, and it needs to be fully softened before mixing. Cold cream cheese leaves little lumps that never quite disappear. Use full-fat blocks for the smoothest, densest bars.
- Sour cream — This adds tang and keeps the texture from becoming heavy. Yogurt can work in a pinch, but it tastes a little sharper and can loosen the filling more than sour cream does.
- Pumpkin puree — Use plain pumpkin puree, not pumpkin pie filling. Pie filling already has sugar and spices mixed in, which throws off the balance and can make the pumpkin side taste too sweet and flat.
- Gingersnap crumbs — These bring spice and a firmer crunch than graham crackers. If you swap in graham crackers, the bars will still work, but the crust tastes milder and the dessert leans more classic cheesecake than pumpkin pie.
Building the Bars So They Bake Cleanly
Pressing and Pre-Baking the Crust
Mix the crumbs, sugar, and melted butter until every crumb looks evenly moistened, then press the mixture firmly into a lined 9×13 pan. A flat-bottomed measuring cup helps you get an even layer without punching holes into the crust. Bake it just until it smells toasted and looks set at the edges; if it goes too far, it turns hard instead of crisp.
Making the Vanilla and Pumpkin Batters
Beat the cream cheese with both sugars until the mixture looks smooth and glossy before you add anything else. Add the eggs one at a time so the batter stays emulsified; dumping them in together is one of the fastest ways to get a loose, uneven filling. Stir in the sour cream and vanilla last, then divide the batter in half before adding the pumpkin and spices to one side.
Swirling Without Overmixing
Alternate spoonfuls of the vanilla and pumpkin batters over the crust, then drag a knife through the top in broad, shallow swoops. Stop when you see defined ribbons. If you keep swirling after that, the colors blur and you lose the marbled look that makes these bars worth cutting into.
Baking Until Just Set
Bake until the edges look set and the center has only a small jiggle when you tap the pan. The top should look matte, not wet, but it shouldn’t puff high or crack across the surface. Cool the bars fully at room temperature, then chill for at least four hours before slicing. If you cut them warm, they’ll slump and smear instead of holding clean squares.
How to Adapt These Bars for Different Kitchens and Crowds
Gluten-Free Crust Swap
Use gluten-free gingersnap cookies or gluten-free graham crackers and crush them finely. The texture stays nearly the same as long as the crumbs are mixed with enough butter to hold together. Check that your cookie choice has a strong spice profile, because the crust carries a lot of the flavor here.
Lower-Sugar Version
You can reduce the granulated sugar in the filling a little, but don’t cut both sugars aggressively or the cheesecake tastes flat and the texture turns less creamy. The brown sugar adds a little depth and helps the pumpkin side taste rounder, so keep at least some of it in the mix.
Make-Ahead for a Party
These bars are built for making ahead. Chill them overnight, then slice with a hot, wiped-clean knife for the sharpest edges. Add the whipped cream right before serving so it stays fluffy instead of melting into the top.
Dairy-Free Is Tricky Here
A full dairy-free version changes the texture more than most swaps, because cream cheese and sour cream are doing the heavy lifting. If you need to go dairy-free, use a high-quality plant-based cream cheese and expect a softer, less tangy filling. The bars will still chill into slices, but they won’t be quite as rich or firm.
Storage and Reheating
- Refrigerator: Store covered for up to 5 days. The crust stays crispest in the first two days, then softens slightly under the filling.
- Freezer: These freeze well without the whipped cream. Wrap bars individually, then thaw overnight in the refrigerator for the cleanest texture.
- Reheating: Don’t reheat these bars; they’re meant to be served chilled. If they’ve been frozen, let them thaw slowly in the fridge so the filling stays smooth instead of weeping.
Questions I Get Asked About This Recipe
Pumpkin Pie Cheesecake Bars
Ingredients
Equipment
Method
- Preheat the oven to 325F, then line a 9x13 pan and press gingersnap crumbs over the bottom to form an even layer.
- Bake for 10 minutes, then let the crust cool slightly while you make the filling.
- Beat the softened cream cheese with both sugars until smooth.
- Add the eggs one at a time, beating after each addition until incorporated.
- Stir in the sour cream and vanilla, then divide the batter into two portions.
- Stir the pumpkin puree, pumpkin pie spice, and cinnamon into one portion until evenly colored.
- Alternately pour both batters over the crust and swirl with a knife to create a marbled pattern.
- Bake for 40-45 minutes, until the center is just set.
- Cool to room temperature, then refrigerate for 4 hours to chill and firm.
- Cut into bars and top each bar with whipped cream before serving.