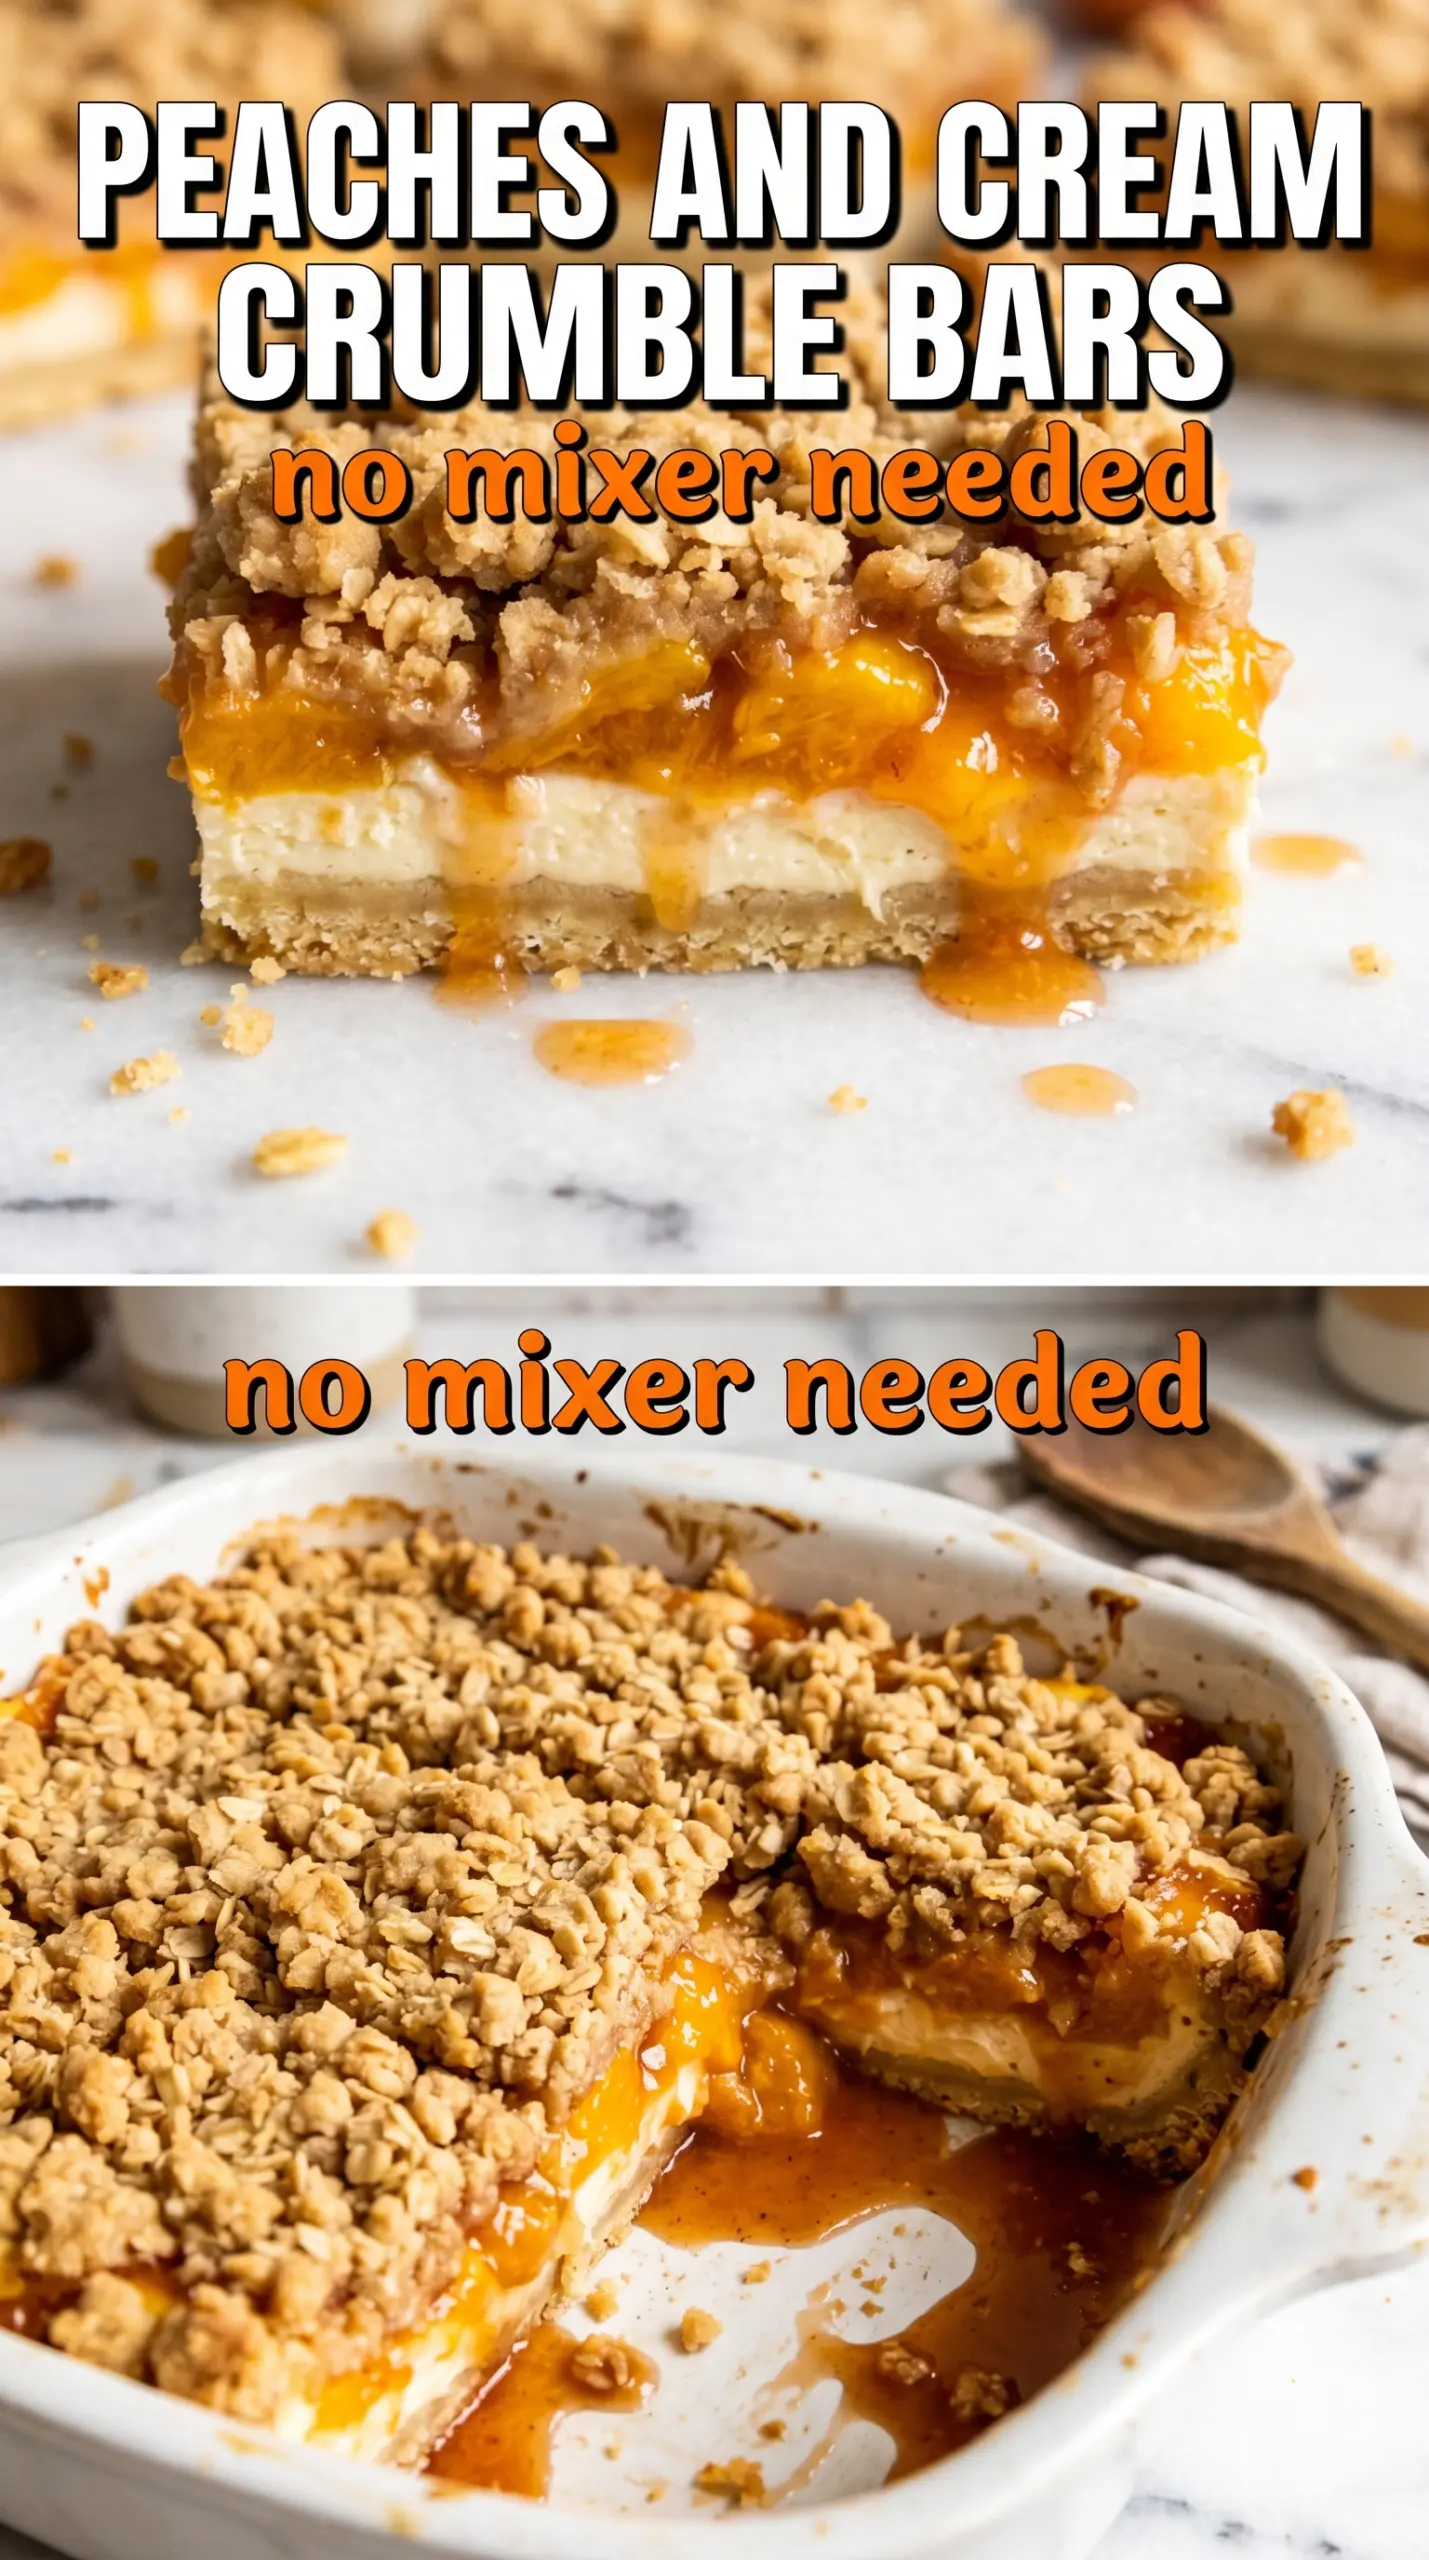
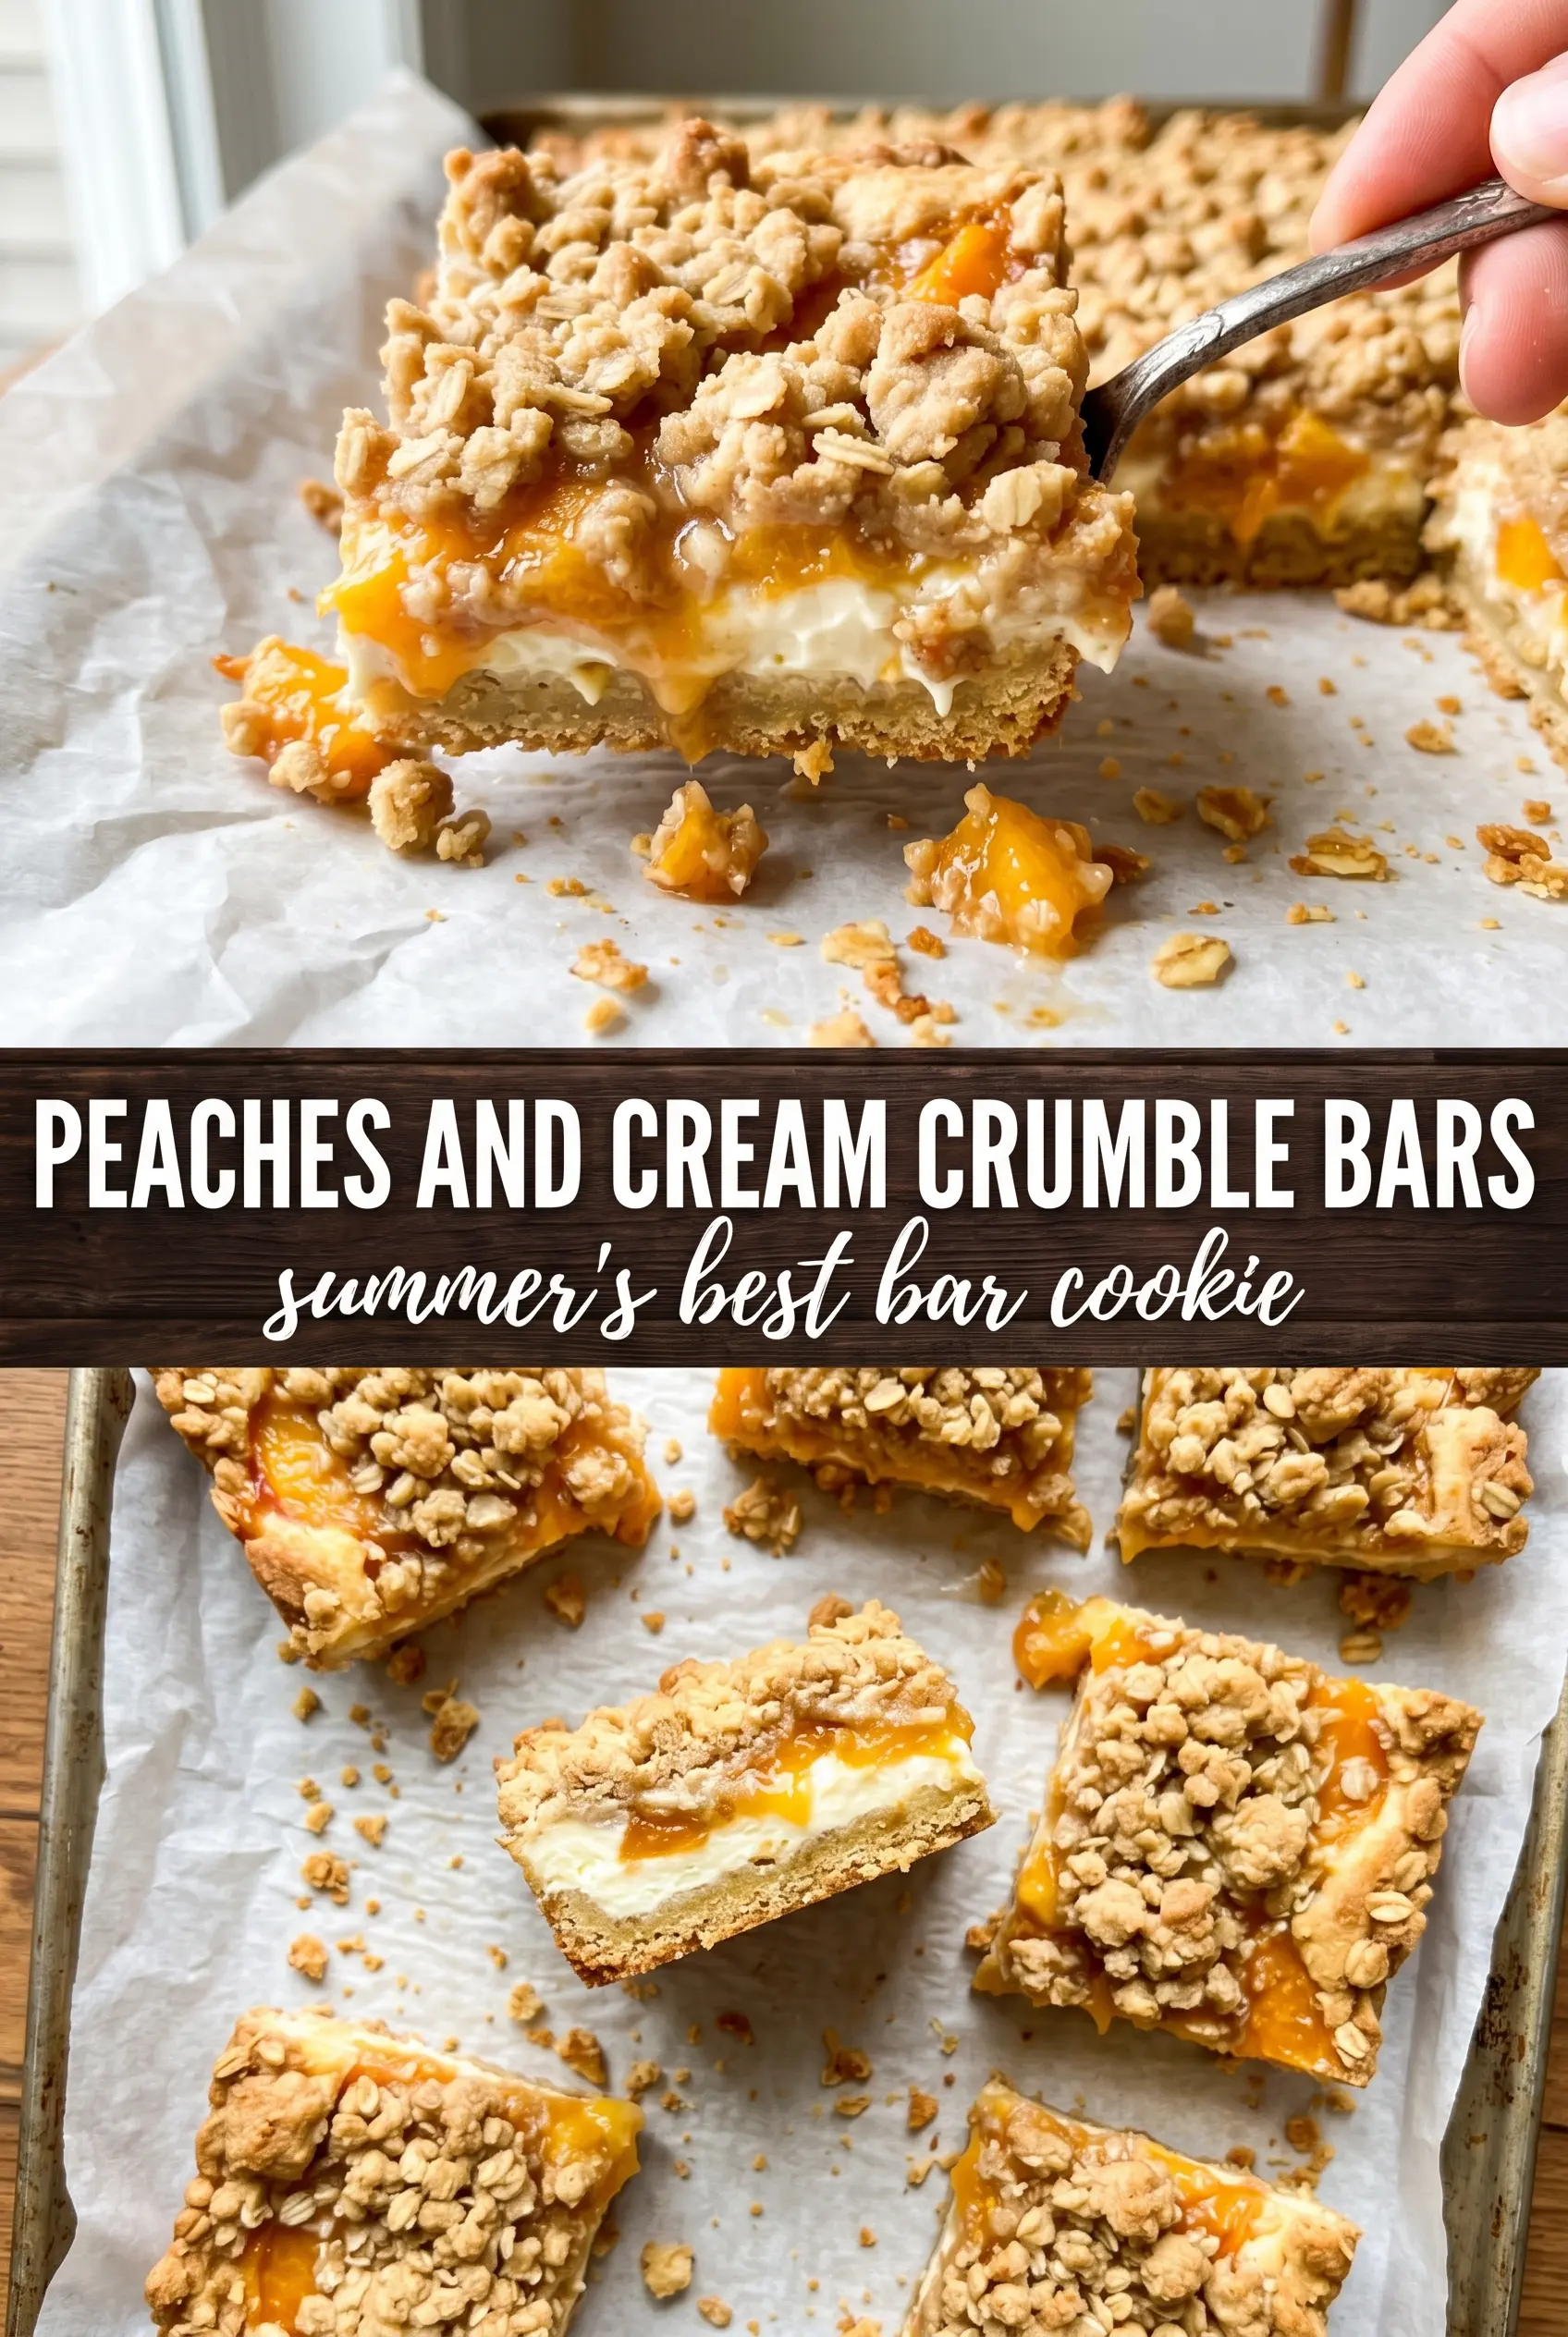
Buttery oat crumble bars with a creamy middle and jammy peach filling are the kind of dessert that disappears fast once the pan hits the table. The base bakes up sturdy enough to hold clean squares, while the topping stays crisp and shattery instead of turning sandy or dry. Every bite gives you a little bit of everything: tender fruit, tangy cream cheese, and a brown sugar crumble with real texture.
What makes these bars work is the layering. The bottom crust gets a short head start in the oven so it can set before the cream cheese and peaches go on top. That keeps the layers distinct and prevents the filling from sinking into the base. A little cornstarch in the peaches helps the juices turn glossy and thick instead of running out when you cut the bars.
If you’ve ever had fruit bars go soft in the center or fall apart on the board, the details below will help. I’ve included the timing that keeps the crust sturdy, plus a few swaps and storage notes for when you want to make them ahead.
The cream cheese layer stayed neat and the peaches thickened up beautifully. I let them cool all the way and got clean squares instead of a gooey mess, which never happens with fruit bars at my house.
Save these peaches and cream crumble bars for the peach desserts when you want a thick cream cheese layer and a crisp oat topping in every square.
The Reason These Bars Slice Clean Instead of Collapsing
Fruit bars usually fail in one of two ways: the base stays too soft, or the filling turns loose and floods the pan. Here, the partial bake on the crust gives the bottom structure before any moisture gets a chance to soak in. That short bake also helps the butter set into the flour-oat mixture, so the crust holds together when you lift the bars out of the pan.
The other detail that matters is cooling. The peach layer will look soft when it comes out of the oven, and that’s fine. The cornstarch finishes thickening as the bars cool, and the cream cheese layer firms up enough to cut neatly only after the pan has fully cooled. If you rush that part, the bars will smear instead of stack.
What Each Ingredient Is Actually Doing in These Peach Bars
- Rolled oats — These give the crumble its rugged texture and keep the topping from eating like plain shortbread. Quick oats turn softer and denser, so rolled oats are the better choice if you want visible craggy bits on top.
- Cold butter — Cold butter is what creates that crisp, nubbly crumble. If it softens too much before baking, the topping turns greasy and fine-textured instead of sandy and crisp.
- Cream cheese — This layer gives the bars their tang and keeps the fruit from tasting one-note sweet. Full-fat cream cheese gives the cleanest, richest result; reduced-fat versions can work, but they tend to bake up looser.
- Cornstarch — This is what turns the peach juices into a glossy filling that holds its shape. Without it, the fruit layer can leak and make the bottom soggy.
- Fresh peaches — Fresh peaches are worth using here because they keep the filling juicy without becoming mushy. If yours are very ripe, dice them a little larger so they don’t disappear during baking.
Building the Layers So the Filling Stays in Place
Mixing the Crumble
Start by cutting the butter into the flour, oats, sugar, cinnamon, and salt until the mixture looks like coarse crumbs with a few pea-sized pieces. Those uneven bits matter because they bake into the best crunchy edges. If you overmix until everything looks sandy, the topping turns dry and compact instead of crisp.
Giving the Base Its Head Start
Press about two-thirds of the crumble mixture into the pan firmly and evenly, then bake it until the edges look set and the surface no longer looks dusty. You want a base that feels a little firm if you tap it with a spoon. If you skip the pre-bake, the bottom can absorb too much juice from the peaches and lose its bite.
Spreading the Cream Cheese Layer
Beat the cream cheese, sugar, egg, and vanilla until smooth before spreading it over the warm crust. Warm, not hot, is the sweet spot: it helps the layer glide on easily without melting into the base. If the cream cheese is lumpy, it was too cold, and those lumps won’t disappear in the oven.
Finishing with the Peach Filling
Toss the peaches with sugar, cornstarch, and lemon juice until every piece looks lightly coated, then spread them evenly over the cream cheese. The lemon juice wakes up the peaches and keeps the filling from tasting flat. Scatter the remaining crumble over the top, then bake until the topping is golden and the filling bubbles at the edges.
Make Them Gluten-Free with One Swap
Use a good 1:1 gluten-free flour blend in place of the all-purpose flour. Keep the oats certified gluten-free if cross-contamination matters. The bars still bake up with a crisp top and sturdy base, though the crumble will be a little more delicate when you cut it.
Swap in Frozen Peaches When Fresh Aren’t in Season
Frozen peaches work, but thaw and drain them first so the filling doesn’t get watery. Pat them dry before tossing with the cornstarch mixture. The flavor is still good, though fresh peaches give you a brighter, firmer bite.
Make It a Little Less Sweet
Cut the sugar in the peach filling by a tablespoon or two if your peaches are very ripe. Leave the brown sugar in the crumble alone, though — that’s what gives the topping its caramel note and helps it brown properly.
Storage and Reheating
- Refrigerator: Store covered for up to 5 days. The crumble softens slightly, but the bars stay sliceable and the flavor gets even better on day two.
- Freezer: These freeze well. Wrap individual bars tightly and freeze for up to 2 months, then thaw in the refrigerator so the cream cheese layer doesn’t sweat and turn slippery.
- Reheating: Serve them chilled or let them sit at room temperature for 20 to 30 minutes. If you warm them, use a low oven for a few minutes; the microwave softens the crumble and makes the filling run before it has time to reset.
Answers to the Questions Worth Asking
Peaches and Cream Crumble Bars
Ingredients
Equipment
Method
- Preheat oven to 350°F and line a 9x13 pan with parchment paper, leaving overhang so the bars lift out cleanly.
- Combine all-purpose flour, rolled oats, brown sugar, cinnamon, and salt, then cut in cold butter until the mixture looks like coarse crumbs.
- Press 2/3 of the crumb mixture firmly into the pan base to form an even layer.
- Bake the pressed base at 350°F for 15 minutes, until set and lightly golden.
- Beat cream cheese, granulated sugar, egg, and vanilla until smooth, then spread over the warm baked base.
- Toss fresh peaches with granulated sugar, cornstarch, and lemon juice, then spread the peach mixture over the cream cheese layer.
- Crumble the remaining oat mixture over the peach layer to cover it evenly.
- Bake at 350°F for 25-30 minutes, until the topping is golden and feels crisp at the edges.
- Cool completely in the pan before cutting into 16 bars so the cream layer sets and the filling holds together.