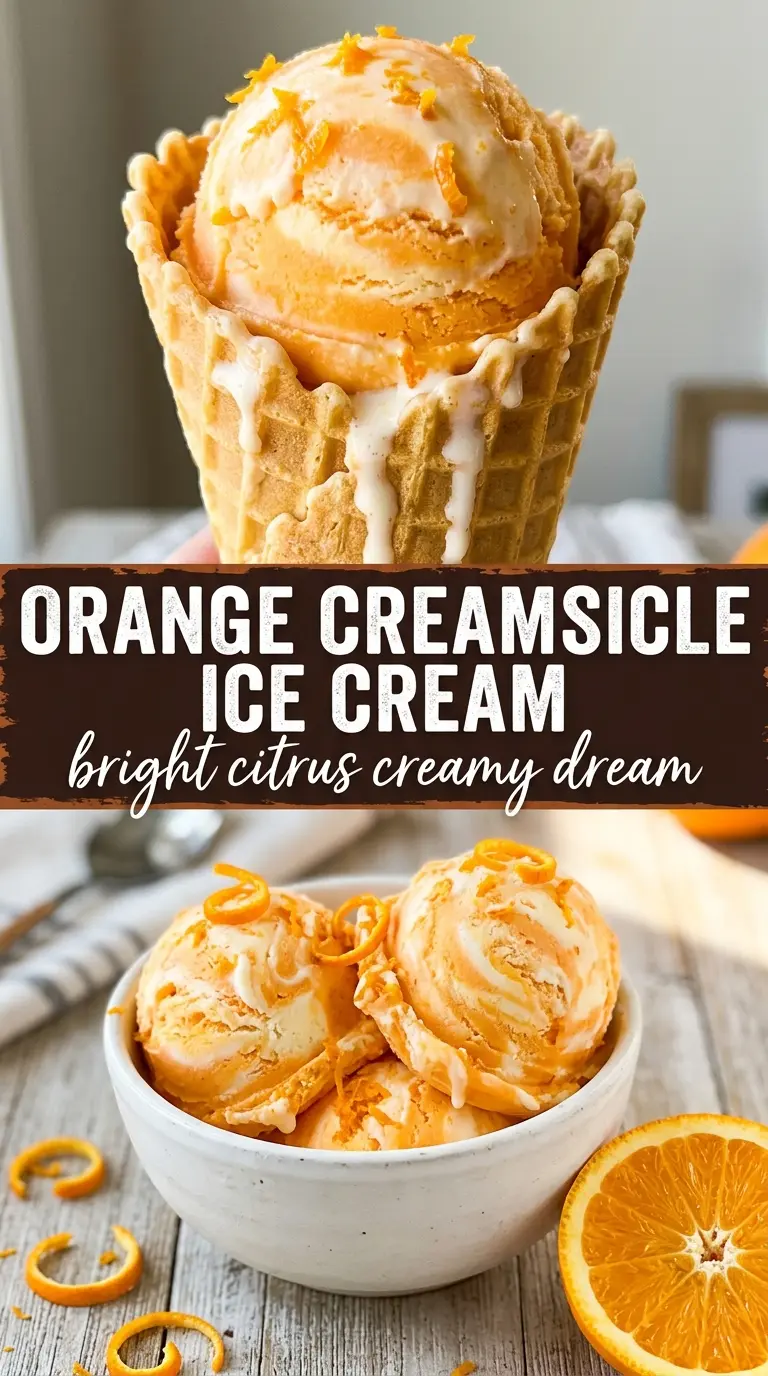
Orange Creamsicle Ice Cream lands with that first cold bite of bright citrus and vanilla custard, and the swirl is what makes it memorable. You get creamy spoonfuls with little ribbons of orange running through them, not a flat orange ice cream that tastes one-note or a vanilla base that disappears in the background.
The trick is building the orange in two stages. The custard stays smooth and rich because the juice never gets cooked into the dairy base; instead, it’s reduced on its own so the citrus flavor stays lively and doesn’t water down the churn. That separation also gives you those pretty sherbet-like streaks instead of an evenly tinted bowl of beige ice cream.
Below, I’ve included the little timing details that matter most, plus the easiest way to keep the swirl distinct when you transfer it to the freezer. If you’ve ever had homemade ice cream turn icy or muddled, this version avoids both problems.
The orange syrup stayed bright and the vanilla base churned up silky. I loved that the swirls actually stayed swirled after freezing, and it tasted like the creamsicles from my childhood.
Like this orange creamsicle swirl? Save it to Pinterest for the days when you want homemade ice cream with bright citrus ribbons and a nostalgic vanilla finish.
The Syrup Stays Bright Only If You Keep It Out of the Custard
Orange juice behaves differently from cream, and that’s the part that trips people up. If you whisk it straight into the base before churning, the acidity dulls the milk flavor and the extra liquid works against that thick, scoopable texture you want. Reducing the juice with sugar first concentrates the orange flavor and gives you a syrup that drizzles into the churned ice cream without thinning it out.
The other important piece is the custard temperature. Bring it to 175°F, not a full boil. Once egg yolks are involved, high heat turns a smooth base grainy fast, and no amount of straining will fully fix that. Slow heat and steady whisking give you a base that tastes rich and freezes cleanly.
- Orange juice — Fresh juice tastes cleaner and brighter here than bottled. Bottled juice can work in a pinch, but it usually tastes flatter, so the zest becomes even more important.
- Orange zest — This is where the real creamsicle aroma comes from. Grate only the orange part; any white pith will turn the syrup bitter.
- Egg yolks — They create the custard body and help the ice cream stay soft after freezing. Don’t swap them out unless you’re willing to lose that classic rich texture.
- Heavy cream and whole milk — The balance matters. All cream makes the finished ice cream heavy; all milk makes it icy.
What Each Ingredient Is Actually Doing in This Ice Cream
- Base ingredient (cream, milk, or custard) — This provides the foundation and richness. Quality matters.
- Sweetener (sugar, honey, or condensed milk) — This sweetens and prevents ice crystals. The ratio is critical.
- Flavor element (vanilla, fruit, chocolate, cookie, or other) — This defines the ice cream personality. Use quality ingredients.
- Egg yolks (if making custard base) — These create richness and silky texture. Optional but elevates ice cream.
- Churning (if using ice cream maker) — This incorporates air and prevents ice crystals. Critical for smooth texture.
- Freezing temperature and time — Proper freezing prevents rock-hard texture. Store at 0°F or below.
- Mix-ins (chocolate, cookies, candy, or swirls) — These add texture and prevent one-dimensional flavor. Add near end of churning.
- Serving temperature (slightly soft, not rock hard) — This provides creamy mouthfeel. Remove from freezer 5 minutes before serving.
Building the Custard, Then Folding in the Orange at the Right Moment
Heating the Dairy
Warm the cream and milk until the edges just start to steam. You’re not trying to boil them; you want enough heat to temper the yolks without scrambling them. If the dairy is too hot when it hits the eggs, you’ll see little bits of cooked yolk right away. Keep the whisk moving and pour in a thin stream.
Cooking the Custard
Return the mixture to the pan and cook over medium-low heat, stirring constantly with a spatula or whisk, until it reaches 175°F and lightly coats the back of a spoon. If it jumps to a simmer, pull it off the heat immediately. The custard should look smooth and slightly thickened, not pudding-thick.
Making the Orange Syrup
Cook the orange juice, zest, and sugar until the mixture turns slightly syrupy and smells intensely citrusy. It should reduce enough to cling to a spoon, but not so much that it turns sticky or candy-like. Cool it completely before swirling it into the churned ice cream, or it will melt the base and blur the swirl.
Churning and Swirling
Churn the chilled custard until it reaches a thick soft-serve texture. In the last couple of minutes, drizzle in the orange syrup in a slow stream so it ribbons through instead of disappearing. When you transfer it to the container, layer spoonfuls and stop stirring once you see the pattern you want. Overmixing at this stage is the fastest way to lose the creamsicle look.
Dairy-Free Orange Creamsicle Ice Cream
Use full-fat canned coconut milk in place of the cream and milk, and expect a softer set with a faint coconut note. The orange syrup still works the same way, but the finished texture will be a little less custardy and a little more scoopable straight from the freezer.
Egg-Free Version
Skip the yolks and use an egg-free vanilla ice cream base or a custard-style base thickened with cornstarch. You’ll lose some of the old-fashioned richness, but the orange swirl still gives you the same creamsicle effect.
Extra-Intense Orange Flavor
Add a little extra zest to the syrup, not extra juice. More juice means more water, which makes the ice cream icier; more zest gives you a stronger orange aroma without changing the texture.
Storage and Reheating
- Refrigerator: Not suitable for the fridge; this is best kept frozen and served after a short rest on the counter.
- Freezer: Store in an airtight container for up to 2 weeks. Press parchment or plastic wrap directly on the surface if you want to protect the swirl and reduce ice crystals.
- Reheating: No reheating needed. Let it sit at room temperature for 5 to 10 minutes before scooping so the custard softens instead of shattering into hard shards.
Answers to the Questions Worth Asking

Orange Creamsicle Ice Cream
Ingredients
Equipment
Method
- Heat heavy cream and whole milk in a saucepan until steaming, not boiling.
- Whisk egg yolks with 1/2 cup granulated sugar until smooth, then slowly whisk in the steaming cream mixture.
- Return to the heat and cook, stirring constantly, until the custard reaches 175F.
- Strain the custard, then add vanilla extract and salt, and whisk until combined.
- Cool the vanilla custard completely at room temperature, then refrigerate until cold.
- Combine fresh orange juice, orange zest, and the remaining 1/4 cup granulated sugar in a small saucepan.
- Simmer for 5 minutes until slightly syrupy, then cool completely.
- Churn the chilled vanilla custard in an ice cream maker until thick.
- In the last 2 minutes, drizzle in the orange syrup to create swirls—do not fully mix.
- Transfer the ice cream to a container, layering spoonfuls to maintain the swirl pattern.
- Freeze at least 4 hours until firm enough to scoop.