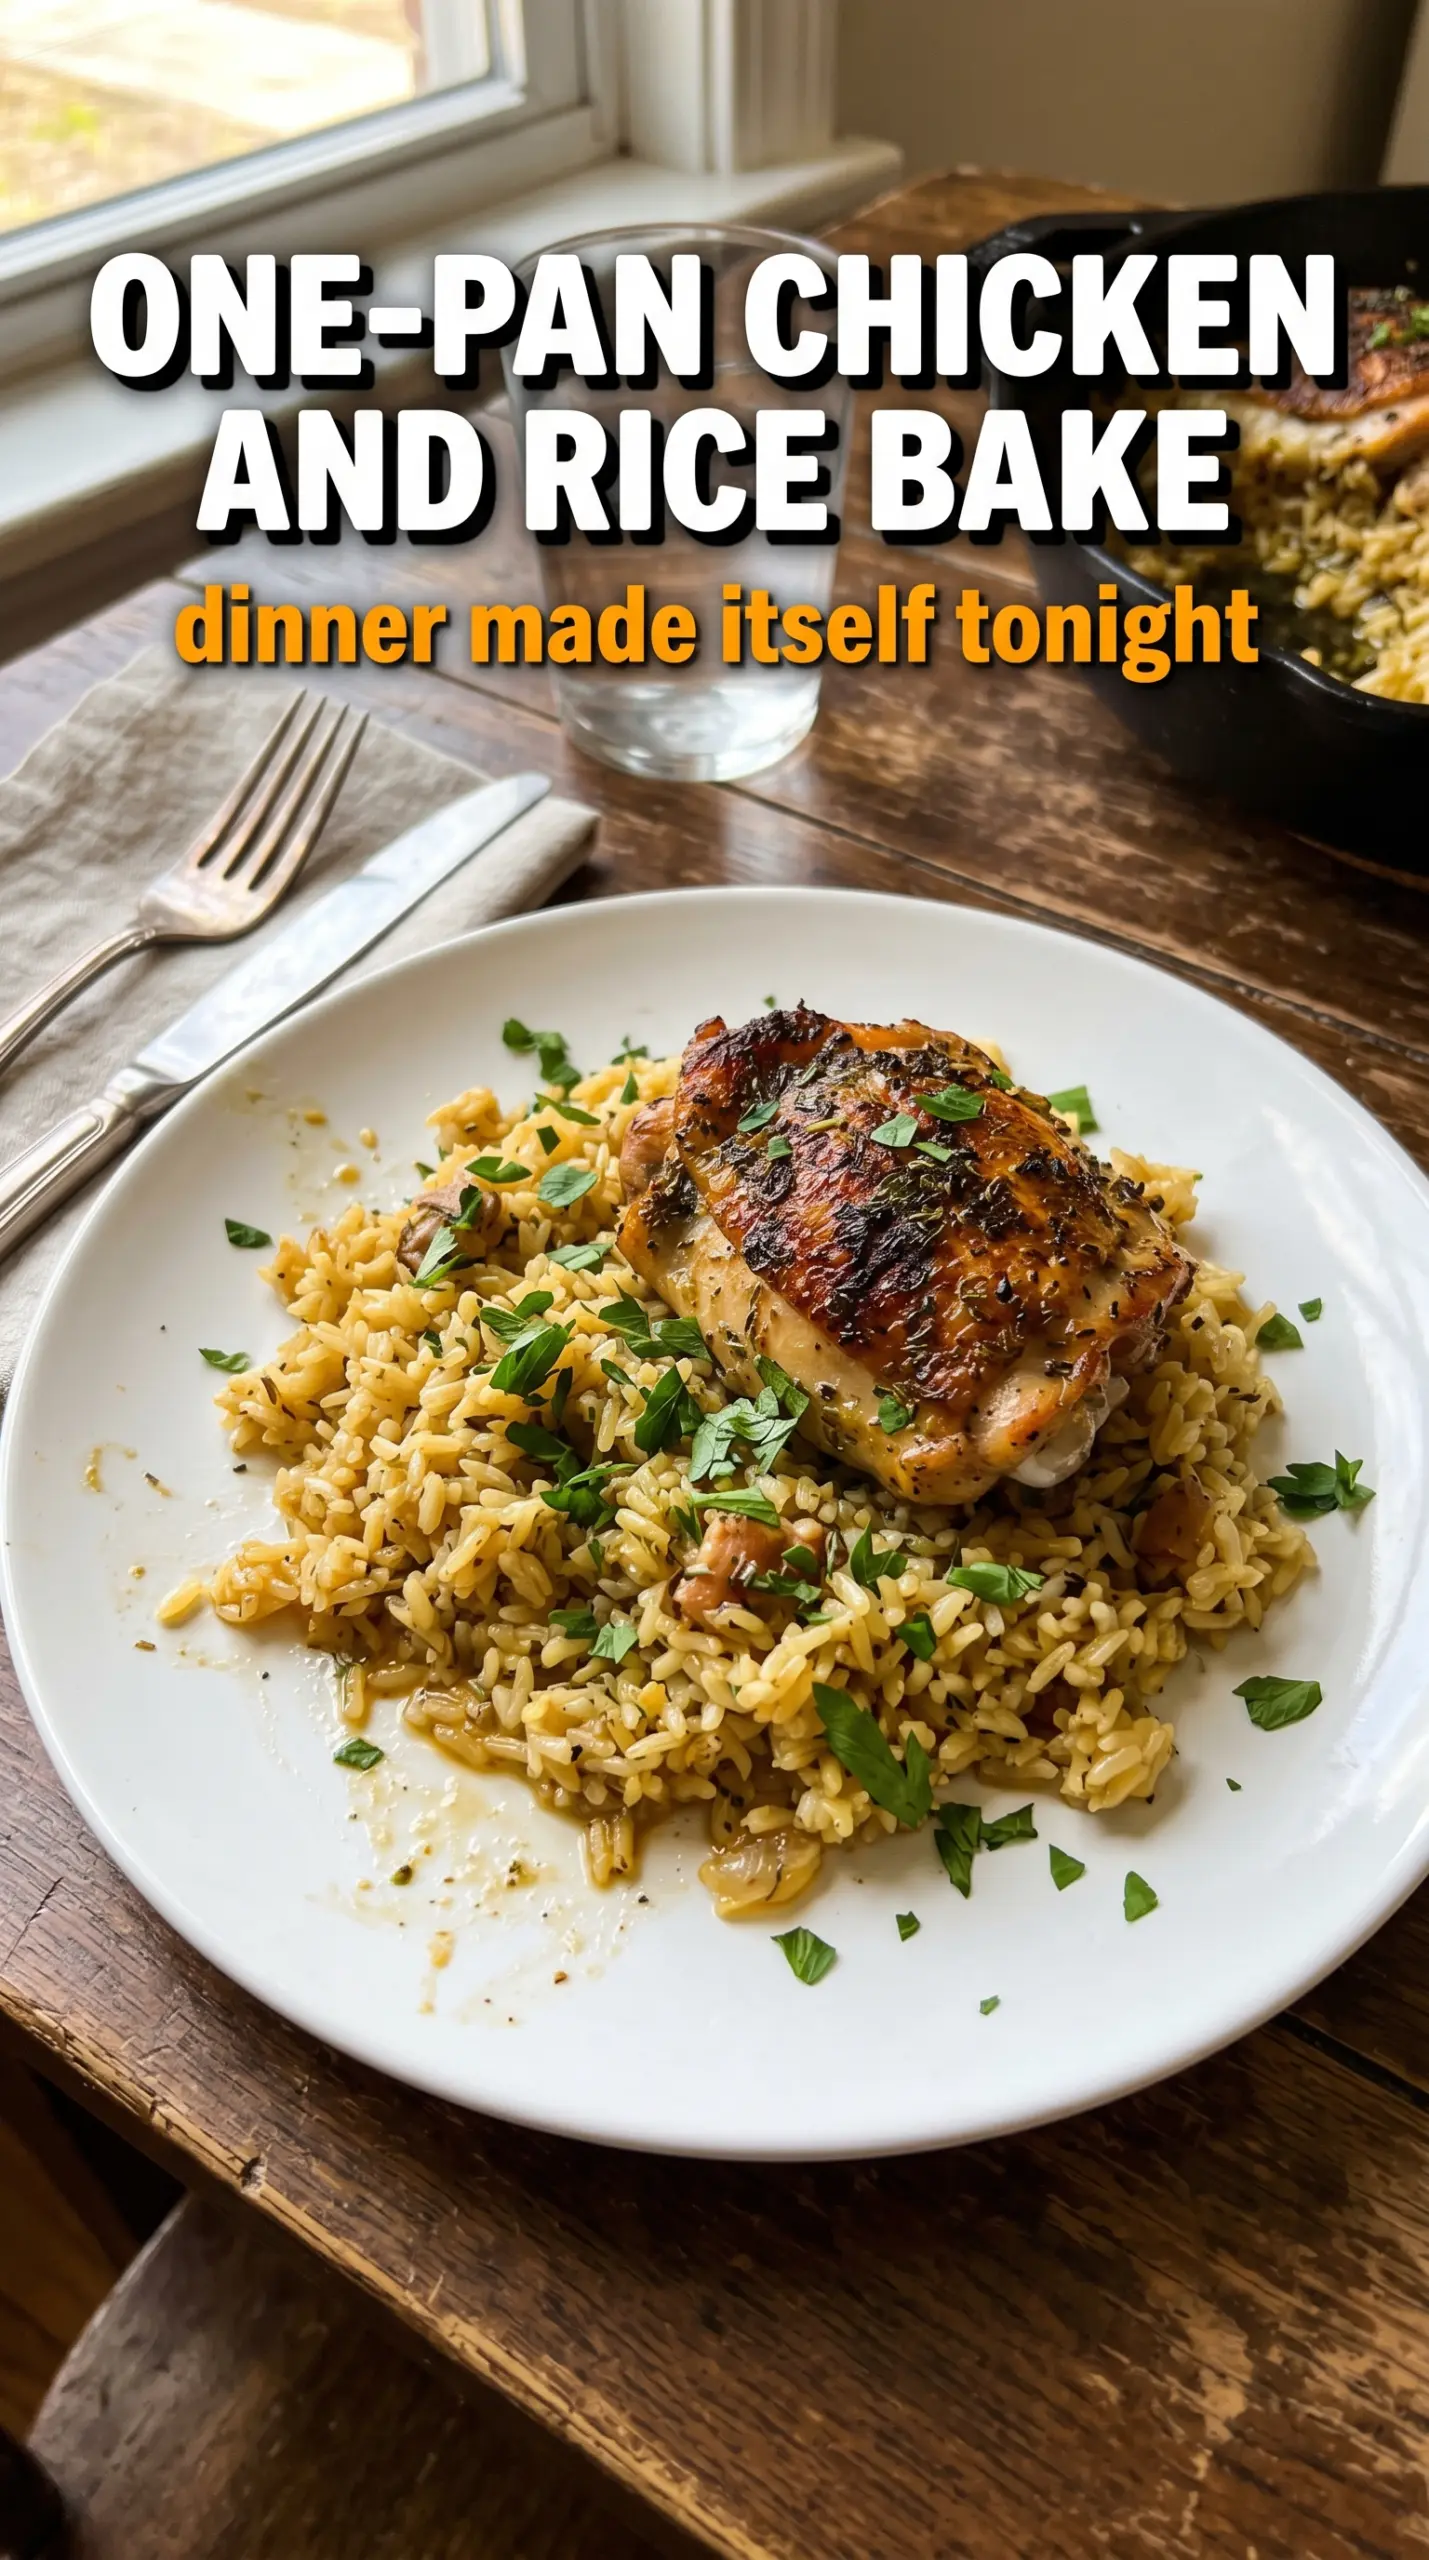
Golden-skinned chicken tucked into herb-scented rice is the kind of dinner that earns its spot in the rotation fast. The chicken roasts right on top of the rice, so every drip of fat and seasoned juice falls into the pan and turns plain grains into something savory and full-bodied. By the time it comes out of the oven, the rice is fluffy underneath and the top layer has just enough browning to keep each bite interesting.
The part that makes this work is the order. The rice goes in raw with broth, onion, garlic, and herbs, then the chicken sits skin-side up on top so it can roast instead of steaming. Covering it at first gives the rice time to absorb liquid evenly. Uncovering it at the end lets the skin dry out and crisp while the rice finishes with all those pan drippings layered in.
Below you’ll find the small details that keep the rice from turning mushy and the chicken from drying out, plus a few useful swaps if you need to work with what’s already in the kitchen.
The rice came out fluffy all the way through and the chicken skin stayed crisp after the second bake. I loved that the onions melted into the rice instead of sitting in chunks.
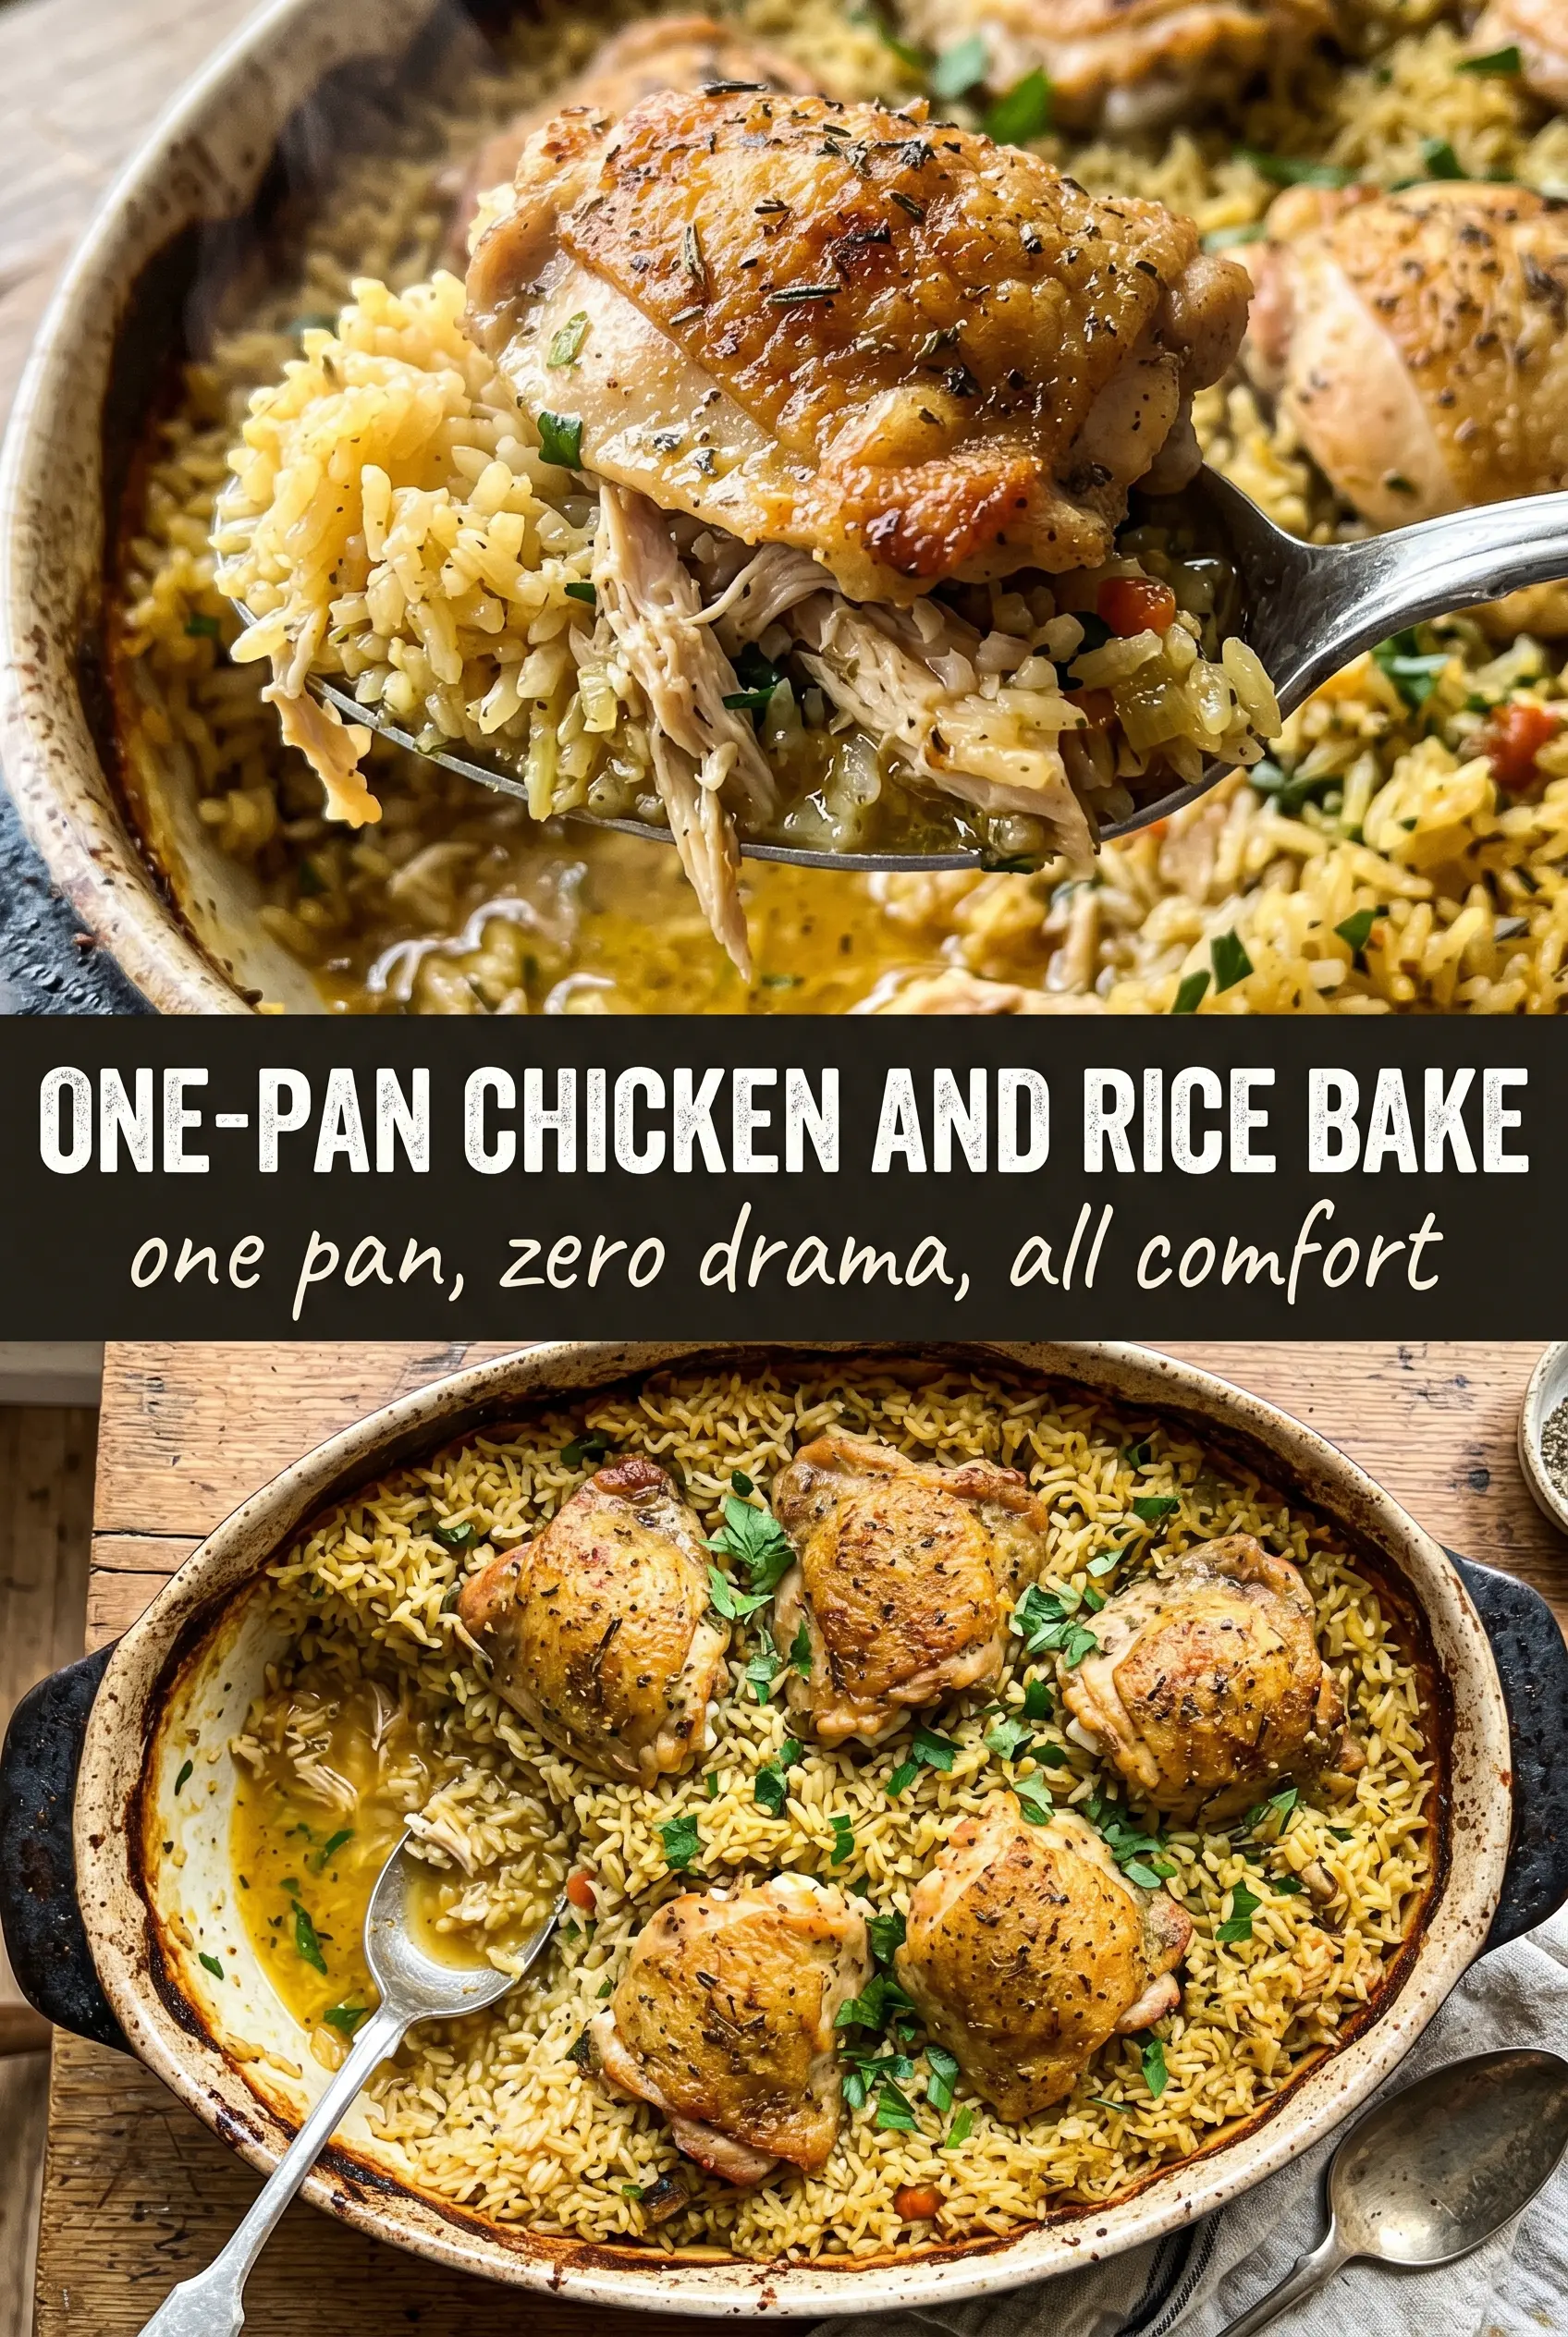
Save this one-pan chicken and rice bake for the nights when you want crispy chicken and fluffy herb rice in the same dish.
The Rice Sits Under the Chicken for a Reason
The biggest mistake with chicken-and-rice bakes is treating the rice like a side dish that gets handled separately. Here, the rice is the base and the chicken is the lid. That matters because the broth, onion, garlic, and seasonings need that enclosed oven time to absorb evenly, and the chicken needs to roast above the liquid instead of boiling in it.
If the rice goes in too dry, it stays uneven and a little chalky in spots. If there’s too much liquid, it turns soft before the chicken skin has a chance to crisp. The balance in this dish is what gives you grains that are tender but still distinct, not a casserole with a heavy, wet middle.
- Bone-in, skin-on chicken thighs — These bring enough fat and drippings to season the rice from the top down. Boneless chicken cooks too fast and gives you less flavor in the pan.
- Long-grain white rice — This is the best choice because it cooks up fluffy and separate. Short-grain rice gets stickier, and brown rice needs a different liquid ratio and a much longer bake.
- Chicken broth — Use a broth you’d actually sip. Since the rice absorbs all of it, weak broth makes the whole dish taste flat.
- Onion and garlic — They soften as the rice cooks and turn into the savory backbone of the dish. Dice the onion small so it disappears into the rice instead of staying crunchy.
- Dried thyme and Italian seasoning — These season the rice from the start, not just the chicken on top. If your Italian seasoning blend is salty, hold back a little extra salt until after baking.
What Each Ingredient Is Actually Doing in This Recipe
- Primary ingredient (the star) — Quality matters most. Choose the best you can find.
- Cooking medium (oil, butter, or broth) — This carries flavors and prevents dryness.
- Seasonings (salt, pepper, spices, herbs) — Layer flavors so nothing overpowers. Build depth gradually.
- Aromatics (garlic, onion, herbs) — Cook with fat to bloom flavors. Become the foundation.
- Supporting ingredients — Complement the main ingredient without overpowering it.
- Sauce or liquid (if applicable) — Brings flavors together. Balance richness with acid.
- Acid (lemon, vinegar, wine, or other) — Brightens and prevents flat-tasting results.
- Final finish (garnish, glaze, or sauce) — Prevents one-dimensional taste and adds visual appeal.
Getting the Chicken Crisp Without Overcooking the Rice
Building the Rice Base
Stir the rice, broth, onion, garlic, thyme, Italian seasoning, and salt directly in the baking dish so everything starts evenly distributed. The liquid should look loose and well mixed, not clumped in corners. If the onion pieces sit on top in a mound, they won’t soften at the same rate, and you’ll get uneven pockets in the finished dish.
Seasoning the Chicken Well
Season the thighs on all sides before they go into the pan. The top skin needs the most attention because that’s what will brown and carry the flavor into the first bite. Lay the pieces skin-side up and nestle them in lightly; don’t press them down until the rice fully covers them, or they’ll cook too close to the liquid and lose that crisp top.
Covered Bake, Then Uncovered Finish
The foil keeps steam in long enough for the rice to cook through without drying out the top. After 40 minutes, remove the foil and let the last 15 minutes work on color and texture. If the skin looks pale at the end, give it a few extra minutes uncovered, but watch the rice closely; it should be tender with no wet liquid left pooling around the edges.
The Rest Before Serving
Let the dish sit for about 5 minutes after it comes out of the oven. That short rest helps the rice finish settling so it doesn’t seem loose when you scoop it. If you cut in too fast, the rice can look wetter than it really is because the steam hasn’t finished redistributing.
How to Change the Pan Without Losing the Texture
Use chicken breasts instead of thighs
You can use bone-in chicken breasts, but they need closer watching because they dry out faster than thighs. Pull the dish as soon as the thickest part of the breast reaches temperature, even if the skin isn’t quite as deeply colored, so the rice stays moist and the meat stays juicy.
Make it dairy-free and gluten-free
This dish already fits both without any special swaps as long as your broth is certified gluten-free. The texture doesn’t change, which is part of why it’s such a reliable weeknight bake.
Add vegetables with the rice
A handful of peas, diced carrots, or sliced mushrooms can go in with the rice at the start. Keep the total add-ins modest so the pan still has enough liquid for the rice to cook evenly, and cut harder vegetables small so they soften in time.
Swap in brown rice
Brown rice needs more liquid and a longer bake, so this isn’t a straight swap. If you want to use it, expect a tougher texture and plan on adding more broth and extra covered time, or the grains will still be chewy when the chicken is done.
Storage and Reheating
- Refrigerator: Store in an airtight container for up to 4 days. The rice will firm up as it chills, but it still reheats well.
- Freezer: It freezes, though the rice softens a little after thawing. Cool completely first, then freeze portions in sealed containers for up to 2 months.
- Reheating: Reheat covered in the oven at 325°F with a splash of broth or water to loosen the rice. The common mistake is blasting it uncovered in the microwave until the chicken dries out and the rice turns gummy in spots.
Answers to the Questions Worth Asking
One-Pan Chicken and Rice Bake
Ingredients
Equipment
Method
- Preheat oven to 375°F, then position a rack in the middle for even browning.
- In a 9x13 baking dish, stir long-grain white rice, chicken broth, diced onion, minced garlic, dried thyme, dried Italian seasoning, and salt until the rice is evenly coated.
- Season the bone-in skin-on chicken thighs generously on all sides with pepper, garlic powder, paprika, and Italian seasoning.
- Nestle chicken skin-side up on top of the rice mixture, then drizzle olive oil over the chicken.
- Cover tightly with foil and bake at 375°F for 40 minutes, then remove the foil.
- Bake uncovered at 375°F for 15 minutes, until the skin is golden and the rice has absorbed all liquid, with a visibly cohesive, fluffy surface around the chicken.
- Garnish with fresh parsley and serve directly from the baking dish so the crispy skin stays intact above the rice.