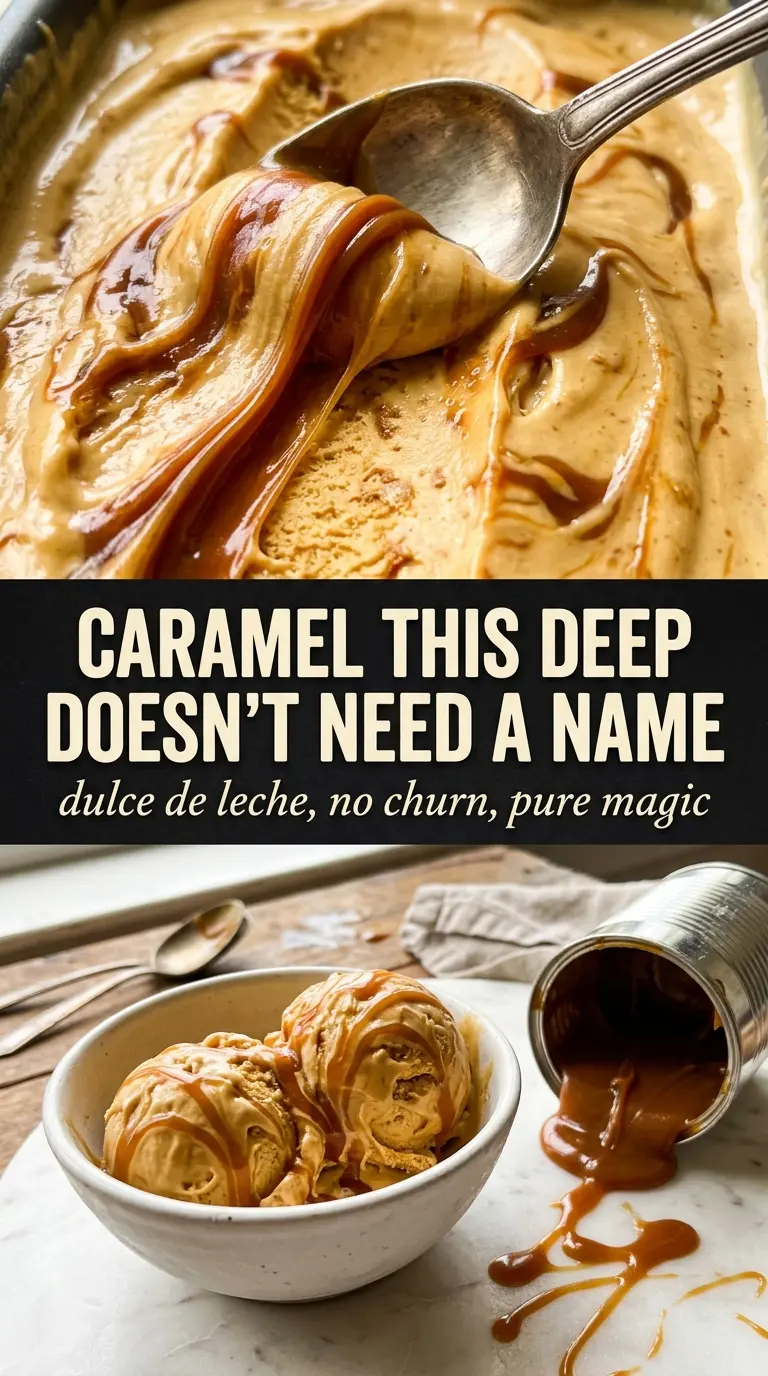
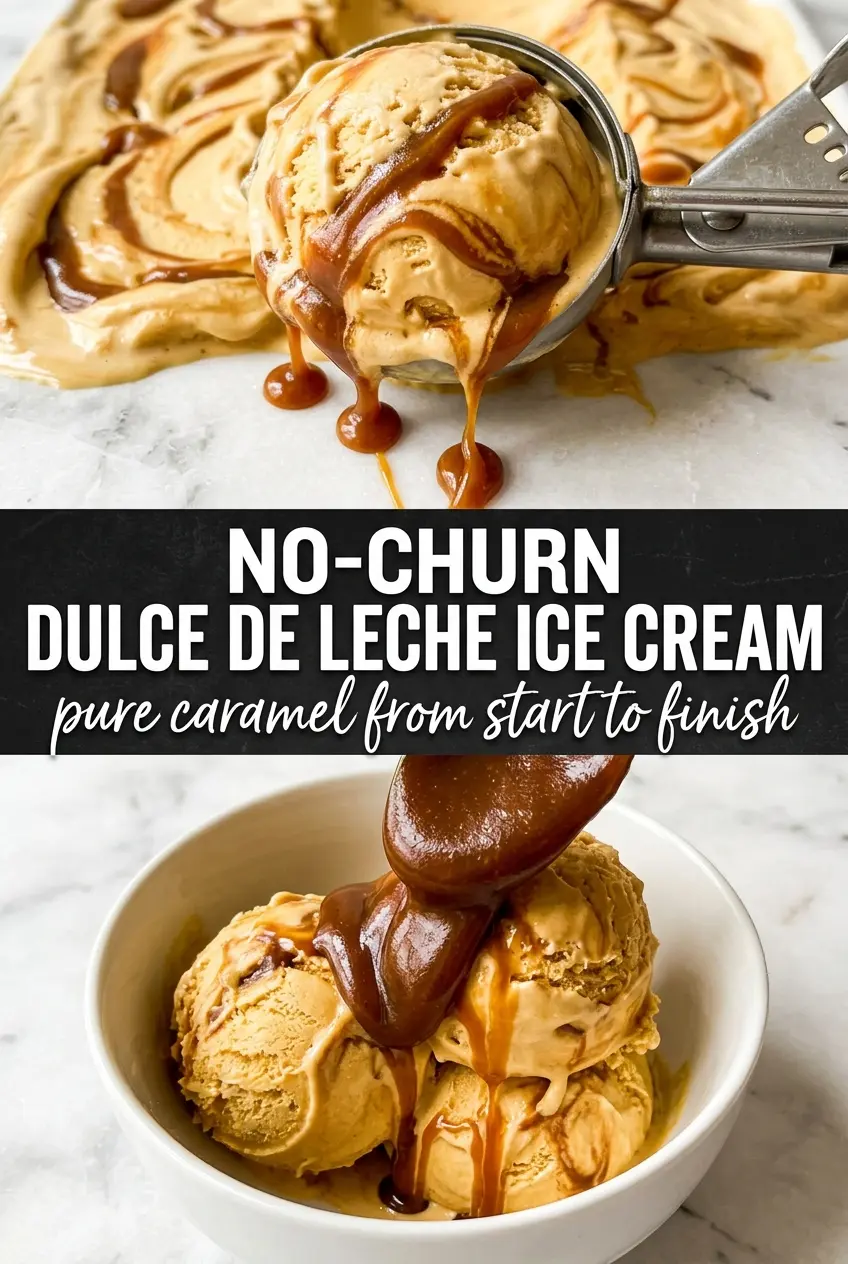
Silky, caramel-forward ice cream with thick ribbons of dulce de leche running through every scoop is one of those desserts that disappears faster than you expect. The base stays plush and creamy without an ice cream maker, and the swirls give each bite that deep, cooked-milk caramel hit that makes people go back for another spoonful.
What makes this version work is the balance. Sweetened condensed milk keeps the texture scoopable, while whipped cream gives the ice cream its light body. The dulce de leche goes in two ways: blended into the base for flavor all the way through, then layered in ribbons so you still get those glossy pockets of caramel instead of one flat, uniform scoop.
Below, I’ll walk through the exact folding and swirling approach that keeps the texture airy and the caramel visible. A couple of small details matter here, especially if you want clean swirls instead of muddy streaks.
The swirl stayed separate and the ice cream scooped beautifully after a full overnight freeze. I loved the little hit of flaky salt on top — it kept the dulce de leche from tasting too sweet.
Save this no-churn dulce de leche ice cream for the nights when you want deep caramel flavor, silky texture, and zero machine required.
The Trick to Keeping the Dulce de Leche Swirls Distinct
No-churn ice cream can turn muddy fast if the mix-ins get stirred too hard or the base is overworked. The goal here is not to fully blend the dulce de leche into the cream; it’s to create pockets of caramel that stay visible after freezing. That means two different textures going in: a light whipped base and a thicker caramel ribbon that holds its shape long enough to marble instead of vanish.
If your dulce de leche is very stiff, warm it just enough to loosen it to a thick drizzle. Too cold, and it clumps in the pan. Too warm, and it disappears into the base. The sweet spot is a spoonable caramel that falls in ribbons, then gets one or two deliberate passes with a knife or skewer.
- Heavy cream — This is what gives the ice cream its body. Whip it to stiff peaks so the dessert freezes up light instead of dense and gummy.
- Sweetened condensed milk — This keeps the texture soft and scoopable without churning. There isn’t a true substitute that behaves the same way, so this is one ingredient worth keeping as written.
- Dulce de leche — Use a thick, smooth version with a deep caramel flavor. If yours is very firm, warm part of it briefly so it swirls instead of tearing through the cream.
- Vanilla extract — It rounds out the caramel and keeps the base from tasting one-note. Pure vanilla gives the cleanest result, but a standard grocery-store bottle works fine here.
- Flaky sea salt — This is finishing detail, not decoration. A few flakes on top cut the sweetness and make the caramel taste fuller.
What Each Ingredient Is Actually Doing in This Ice Cream
- Base ingredient (cream, milk, or custard) — This provides the foundation and richness. Quality matters.
- Sweetener (sugar, honey, or condensed milk) — This sweetens and prevents ice crystals. The ratio is critical.
- Flavor element (vanilla, fruit, chocolate, or other) — This defines the ice cream personality. Use quality ingredients.
- Egg yolks (if making custard base) — These create richness and silky texture. Optional but elevates ice cream.
- Churning (if using ice cream maker) — This incorporates air and prevents ice crystals. Critical for smooth texture.
- Freezing temperature and time — Proper freezing prevents rock-hard texture. Store at 0°F or below.
- Mix-ins (chocolate, cookies, fruit, or swirls) — These add texture and prevent one-dimensional flavor. Add near end of churning.
- Serving temperature (slightly soft, not rock hard) — This provides creamy mouthfeel. Remove from freezer 5 minutes before serving.
How to Fold It So It Stays Light and Creamy
Whipping the Cream to the Right Peak
Start with cold cream and whip it until the beater leaves deep ridges that hold their shape. Stop there. If you go much further, the cream gets grainy and begins to turn buttery, which makes the finished ice cream heavier and less smooth. The cream should look billowy and sturdy, not dry.
Mixing the Caramel Base Without Deflating It
Whisk the condensed milk, vanilla, salt, and about half of the dulce de leche together until smooth before it ever meets the whipped cream. This keeps the caramel from clumping in the bowl and makes the folding step easier. Fold gently with a spatula, cutting through the center and turning the mixture over itself until no white streaks remain. If you stir fast, you’ll knock out the air that gives the ice cream its soft texture.
Layering and Swirling in the Pan
Pour half the mixture into the loaf pan, drizzle on half the remaining dulce de leche, then repeat with the rest. Don’t over-swirl; two or three loose figure-eights are enough. You want ribbons, not a fully mixed pan. Finish with flaky salt before freezing so it clings to the top and melts into the first spoonful.
Chocolate-Dulce de Leche Swirl
Drizzle a little cooled fudge sauce with the dulce de leche for a deeper caramel-chocolate finish. Keep the swirls loose so the two sauces stay distinct instead of blending into one dark layer.
Dairy-Free Version
Use full-fat coconut cream in place of the heavy cream and a dairy-free caramel sauce in place of the dulce de leche. The texture will be a little softer and the coconut flavor will show, but it still freezes into a scoopable dessert.
Salted-Caramel Lean
Use the full cup of dulce de leche in the base and hold back only a thin drizzle for the top. This gives every bite a more even caramel flavor and a slightly less swirled look.
Storage and Reheating
- Refrigerator: Not recommended. This needs the freezer to hold its structure.
- Freezer: Keeps well for up to 2 weeks in a covered loaf pan or airtight container. Press parchment or wax paper directly on the surface to limit ice crystals.
- Reheating: Not applicable. For the best scoop, let it sit at room temperature for 5 to 10 minutes before serving so the caramel ribbons soften instead of shattering.
Questions I Get Asked About This Recipe
No-Churn Dulce de Leche Ice Cream
Ingredients
Equipment
Method
- Whip the heavy cream until stiff peaks form, so the cream holds its shape when the whisk is lifted. Stop once peaks are firm to avoid grainy texture.
- Whisk the sweetened condensed milk, 1/2 cup of the dulce de leche, vanilla extract, and salt until smooth and glossy. Scrape the sides to ensure no streaks remain.
- Fold the dulce de leche mixture into the whipped cream gently until no white streaks remain. Keep the mixture airy to maintain a creamy scoop.
- Pour half of the mixture into a 9x5 loaf pan and drizzle half of the remaining dulce de leche over the top. Swirl with a spoon to create thick ribbons.
- Pour in the remaining ice cream mixture, then drizzle the rest of the dulce de leche and swirl again. Aim for visible caramel streaks throughout the surface.
- Sprinkle flaky sea salt over the top for finishing, then cover and freeze for at least 6 hours. The ice cream should be firm enough to slice and scoop cleanly.