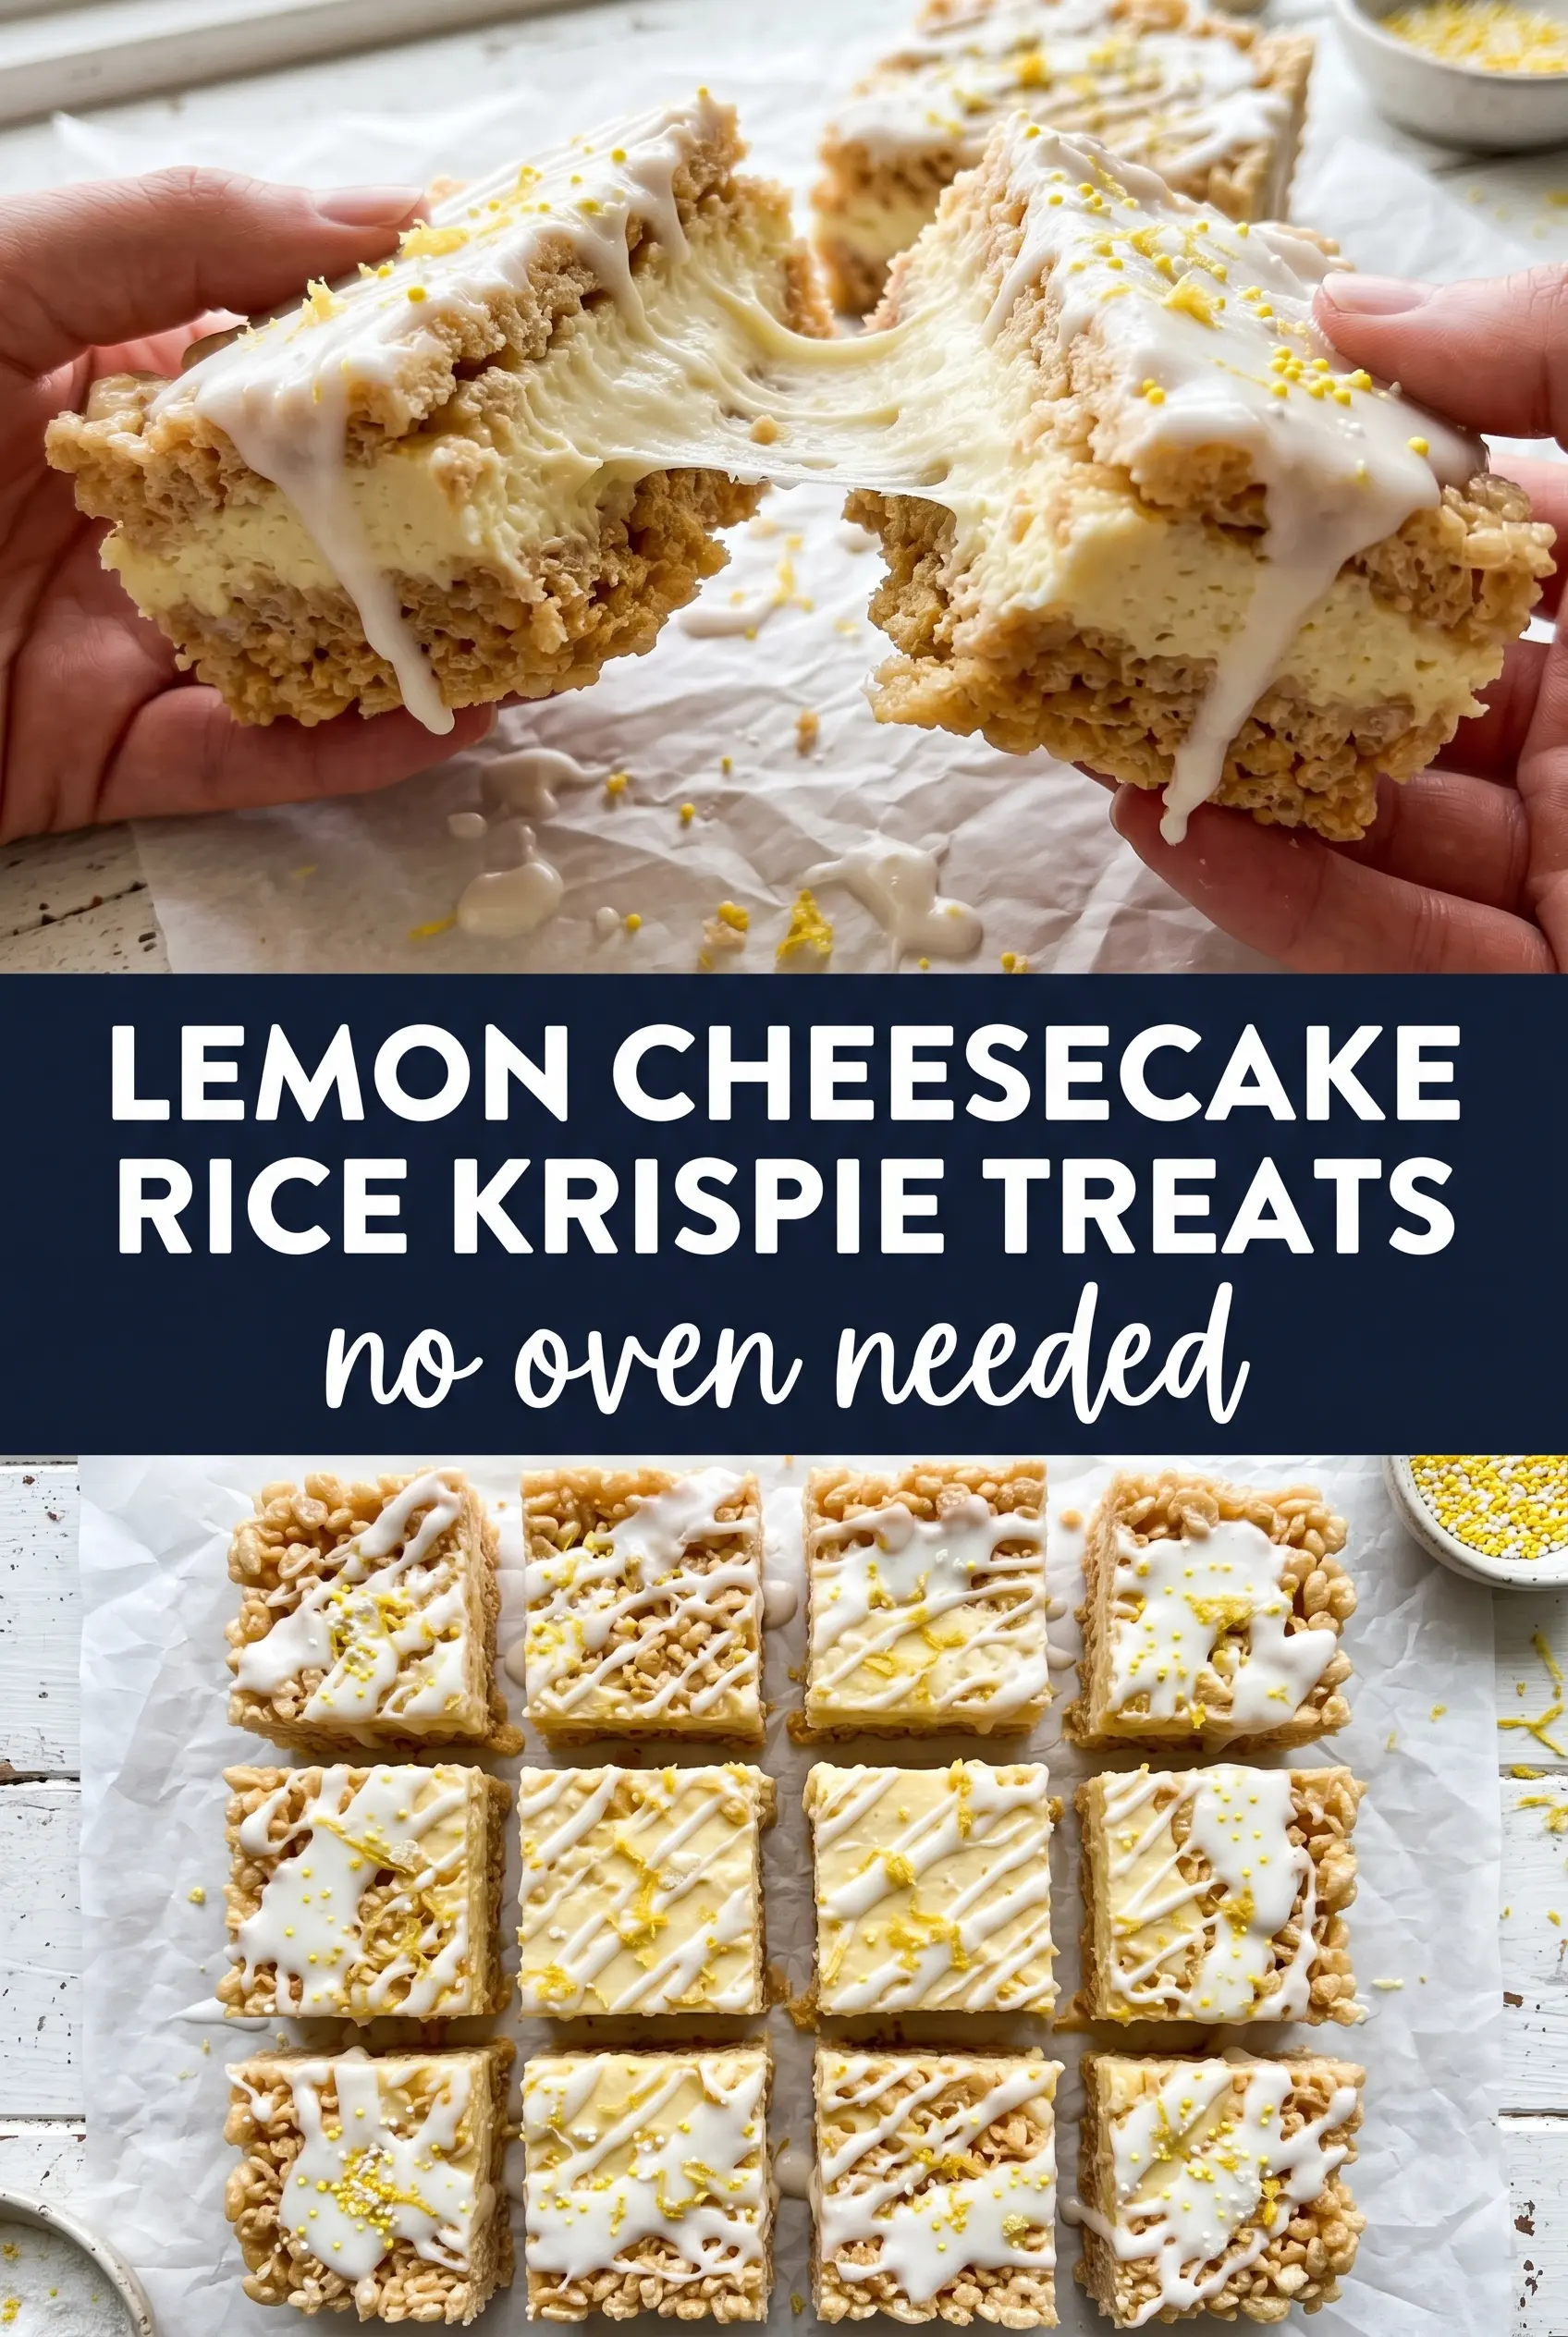
Thick, chewy Rice Krispie bars with a bright lemon marshmallow base and a creamy cheesecake topping are the kind of dessert people grab a second square of before they’ve finished the first. The contrast is what makes them work: crisp cereal, soft marshmallow chew, tangy lemon cream, and a little snap from the white chocolate drizzle. They slice cleanly after chilling, which means you get neat bars instead of a sticky pan of crumbs.
The lemon flavor shows up twice here, and that matters. Zest goes into the warm marshmallow mixture for a fragrant, citrusy base that doesn’t bake off, then fresh lemon juice and more zest go into the cheesecake layer for actual tang. I tested this with both the marshmallow mixture and the topping kept on the cooler side so the cereal stays tender and the cream cheese layer stays smooth instead of loose.
Below you’ll find the small details that keep the bars from getting gummy or bland, plus a few swaps that make them work for different diets and different pan sizes.
The lemon zest in the marshmallow base made these taste fresh, not fake, and the cheesecake layer set up beautifully after an hour in the fridge. My pan was gone by the next morning.
Save these lemon cheesecake Rice Krispie bars for the next time you want a no-bake dessert with a creamy top and bright citrus flavor.
The Reason These Bars Stay Chewy Instead of Turning Dense
The main mistake with layered cereal bars is pressing the base too hard. You want it packed enough to hold the cheesecake layer, but not so compressed that it turns into a brick once chilled. A gentle, even press gives you clean slices and keeps the cereal from losing all its crunch.
The other thing that matters is heat. Marshmallows only need to melt until smooth, not cook down into a syrup. Once they go glossy and fully combined, pull the pot off the burner and stir in the lemon zest before adding the cereal. That keeps the citrus aroma bright instead of dull.
- Medium-low heat keeps the marshmallows soft and stretchy. High heat makes them stiff, and stiff marshmallows make hard bars.
- Lemon zest in the base adds the strongest lemon flavor here because the oils in the zest carry more punch than juice alone.
- Room-temperature cream cheese is non-negotiable for the topping. Cold cream cheese leaves little lumps that don’t fully smooth out.
What Each Ingredient Is Doing in the Lemon Cheesecake Layer
- Mini marshmallows melt more evenly than large ones and coat the cereal without leaving hard bits behind. Fresh bags matter here; stale marshmallows don’t melt as smoothly.
- Rice Krispies cereal gives the base its snap. Generic crisp rice cereal works, but the texture can be a little less light, so expect a denser bar if you swap it.
- Cream cheese gives the topping its cheesecake body. Full-fat cream cheese gives the cleanest set and the best tang; reduced-fat versions can turn looser after chilling.
- Whipped topping keeps the lemon layer light enough to sit nicely on the bars instead of feeling like a thick frosting. If you use whipped cream, fold it in gently and serve the bars the same day for the best shape.
- White chocolate chips add sweetness and a clean finish, but they also help the top look polished. Melt them slowly; overheated white chocolate seizes fast and turns grainy.
Building the Layers Without Making a Sticky Mess
Melt the Base Low and Slow
Set the butter over medium-low heat and let the marshmallows melt until they look glossy and mostly smooth. Stir often, but don’t keep cooking them once they’re melted or the final bars will lose that soft chew. The moment the mixture is uniform, take it off the heat and stir in the lemon zest while it’s still warm enough to release the oils.
Press the Cereal Layer with a Light Hand
Fold in the cereal quickly so every piece gets coated before the marshmallow starts setting. Transfer it to the parchment-lined pan and press it in with lightly buttered hands or the bottom of a measuring cup, using just enough pressure to level it. If you pack it too tightly, the bars turn compact instead of chewy.
Whip the Cheesecake Topping Until Smooth
Beat the cream cheese, powdered sugar, lemon juice, lemon zest, and vanilla until the mixture looks silky and light. Stop and scrape the bowl if you see any streaks, because those streaks show up later as uneven pockets of cream cheese. Fold in the whipped topping at the end so the layer stays airy and spreads without tearing up the cereal base.
Chill Until the Top Holds Its Shape
Spread the cheesecake layer all the way to the edges, then drizzle the melted white chocolate over the top in a zigzag. The bars need a full hour in the fridge before cutting, and longer is fine if you want even cleaner edges. If you cut too soon, the topping smears and the base squishes instead of slicing.
How to Adapt These Bars for Different Kitchens and Diets
Make Them Gluten-Free
Use certified gluten-free crisp rice cereal, since regular Rice Krispies can contain malt flavoring. The texture stays the same, and the lemon cheesecake topping doesn’t need any changes.
Swap the Whipped Topping for Fresh Whipped Cream
Soft whipped cream works if you want a fresher dairy note and a lighter finish, but the bars will be softer and a little less stable. Chill them well and serve within a day for the best slice.
Use More Lemon, Less Sweet
If you like a sharper lemon bite, add another teaspoon of zest to the cheesecake layer and keep the powdered sugar as written. Adding more juice than that can thin the topping, so zest is the better way to push the citrus flavor.
Storage and Reheating
- Refrigerator: Store in an airtight container for up to 4 days. The cereal base softens slightly, but the bars stay sliceable and the lemon layer stays creamy.
- Freezer: These freeze better without the white chocolate drizzle. Wrap tightly, freeze for up to 1 month, and thaw in the fridge so the topping doesn’t sweat.
- Reheating: Don’t reheat these. They’re meant to be served cold, and warming them melts the cheesecake layer and makes the base sticky.
Answers to the Questions Worth Asking
No-Bake Lemon Cheesecake Rice Krispie Treats
Ingredients
Equipment
Method
- Line a 9x13 pan with parchment paper and spray lightly so the bars release cleanly.
- Melt butter in a large pot over medium-low heat, then add mini marshmallows and stir until fully melted (about 3-5 minutes).
- Remove from the heat and stir in lemon zest until evenly distributed.
- Fold in Rice Krispies cereal and press the mixture firmly into the prepared pan.
- Cool the pressed Krispie base until it is set before adding the cheesecake layer.
- Beat cream cheese, powdered sugar, lemon juice, lemon zest, and vanilla until smooth.
- Fold in whipped topping until the mixture is creamy and evenly combined.
- Spread the lemon cheesecake layer evenly over the cooled Krispie base.
- Drizzle melted white chocolate in a zigzag pattern over the top so it forms thin lines.
- Scatter extra lemon zest over the top for bright garnish.
- Refrigerate for 1 hour before cutting into 16 bars to ensure clean slices.