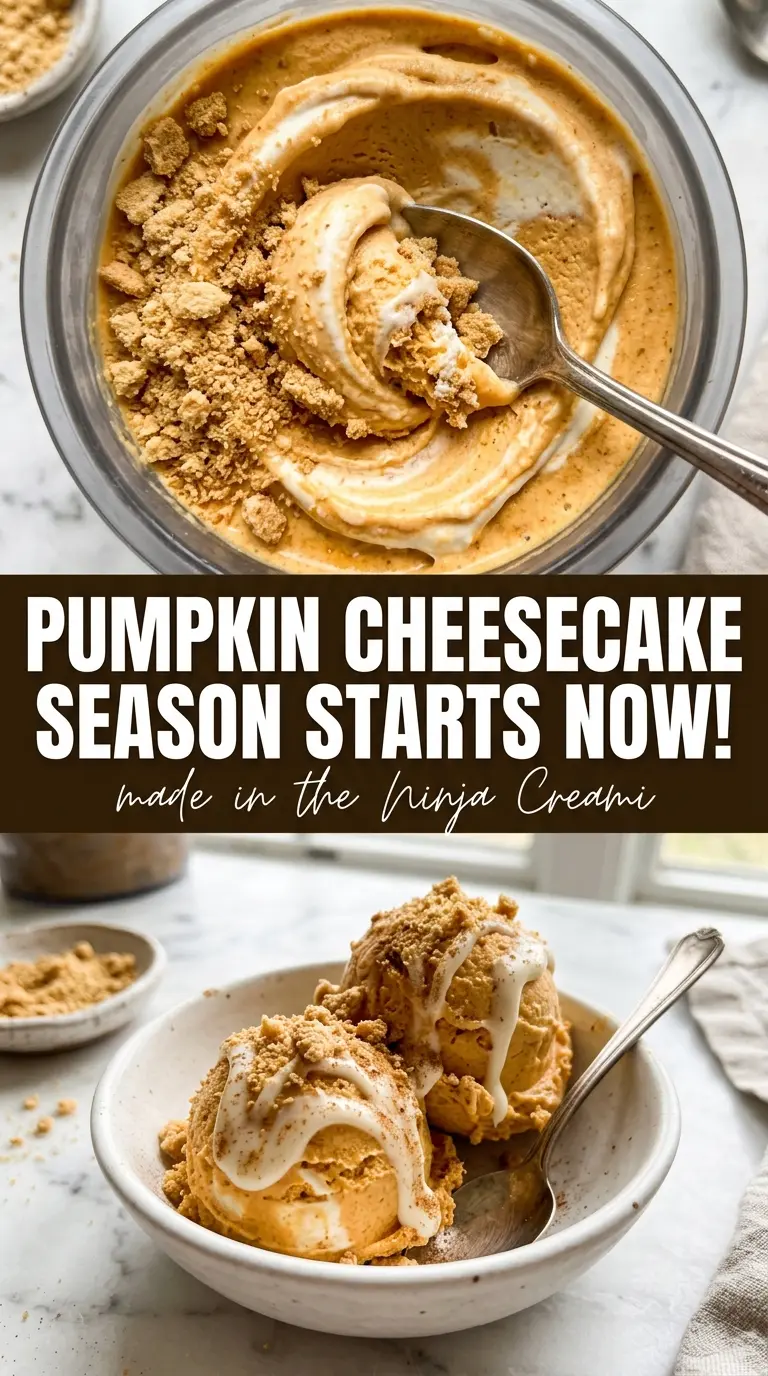
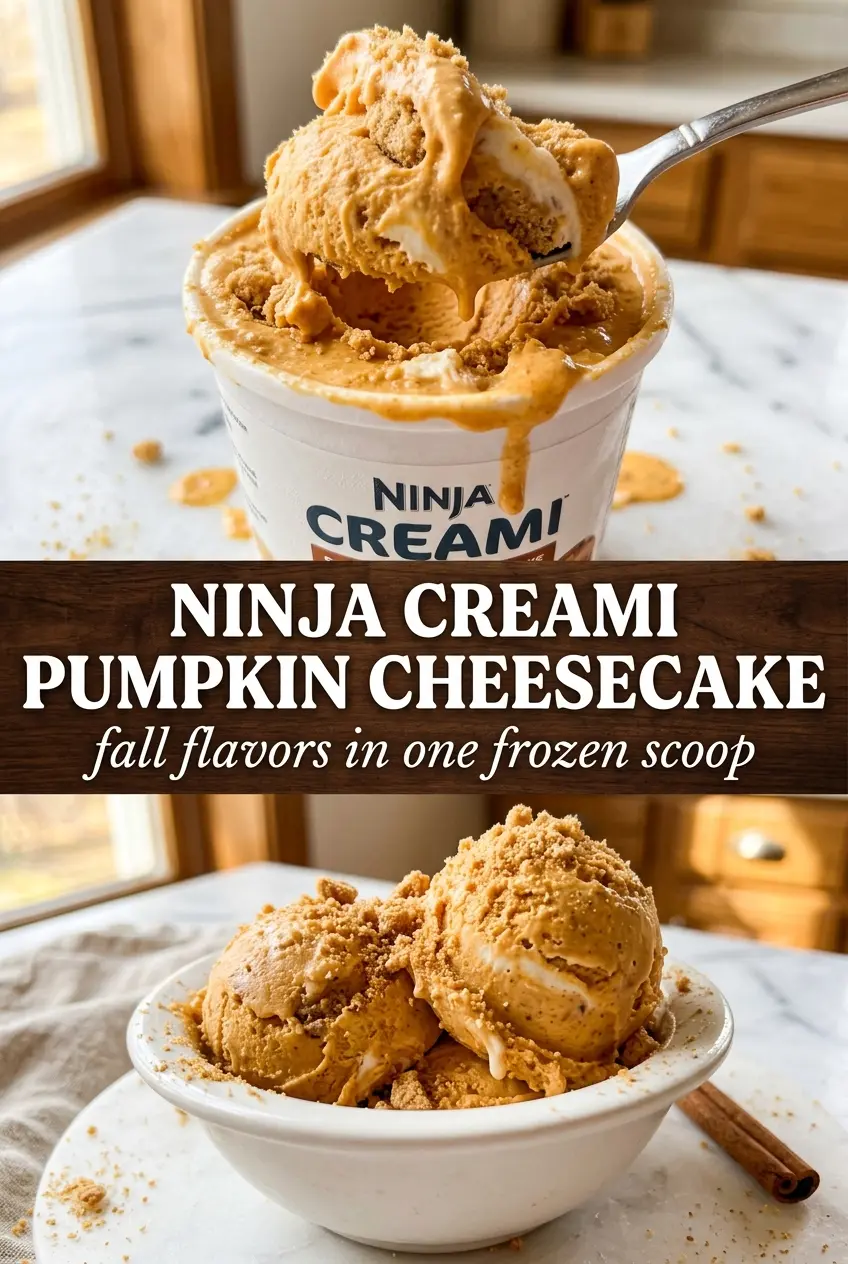
Warm pumpkin cheesecake flavor turns extra creamy in the Ninja Creami, with the kind of smooth, spoonable texture that makes a frozen dessert feel richer than it should for how little effort goes into the base. The pumpkin stays earthy and mellow, the cream cheese brings that unmistakable cheesecake tang, and the graham cracker bits give each bite a little crunch that keeps the whole pint from tasting flat.
The key is blending the base until it’s completely silky before it ever hits the freezer. Cream cheese can leave tiny lumps that never disappear later, and pumpkin puree needs enough mixing to keep the finished ice cream from turning grainy or icy. A full 24-hour freeze gives the machine the firm, even base it needs to shave cleanly instead of dragging through a half-frozen center.
Below you’ll find the small details that make this taste like frozen pumpkin cheesecake instead of generic pumpkin ice cream, plus the fixes I use when the pint comes out a little dry after the first spin.
The cream cheese gave it that real cheesecake tang, and after one re-spin it came out perfectly smooth. The graham cracker mix-in made it taste like pumpkin cheesecake in frozen form.
Like this Ninja Creami pumpkin cheesecake ice cream? Save it for the next time you want a frozen dessert with pumpkin spice, cream cheese tang, and graham cracker crunch.
The Cream Cheese Has to Disappear Before Freezing, Not After
The biggest mistake with this kind of pint is assuming the machine will smooth out a lumpy base. It won’t. If the cream cheese isn’t fully blended with the milk and pumpkin puree, those little bits set up in the freezer and stay there, which gives you a chalky mouthfeel instead of the plush, cheesecake-like finish you want.
Brown sugar does more than sweeten here. It softens the pumpkin’s edge and helps the base stay scoopable after freezing. The pumpkin pie spice should read warm, not harsh; if the mix smells sharp before it freezes, it’ll taste sharper after the cold mutes the other flavors. The goal is a base that tastes a touch sweeter and more spiced than you think it should before it goes into the pint.
- Whole milk — This gives the base enough fat and body to turn creamy in the Creami. Lower-fat milk works, but the finished texture will be a little more icy unless you add a richer dairy component.
- Cream cheese — This is what makes the flavor lean cheesecake instead of plain pumpkin ice cream. Full-fat cream cheese gives the best tang and body; reduced-fat versions work in a pinch, but they can taste flatter and blend less smoothly.
- Pumpkin puree — Use pure pumpkin, not pumpkin pie filling. Pie filling is already sweetened and spiced, which throws off the balance and can make the final pint taste muddy.
- Graham crackers — These belong in the mix-in step, not the base, or they’ll turn soggy. Crushed just enough to give a few crunchy bites, they echo the crust on an actual cheesecake.
What Each Ingredient Is Actually Doing in This Ice Cream
- Base ingredient (cream, milk, or custard) — This provides the foundation and richness. Quality matters.
- Sweetener (sugar, honey, or condensed milk) — This sweetens and prevents ice crystals. The ratio is critical.
- Flavor element (vanilla, fruit, chocolate, or other) — This defines the ice cream personality. Use quality ingredients.
- Egg yolks (if making custard base) — These create richness and silky texture. Optional but elevates ice cream.
- Churning (if using ice cream maker) — This incorporates air and prevents ice crystals. Critical for smooth texture.
- Freezing temperature and time — Proper freezing prevents rock-hard texture. Store at 0°F or below.
- Mix-ins (chocolate, cookies, fruit, or swirls) — These add texture and prevent one-dimensional flavor. Add near end of churning.
- Serving temperature (slightly soft, not rock hard) — This provides creamy mouthfeel. Remove from freezer 5 minutes before serving.
Freezing the Base So the Creami Can Work Cleanly
Build a smooth custard-style base
Blend the milk, pumpkin puree, cream cheese, brown sugar, pumpkin pie spice, vanilla, and salt until the mixture looks completely even and glossy. Stop and scrape the blender if you see pale streaks of cream cheese or darker pockets of pumpkin; those won’t fix themselves later. The base should pour like a thin milkshake, not look thick or grainy. If you rush this part, the finished ice cream can come out speckled and uneven instead of smooth.
Freeze the pint flat and untouched
Pour the mixture into the Ninja Creami pint and freeze it level for a full 24 hours. If the surface freezes at an angle, the blade can catch unevenly and leave a crumbly top. Don’t try to spin it early just because the outside feels hard; the center needs time to freeze through or the texture stays slushy in the middle and icy on the edges.
Spin, then rescue the texture if needed
Use the Ice Cream setting first. If the pint looks powdery or dry after the first spin, add 1 tablespoon milk and re-spin rather than overfilling the base up front. That small amount is usually enough to bring the mixture back into a creamy churned texture without making it loose. Once it looks fluffy and cohesive, add the graham crackers with the Mix-In function so they stay distinct.
How to Adapt This Pinta for Different Cravings and Diets
Dairy-Free Pumpkin Cheesecake Version
Swap the whole milk for a full-fat oat milk or canned coconut milk, and use a dairy-free cream cheese that softens well. Coconut milk gives the richest result, while oat milk tastes lighter and less like cheesecake. The texture will be a little less dense than the original, but it still spins creamy if the base is fully blended.
Lower-Sugar Pumpkin Spice Pint
Cut the brown sugar slightly if you like a less sweet dessert, but don’t remove it completely unless you want a firmer, less scoopable freeze. Sugar helps keep the texture soft after freezing, so lowering it makes the pint taste a little more frozen and less plush. A tablespoon of maple syrup can replace some of the sugar if you want a rounder flavor.
Gluten-Free Version
Skip the graham crackers or use certified gluten-free graham-style crackers for the mix-in. The base itself is naturally gluten-free, so this swap only affects the crunch on top. If you leave out the crumble entirely, add a little cinnamon on serving so the dessert still tastes finished.
Storage and Reheating
- Refrigerator: This dessert is best served right after spinning. Once churned, it doesn’t hold well in the fridge and will melt into a loose cream rather than stay ice-cream-like.
- Freezer: You can freeze the blended base for up to 2 months before spinning, as long as the pint is sealed well. After spinning, it’s best eaten the same day because it hardens into a dense block if refrozen.
- Reheating: Not applicable. If the spun ice cream gets too firm after sitting out, let it stand on the counter for 5 to 10 minutes instead of microwaving it, which ruins the texture fast.
Answers to the Questions Worth Asking
Ninja Creami Pumpkin Cheesecake Ice Cream
Ingredients
Equipment
Method
- Blend whole milk, pumpkin puree, cream cheese, brown sugar, pumpkin pie spice, vanilla extract, and salt until completely smooth with no cream cheese lumps remaining, scraping down as needed for a uniform orange-tan base.
- Pour the mixture into the Ninja Creami pint container, level the top, and freeze for 24 hours until fully solid.
- Process on the Ice Cream setting; when the texture looks tight or not fully broken down, re-spin once more with 1 tablespoon milk to loosen, stopping when it reaches a thick, scoopable consistency.
- Use the Mix-In function to fold in the crushed graham crackers for a cheesecake-like crunch throughout.
- Top with whipped cream and dust with cinnamon before serving.