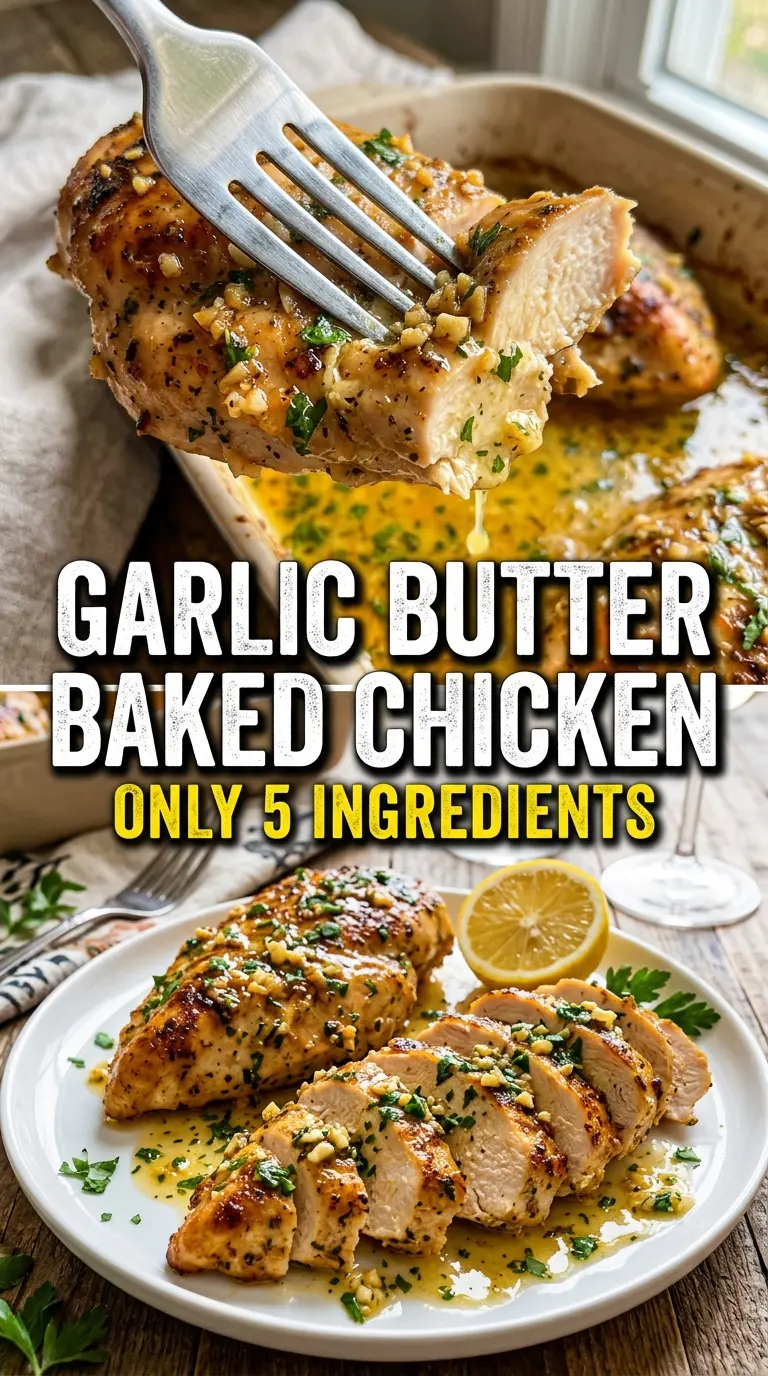
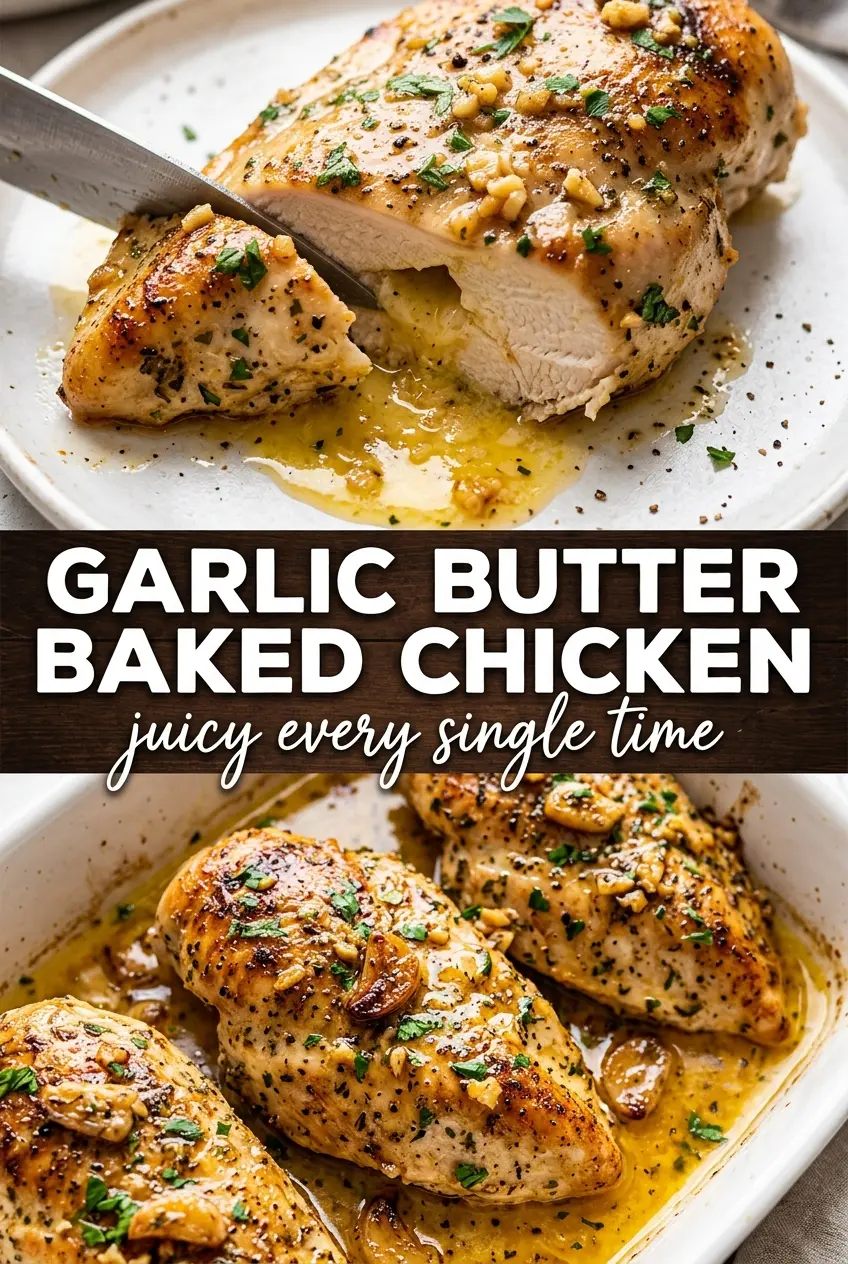
Garlic butter baked chicken breast comes out with a golden surface, a glossy herb-studded coating, and meat that stays juicy instead of drying out in the oven. The butter pools in the bottom of the dish and turns into its own quick pan sauce, which is exactly why this version earns a permanent place in a weeknight rotation.
The trick is keeping the chicken coated from the start and basting it once halfway through so the top never goes dull or dry. Fresh garlic, parsley, thyme, and rosemary give the butter enough backbone to carry the whole dish, and a little lemon juice keeps the richness from feeling heavy. Bake hot, rest it briefly, then spoon those juices right back over the chicken.
Below, I’m walking through the part that matters most: how to keep chicken breast tender at 425°F, how to season it so it tastes like more than butter, and how to adjust the herbs if you’re working with what’s already in the kitchen.
The garlic butter bubbled up around the chicken and the breasts stayed juicy all the way through. I basted once at the halfway point like you said, and the pan juices were perfect spooned over rice.
Save this garlic butter baked chicken breast for the nights when you want juicy chicken and a built-in pan sauce with almost no cleanup.
The Secret to Juicy Chicken at 425°F Without Babying It
Chicken breast dries out when it spends too long in the oven after the outside is already done. The fix here is simple: coat it generously with butter before baking, then cook hot and fast. That butter layer protects the surface, helps the seasoning stick, and gives the chicken enough moisture at the edges that the meat doesn’t tighten up before the center is finished.
The other mistake is pulling the chicken as soon as the thermometer hits the target and serving it immediately. Resting matters because the juices need a minute to settle back into the meat. If you cut too soon, they run right onto the board instead of staying in the chicken.
- Bone-in chicken breasts will work, but they need a longer bake time and a little more attention so the outside doesn’t overcook before the center is ready.
- Baking hot matters here. A lower oven gives you paler chicken and more chance of a dry texture before the butter ever gets a chance to do its job.
- Basting once halfway through is enough. Keep opening the oven over and over and you’ll lose heat without improving the result.
What the Butter, Garlic, and Herbs Are Each Bringing to the Pan
Butter does the heavy lifting here because it carries flavor and browns gently in the oven. Use the real thing, not a spread. Margarine won’t give you the same rich pan juices, and it tends to taste flat once it’s baked with garlic and herbs.
- Garlic should be minced fine so it perfumes the butter and doesn’t sit in harsh little raw bits on top of the chicken.
- Fresh parsley, thyme, and rosemary give a brighter, cleaner finish than dried herbs. If you have to use dried, cut the amount down by about two-thirds because dried herbs can take over fast.
- Lemon juice is the quiet ingredient that keeps the butter from tasting heavy. Bottled juice works in a pinch, but fresh lemon gives the sauce a sharper finish.
- Smoked paprika adds color and a little warmth without turning the dish spicy. If you skip it, the chicken still works, but the surface won’t have the same depth.
Getting the Chicken In, Out, and Basted at the Right Moment
Seasoning the Surface
Pat the chicken dry before anything else. Wet chicken steams, and steamed chicken never gets the same nice coating or light browning. Season both sides evenly so the flavor doesn’t stop at the top layer. If your breasts are very thick on one end, press them gently so they cook more evenly in the dish.
Mixing the Garlic Herb Butter
Stir the melted butter with the garlic, herbs, and lemon juice until it looks evenly speckled. The goal is a loose, fragrant baste, not a thick paste. Pour it over the chicken and spoon some of the herbs back on top so the flavor stays on the meat instead of sinking to the bottom of the pan. If the garlic sits in one clump, you’ll get a harsh bite in one spot and almost none in the others.
Baking Until Just Done
Bake until the thickest part of the chicken reaches 165°F and the juices in the dish look clear, not pink. At around the halfway mark, spoon the pan juices back over the tops. That quick baste keeps the surface glossy and helps the herbs toast instead of dry out. If the tops are browning too fast before the center is done, lay a loose piece of foil over the dish for the last few minutes.
Resting and Serving
Let the chicken sit for 5 minutes before slicing. The texture firms up just enough to stay juicy, and the pan sauce thickens slightly as it cools. Spoon the butter and garlic bits over each breast right before serving, then finish with lemon wedges so people can brighten their own plate.
How to Adjust This Chicken When You Need a Different Dinner
Dairy-Free Version
Swap the butter for a good olive oil and the dish turns lighter, with less of that rich pan sauce at the bottom. You’ll still get garlic and herb flavor, but you’ll lose the silky finish that butter gives. If you go this route, use a little extra lemon at the end to keep the chicken lively.
Using Dried Herbs Instead of Fresh
Dried herbs work if that’s what you have, but they need less volume and a little more time to soften in the butter. Use about one-third of the fresh amount and let the mixture sit for a minute before pouring it over the chicken. The flavor will be a little earthier and less bright, which is fine if you’re after a pantry version.
For Thicker Chicken Breasts
If your chicken breasts are especially large, butterfly them or pound them to an even thickness before baking. That keeps the thinner end from drying out while the thicker end catches up. Even pieces cook more predictably and brown more evenly in the butter.
Storage and Reheating
- Refrigerator: Store leftovers in an airtight container for up to 4 days. The butter sauce will firm up in the fridge, but it melts back down when reheated.
- Freezer: This freezes well for up to 2 months, though the butter sauce will separate a little after thawing. Freeze the chicken with some of the pan juices so it reheats less dry.
- Reheating: Warm covered in a 300°F oven with a spoonful of the pan juices or a splash of broth until heated through. High heat is the mistake here; it drives the chicken past juicy and straight into tough.
Questions I Get Asked About This Recipe
Garlic Butter Baked Chicken Breast
Ingredients
Equipment
Method
- Preheat oven to 425°F and lightly grease a baking dish. Aim for a hot oven so the surface browns quickly.
- Season chicken breasts on both sides with salt, pepper, garlic powder, and smoked paprika. Pat the spices in so they adhere for even flavor and browning.
- Melt butter and stir in garlic, parsley, thyme, rosemary, and lemon juice until combined. Continue stirring until the butter looks smooth and fragrant.
- Place chicken in the prepared dish and pour garlic herb butter over each breast, coating thoroughly. Make sure butter pools around the base for caramelization.
- Bake for 20-25 minutes, basting with the pan juices once at the halfway point. Watch for a golden surface glistening and bake until the internal temperature reaches 165°F.
- Rest chicken for 5 minutes before serving. This helps juices redistribute so the centers stay juicy.
- Serve with the pan juices spooned over and lemon wedges alongside. The glaze should look glossy as it coats the chicken.