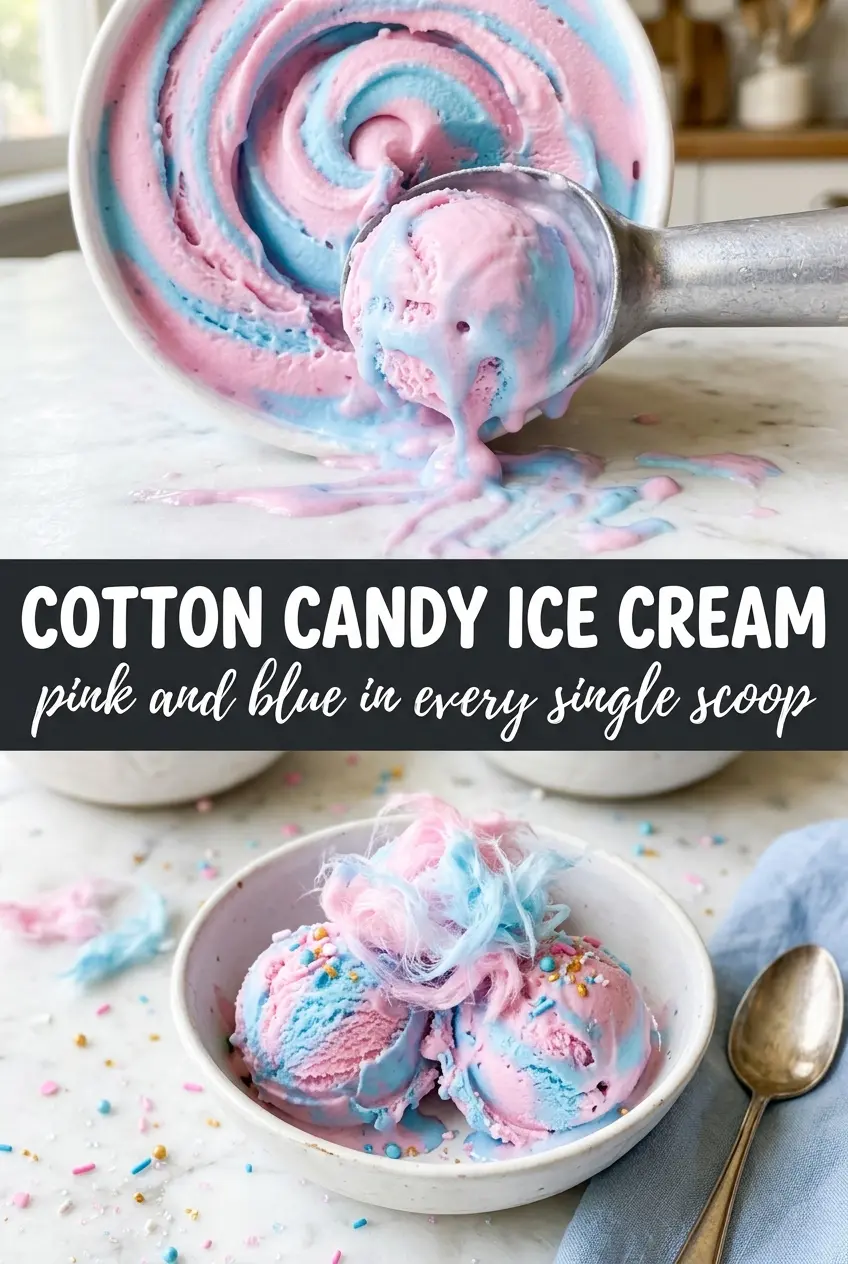
Cotton candy ice cream turns a simple custard base into something playful, creamy, and unmistakably nostalgic. The texture stays smooth and rich, but the flavor lands light and sweet with that carnival-style cotton candy note that feels right at home in a cone or a bowl. The pink-and-blue swirls make it look as fun as it tastes, and that matters here because this dessert should feel like a treat before the first bite.
The base starts like a classic cooked ice cream custard, which is what keeps the texture soft instead of icy. Egg yolks give it body, while heavy cream and whole milk keep it balanced enough to churn well. Cotton candy flavoring goes in after cooking so it keeps its bright, sugary character, and the food coloring is best added only after the custard is split so the colors stay clean and vivid.
Below, I’ll show you how to keep the custard from scrambling, how to get those swirls without muddying the colors, and the one topping that makes the whole thing look finished.
The custard turned out silky and the pink and blue layers stayed bright even after freezing. My kids said it tasted just like a fairground cone, and the scoop held its shape without getting hard.
Love the pink-and-blue swirl in this cotton candy ice cream? Save it to Pinterest for the next birthday party or summer dessert night.
The Custard Base Needs Gentle Heat, Not Speed
The biggest mistake with homemade ice cream is rushing the custard. If the heat is too high when you add the eggs, you get little bits of scrambled yolk instead of a smooth base, and no amount of straining fixes a cooked-egg flavor. Warm the cream and milk until steaming, then whisk the hot liquid into the yolks slowly so the eggs come up in temperature without shocking.
Cooking the custard to 175F gives you enough thickness for a rich scoopable texture without pushing it into a grainy zone. If the mixture coats the back of a spoon and leaves a clean line when you drag a finger through it, you’re in the right range. Strain it before chilling so any tiny cooked bits never make it into the churn.
What Each Ingredient Is Actually Doing Here

- Heavy cream — This brings the rich, smooth mouthfeel that keeps the ice cream from freezing too hard. You need the fat here; swapping in half-and-half will make it icier and less plush.
- Whole milk — The milk lightens the base just enough so the finished ice cream doesn’t feel greasy. Lower-fat milk works in a pinch, but the texture gets thinner and less creamy.
- Egg yolks — These are what turn the base into a custard and give it that scoopable, velvety body. There’s no exact substitute if you want the same texture, though an egg-free base will still work if you prefer a lighter frozen dessert.
- Cotton candy flavoring — This is the ingredient that carries the whole idea. Use a brand meant for baking or ice cream, and add it after cooking so the flavor stays bright instead of fading in the heat.
- Pink and blue food coloring — Gel coloring gives you stronger color with less liquid, which matters when you want bold swirls instead of pastel streaks. Liquid coloring works, but you’ll usually need more of it.
- Cotton candy for topping — Add it right before serving. It melts fast on cold ice cream, so it should be a last-minute garnish, not something you prep ahead.
Churning, Swirling, and Freezing Without Losing the Colors
Temper the Custard First
Whisk the egg yolks and sugar until they look lighter, then pour in the hot dairy a little at a time while whisking constantly. That slow addition keeps the yolks from seizing. Once everything goes back into the saucepan, cook it over medium-low heat and stir with patience; the custard thickens gradually, and if you blast it with heat, you’ll get curdled edges before the center is done.
Split the Base for Color
After straining, divide the custard into two bowls and tint one pink and the other blue. Stir just until the color looks even, because overmixing can knock out some of the air and make the finished ice cream denser. If the color seems pale, add a tiny bit more gel coloring rather than pouring in a lot of liquid and thinning the base.
Churn or Layer for the Swirl
For the cleanest swirls, churn the two colors separately and layer them into the container as you pack them. If your machine is small or you want one faster batch, churn a single base and ribbon the colored custards in during the freeze step. The key is to stop before the colors fully blend; once they look marbled, leave them alone or you’ll end up with one flat pastel shade.
Freeze Until Firm Enough to Scoop
Press parchment or plastic wrap directly onto the surface before freezing so ice crystals don’t form on top. The ice cream needs several hours to set fully, and it usually scoops best after an overnight freeze. If it’s rock hard straight from the freezer, let it sit on the counter for 5 to 10 minutes before serving instead of forcing the scoop and tearing the texture.
How to Adapt Cotton Candy Ice Cream for Different Freezers and Crowds
Dairy-Free Version
Use full-fat coconut milk in place of the cream and whole milk, then keep the custard base egg-thickened if you want the closest texture. The result will taste a little coconut-forward, but it still churns into a creamy ice cream with the same carnival-style flavor.
Stronger Cotton Candy Flavor
If you want the flavor to taste louder and sweeter, add a few extra drops of cotton candy flavoring after the custard chills. Don’t add too much at once, because these extracts can turn sharp fast and overpower the vanilla.
Single-Color Shortcut
Skip the split-and-swish look and color the whole batch one pastel shade if you want a quicker, more uniform dessert. You lose the dramatic marbling, but the flavor and texture stay the same and the process gets easier for a small freezer or busy day.
Storage and Reheating
- Refrigerator: The custard base can be chilled up to 2 days before churning, which actually helps the flavor settle and the texture improve.
- Freezer: Once churned, it keeps well for about 2 weeks if covered tightly. After that, the texture starts to pick up ice crystals and the swirls can lose their bright look.
- Reheating: Ice cream doesn’t need reheating, but it does need a short tempering time before scooping. Set it out for 5 to 10 minutes so the edges soften first; microwaving just melts the outside and leaves the center too hard.
Questions I Get Asked About This Recipe
Cotton Candy Ice Cream with Pink and Blue Swirls
Ingredients
Equipment
Method
- Heat the heavy cream and whole milk in a saucepan until steaming, not boiling, about 3–5 minutes, and keep the surface gently steaming. Meanwhile, whisk the egg yolks with the granulated sugar in a heatproof bowl until smooth.
- Slowly whisk the steaming cream mixture into the egg yolks in a thin stream, and the mixture should become glossy and slightly thick.
- Return everything to the saucepan and cook, stirring constantly, until it reaches 175°F, about 5–7 minutes, until the custard coats the back of a spoon.
- Strain the custard to remove any bits, and pour it into a clean bowl so it looks silky.
- Whisk in the cotton candy flavoring (or extract), vanilla extract, and salt until evenly combined, and the custard should look smooth and uniform.
- Divide the custard into two bowls and stir in pink and blue food coloring to one bowl, and leave the other bowl its contrasting color until both are clearly tinted.
- Chill both custards completely in the refrigerator for at least 4 hours, until cold to the touch, and no surface warmth remains.
- Churn each color separately in an ice cream maker until it reaches soft-serve thickness, and keep going until the paddle leaves defined tracks.
- Either alternate spoonfuls of the pink and blue ice cream in the container while it firms, or layer both colors together during the freeze step for a blue-pink swirl effect, and press gently to reduce air pockets.
- Freeze until firm, about 4–6 hours more, until scoopable and set through.
- Top the ice cream with cotton candy right before serving, and add a small tuft so it stands out over the swirls.