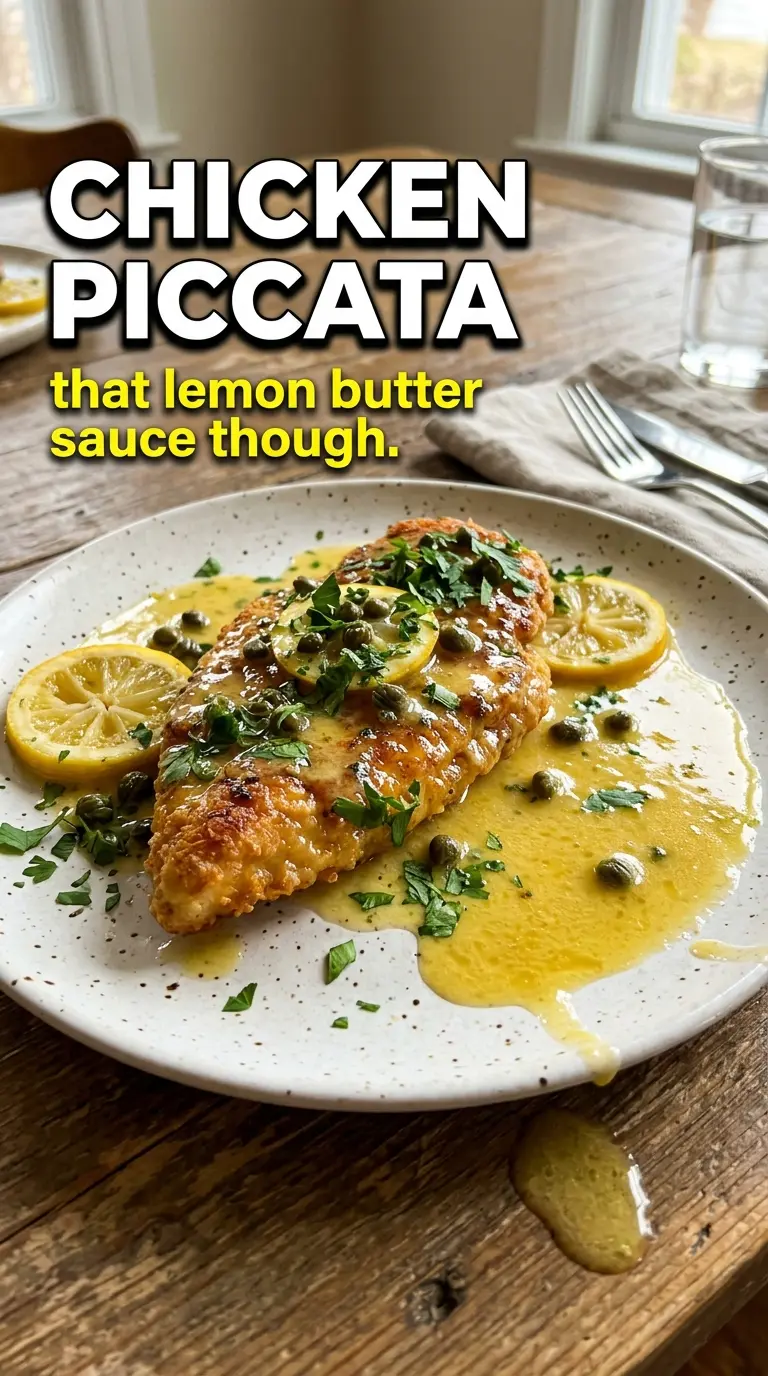
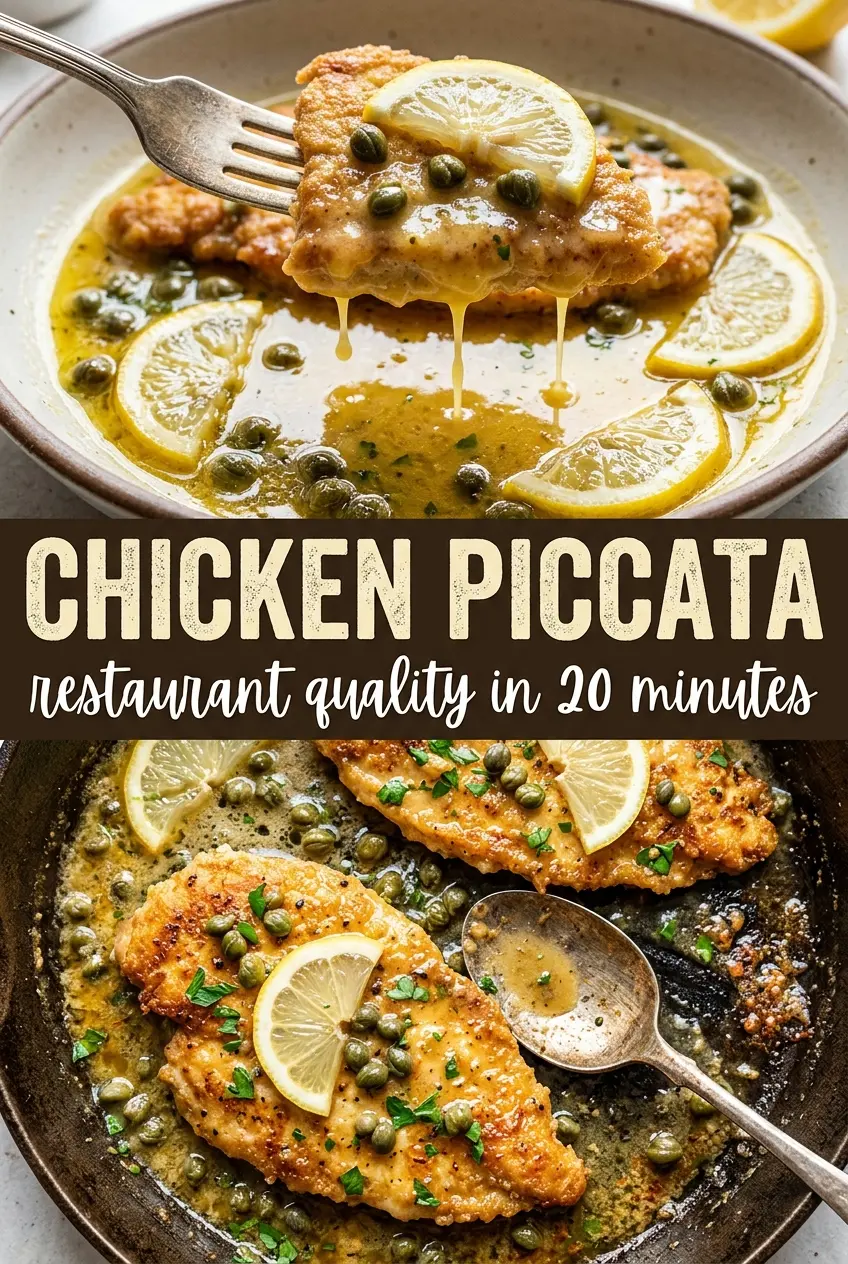
Chicken piccata lives or dies by the sauce. When it’s done right, the cutlets stay crisp at the edges, the lemon stays bright instead of harsh, and the pan sauce turns glossy enough to cling to every bite. That balance is what makes this version worth coming back to on a weeknight.
The trick is treating each part with a little restraint. Thin cutlets cook fast and stay tender, a light flour dredge gives the chicken just enough crust to help the sauce grab on, and the final butter goes in off the heat so the sauce finishes silky instead of breaking. White wine adds depth, but it’s the lemon juice and capers that make the whole pan taste alive.
Below, I’ll walk through the small choices that matter most: how to keep the coating light, when the sauce should reduce, and why the butter gets swirled in at the very end. Those details are what separate a decent chicken piccata from one that tastes like it came from a good Italian restaurant.
The chicken stayed tender and the sauce thickened into that glossy, lemony coating I always hope for. I served it over pasta and the whole pan disappeared fast.
Save this chicken piccata for the nights when you want crisp cutlets and a bright lemon-caper pan sauce in one skillet.
The Cutlets Need to Be Thin Before the Pan Gets Hot
Chicken piccata goes wrong when the chicken is too thick. The outside browns before the center is cooked, so you end up with dry edges and a sauce that waits too long. Halving the breasts into thin cutlets keeps the cook time short and gives you more surface area for that light flour coating, which is what helps the sauce cling later.
The flour should look dusty, not pasty. If it goes on in a thick layer, it turns gummy in the pan and muddies the sauce. Shake off the excess and let the chicken fry in a thin film of oil and butter until it releases cleanly and the crust turns a deep golden color.
What Each Ingredient Is Actually Doing in the Pan Sauce
- Chicken breasts — Halving them into thin cutlets is the difference between fast, even cooking and dry chicken. If you buy pre-sliced cutlets, use them; just keep them an even thickness so they brown at the same rate.
- All-purpose flour — This gives the chicken a delicate crust and helps thicken the sauce slightly when the browned bits are scraped up. A gluten-free 1:1 flour blend works here, though the coating will be a touch more delicate.
- Dry white wine — It deglazes the pan and adds a clean acidity that lemon alone can’t give. Use something dry and drinkable, not sweet, because the sweetness shows up once the sauce reduces.
- Chicken broth — This stretches the sauce without making it heavy. Homemade or low-sodium broth gives you more control, which matters because the capers add their own salt.
- Lemon juice and slices — Fresh lemon juice tastes sharp and clean; bottled juice can read flat or bitter. The slices simmer in the sauce and soften the edge of the acidity, but don’t let them cook so long that the pith turns harsh.
- Capers — They bring the briny bite that makes piccata taste like piccata. Drain them, but don’t rinse them unless they’re extremely salty; that little bit of brine is part of the dish.
- Cold butter — Swirled in off the heat, it gives the sauce its sheen and softens the sharpness of the lemon. If the pan is too hot, the butter separates instead of emulsifying.
Building the Sauce Without Losing the Gloss
Brown the Chicken in Batches
Get the skillet hot enough that the chicken sizzles the moment it lands. If you crowd the pan, the cutlets steam and the flour coating turns pale instead of crisp. Two batches are better than one if that’s what it takes to keep the heat up. Pull the chicken when it’s golden and just cooked through, then set it aside while you build the sauce in the same pan.
Wake Up the Brown Bits
Add the garlic for just 30 seconds, long enough for it to smell fragrant but not long enough to color. Then pour in the wine and scrape the bottom of the pan with a wooden spoon. Those browned bits are the base of the sauce, and they should dissolve into the liquid almost immediately. If the pan looks dry or scorched before the wine goes in, lower the heat; burnt garlic will carry through the whole dish.
Reduce, Then Finish Cold
Let the broth, lemon juice, capers, and lemon slices simmer until the sauce drops by about a third and looks a little more concentrated. It should still be loose enough to spoon, not syrupy. Take the pan off the heat before adding the last butter cubes, then swirl until the sauce turns glossy and lightly thickened. If it looks broken, the pan was too hot; a brief pause off the heat usually brings it back together.
How to Adapt Chicken Piccata Without Losing What Makes It Work
Gluten-Free Piccata
Use a good 1:1 gluten-free flour blend in place of all-purpose flour. You’ll still get a light coating and enough body in the sauce, though the crust won’t brown quite as evenly as regular flour, so watch the pan closely.
Dairy-Free Version
Swap the butter for a neutral olive oil or a plant-based butter that melts cleanly. The sauce won’t have the same silky finish, but the lemon, wine, and capers still carry the dish. Add the fat at the end off the heat so it emulsifies instead of separating.
No Wine, Still Bright
Replace the wine with extra chicken broth plus a small splash of lemon juice. You’ll lose a little depth, but the sauce stays clean and balanced. Keep the heat gentle so the extra lemon doesn’t turn sharp while it reduces.
Leftovers and Reheating
- Refrigerator: Store the chicken and sauce together for up to 3 days. The coating softens as it sits, but the flavor stays good.
- Freezer: It freezes, but the sauce can turn a little dull and the chicken loses some of its crispness. Freeze for up to 2 months in a tight container if needed, then thaw overnight in the fridge.
- Reheating: Warm it gently in a skillet over low heat with a splash of broth or water. High heat will tighten the chicken and can make the sauce split, so take your time and spoon sauce over the cutlets as they warm.
Answers to the Questions Worth Asking
Chicken Piccata
Ingredients
Equipment
Method
- Season the chicken cutlets with salt and pepper and dredge lightly in flour, shaking off the excess so the surface is thinly coated (visual cue: flour clings but doesn’t form a thick layer).
- Heat olive oil and 2 tablespoons butter in a large skillet over medium-high heat until the butter foams; cook the chicken in batches for 3-4 minutes per side until golden and cooked through (visual cue: cutlets turn deep golden with crisp edges).
- Remove the cooked cutlets and set aside while you make the sauce (visual cue: chicken rests off the heat without losing their golden color).
- Add the minced garlic to the skillet and cook for 30 seconds, stirring until fragrant (visual cue: garlic darkens slightly but doesn’t burn).
- Pour in the dry white wine and scrape up the browned bits from the pan, then simmer for 2 minutes (visual cue: liquid reduces and looks slightly syrupy).
- Add chicken broth, lemon juice, capers, and lemon slices, then simmer for 4-5 minutes until the sauce reduces by about a third (visual cue: sauce thickens and coats the back of a spoon).
- Remove the skillet from the heat and swirl in the remaining 2 tablespoons cold butter until the sauce turns glossy (visual cue: the sauce shines and looks smooth).
- Return the chicken cutlets to the skillet, spoon sauce over each, and garnish with chopped fresh parsley (visual cue: sauce pools around the fillets and parsley stays bright green).