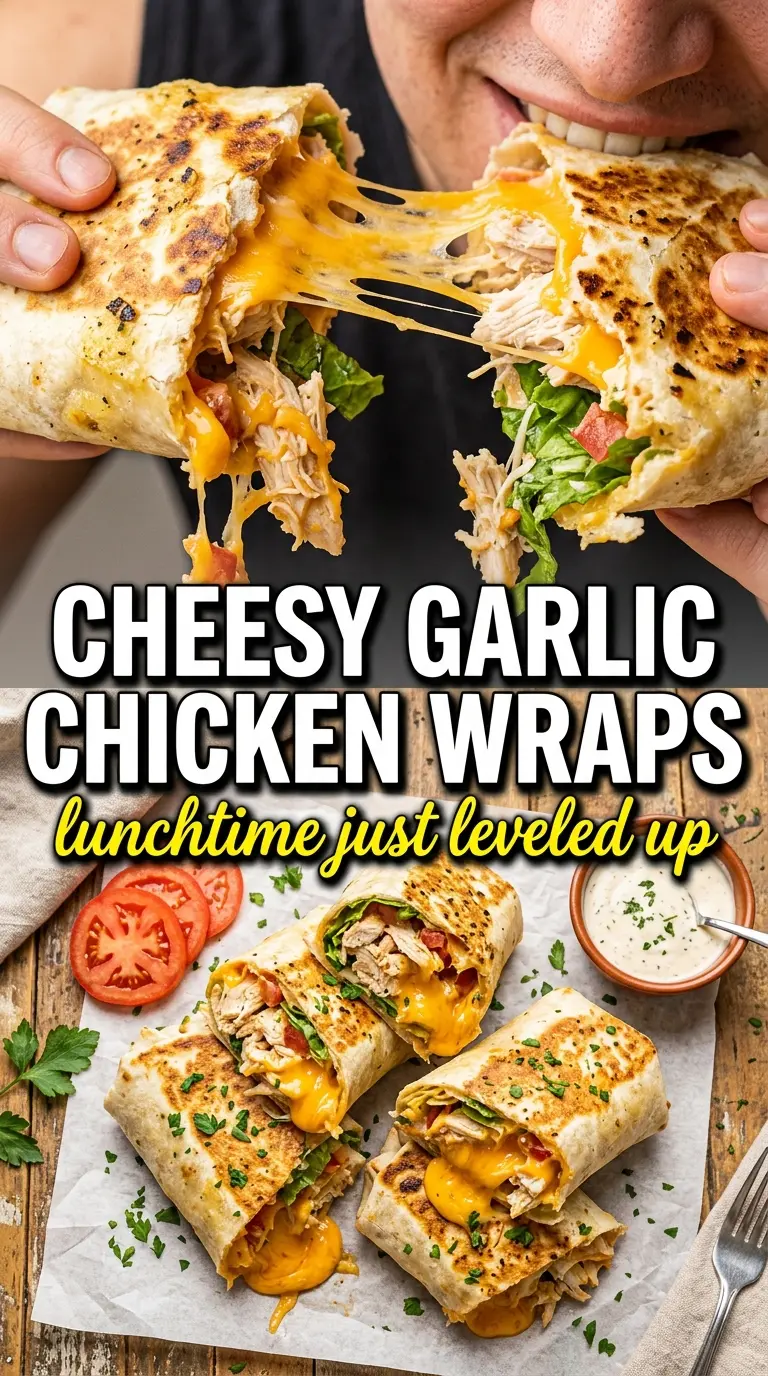
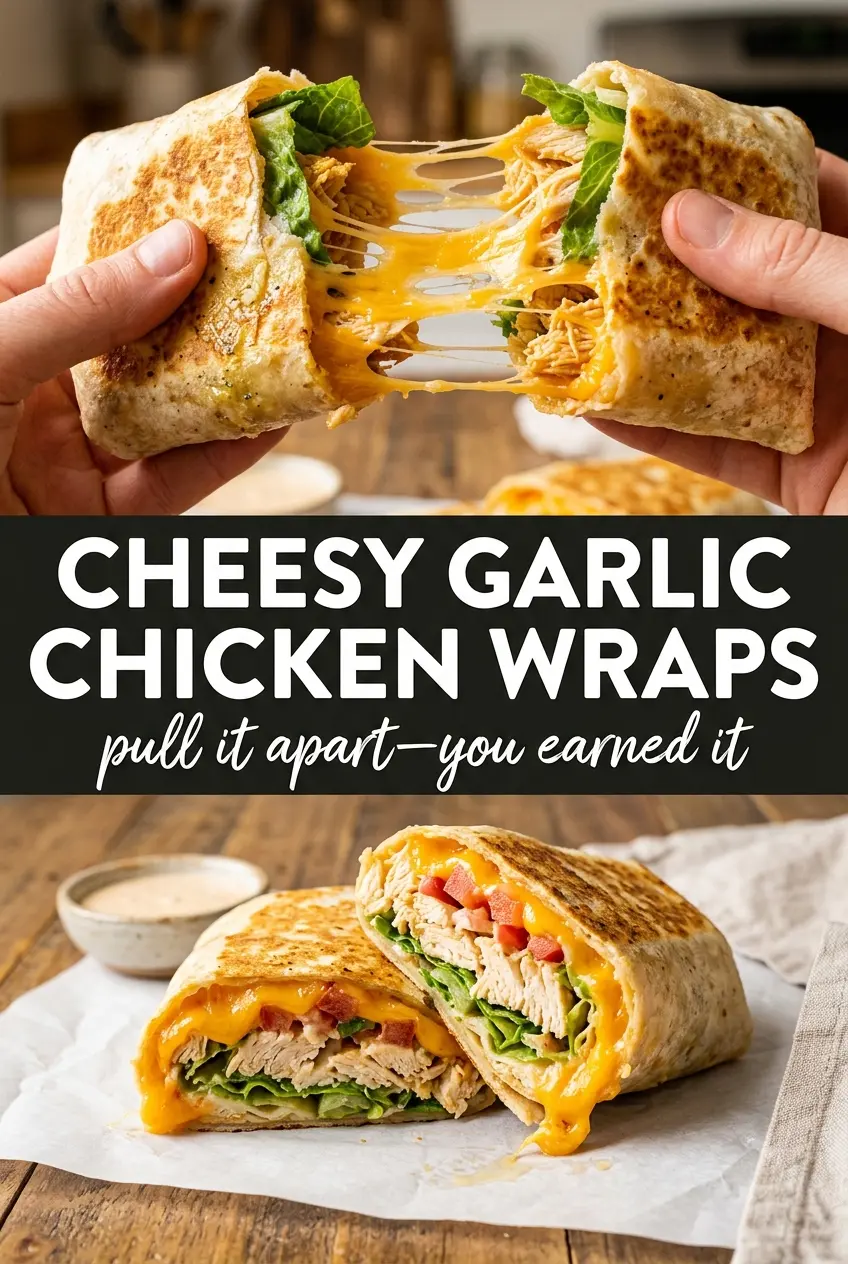
Golden, toasted Cheesy Garlic Chicken Wraps hit the sweet spot between fast lunch and real dinner. The tortilla crisps on the outside while the inside stays loaded with garlicky chicken, melted mozzarella, cool romaine, and juicy tomatoes, so every bite gives you a little crunch, a little melt, and plenty of savory garlic butter flavor.
What makes this version work is the order. The chicken gets cooked first, then tossed in garlic butter off the direct heat so the garlic turns fragrant instead of bitter. The wrap is built with just enough dressing to add tang without soaking the tortilla, and the final skillet toast seals everything together and gives you that deep golden finish.
Below, I’ve included the small details that keep the tortilla from tearing, the filling from sliding out, and the cheese from disappearing into the pan. If you’ve ever had a wrap go soggy before you reached the table, this one fixes that.
The garlic butter coated the chicken perfectly, and the tortillas stayed crisp even after I sliced them. The mozzarella got nice and stretchy without making the wrap greasy.
Like this garlic butter chicken wrap? Save it to Pinterest for the nights when you want a crisp tortilla, melted mozzarella, and a fast dinner that eats like a sandwich.
The Reason the Tortilla Stays Crisp Instead of Going Soggy
The filling in a wrap has to be hot, but not wet. That’s the part most people miss. If the chicken goes straight from the pan into the tortilla with excess butter or if the dressing gets spread too thick, the steam gets trapped and softens the wrap before you even slice it.
Here, the garlic butter clings to the chicken first, then the wrap gets assembled with a light hand. The final skillet toast does two jobs at once: it melts the cheese and drives off surface moisture so the tortilla turns crisp and stays that way long enough to serve.
- Chicken strips — Cutting the chicken into strips gives you more browned surface area and faster cooking. Thin, even pieces cook through before the outside dries out.
- Butter — This carries the garlic flavor and helps the chicken brown. You can use salted or unsalted, but if you use salted, ease up on the added seasoning.
- Mozzarella — This is the melt factor. It stretches well and holds the filling together, though low-moisture mozzarella works better than fresh mozzarella here because it won’t water down the wrap.
- Romaine and tomatoes — These go in raw for crunch and freshness. Pat the tomatoes dry after halving them so they don’t leak into the tortilla.
- Ranch or Caesar dressing — Use just enough to coat the tortilla. Too much turns the inside slippery and makes rolling harder.
What Each Layer Is Doing Inside the Wrap
- Flour tortillas — Ten-inch tortillas give you enough surface area to hold the filling without splitting. Warm them briefly before filling so they roll without cracking.
- Garlic — Fresh minced garlic is the point here. Jarred garlic can work in a pinch, but it won’t taste as clean or as bright once it hits the butter.
- Parsley — This cuts through the richness and keeps the garlic butter from tasting heavy. Dried parsley won’t do the same job.
- Ranch or Caesar — Ranch gives you a cool, creamy finish; Caesar adds a little more salt and a sharper edge. Either one works, but use the lighter hand with Caesar because it can overpower the chicken faster.
- Romaine — Iceberg can stand in if that’s what you have, but romaine gives better crunch and doesn’t collapse as quickly after slicing.
How to Keep the Chicken Juicy and the Wrap Tight
Cook the Chicken in a Hot Pan
Season the chicken strips and cook them in the butter over medium-high heat until the outside turns golden and the center reaches 165°F. If the pan is crowded, the chicken will steam instead of sear, and you’ll lose the browned bits that help this taste like more than a plain wrap. Move the pieces around just enough to color them, then leave them alone long enough to develop a little crust.
Turn the Garlic into Butter, Not Burnt Bits
Once the chicken comes out, add the garlic to the remaining butter and cook it for about a minute, just until fragrant. Garlic burns fast, especially in butter, so keep the heat moderate and stir constantly. The moment it smells sweet and toasty, toss the chicken back in and coat it right away.
Roll It Tight and Toast Seam-Side Down
Spread the dressing in a thin layer, then stack the cheese, chicken, lettuce, and tomatoes in the center of each tortilla. Roll it snugly and start the toast seam-side down so the wrap seals itself as the cheese melts. If the heat is too high, the tortilla browns before the cheese softens, so keep the skillet at medium and give it the full two minutes per side.
How to Adapt This for Different Pans, Diets, and Leftovers
Gluten-Free Wraps
Use sturdy gluten-free tortillas and warm them gently before filling. They crack more easily than flour tortillas, so keep the filling centered and don’t overstuff them. The flavor stays the same, but the wrap will be a little softer and less crisp after toasting.
Dairy-Free Version
Swap the butter for a plant-based butter and use a dairy-free shredded mozzarella that melts well. The texture will be slightly less stretchy, but the garlic chicken still carries the wrap. Choose a creamy dairy-free dressing so the inside doesn’t taste dry.
Chicken Thigh Swap
Boneless chicken thighs work well if you want a juicier filling with a little more richness. They need a few extra minutes in the skillet, but they stay tender and take on the garlic butter beautifully. Trim excess fat so the wrap doesn’t get greasy.
Storage and Reheating
- Refrigerator: Store the cooked chicken separately from the lettuce and tomatoes for up to 3 days. Fully assembled wraps soften as they sit.
- Freezer: The chicken freezes well, but the finished wrap doesn’t. Freeze the garlic chicken in an airtight container for up to 2 months, then build fresh wraps later.
- Reheating: Warm the chicken in a skillet over low heat or in the microwave in short bursts, then assemble with fresh lettuce and tomatoes. If you reheat an already assembled wrap, the tortilla goes soft and the lettuce wilts.
Questions I Get Asked About This Recipe
Cheesy Garlic Chicken Wraps
Ingredients
Equipment
Method
- Season the chicken strips with salt and pepper. Cook in 2 tablespoons butter in a skillet over medium-high heat for 5-6 minutes until golden and cooked through to 165°F, stirring occasionally.
- In the same skillet, melt the remaining 2 tablespoons butter over medium heat. Cook the garlic for 1 minute until fragrant, then toss the cooked chicken strips in the garlic butter and stir in the fresh parsley.
- Warm the tortillas until pliable in a skillet or dry pan over low to medium heat for about 20-30 seconds per side. Stop when they flex without cracking.
- Spread ranch dressing over each tortilla in an even layer. Leave a small border around the edges so it doesn’t leak out.
- Layer shredded mozzarella, garlic chicken strips, romaine, and cherry tomatoes down the center of each tortilla. Press lightly so the filling stays together.
- Roll tightly and place each wrap seam-side down in the skillet. Toast over medium heat for 2 minutes per side until golden and the cheese is melted.
- Slice each wrap diagonally and serve immediately. Cut edge-up shows the melted mozzarella and chicken through the toast marks.