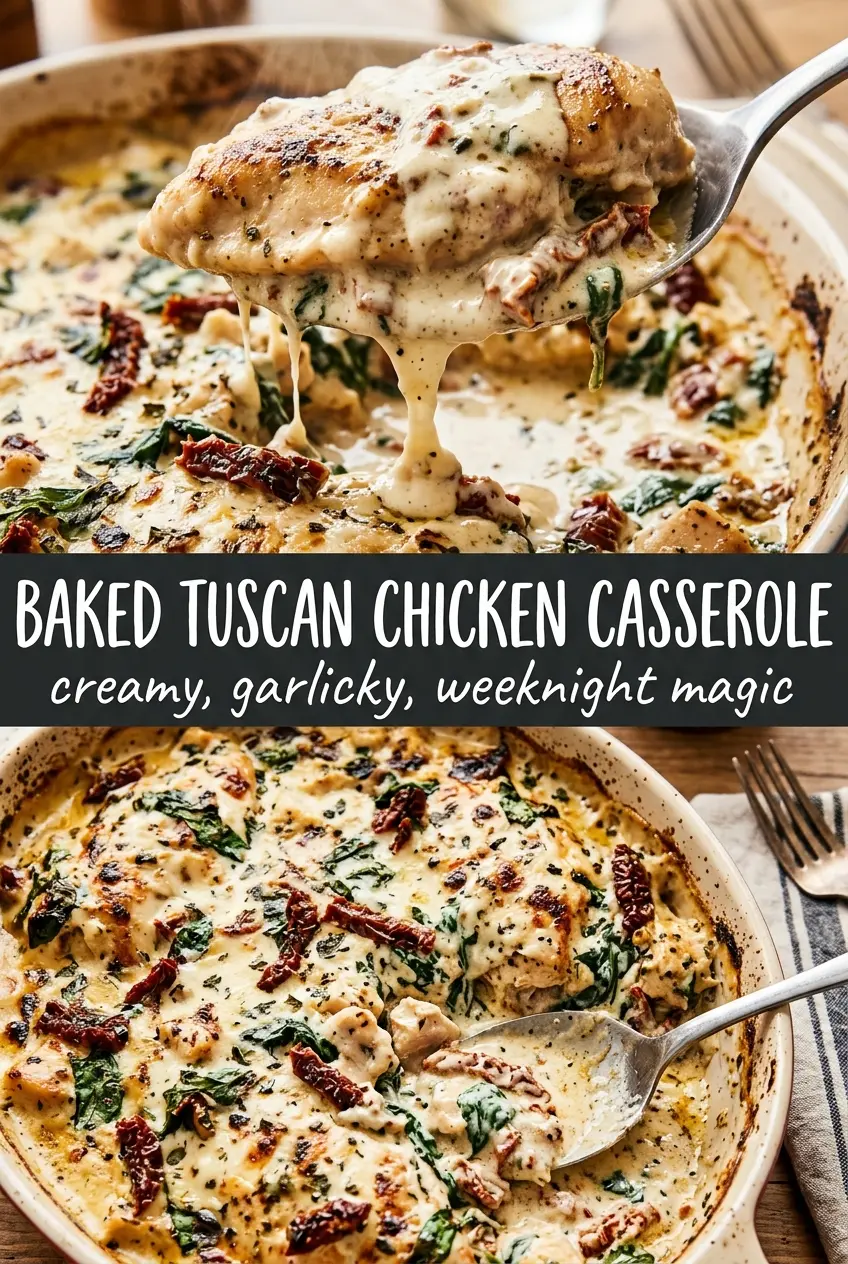
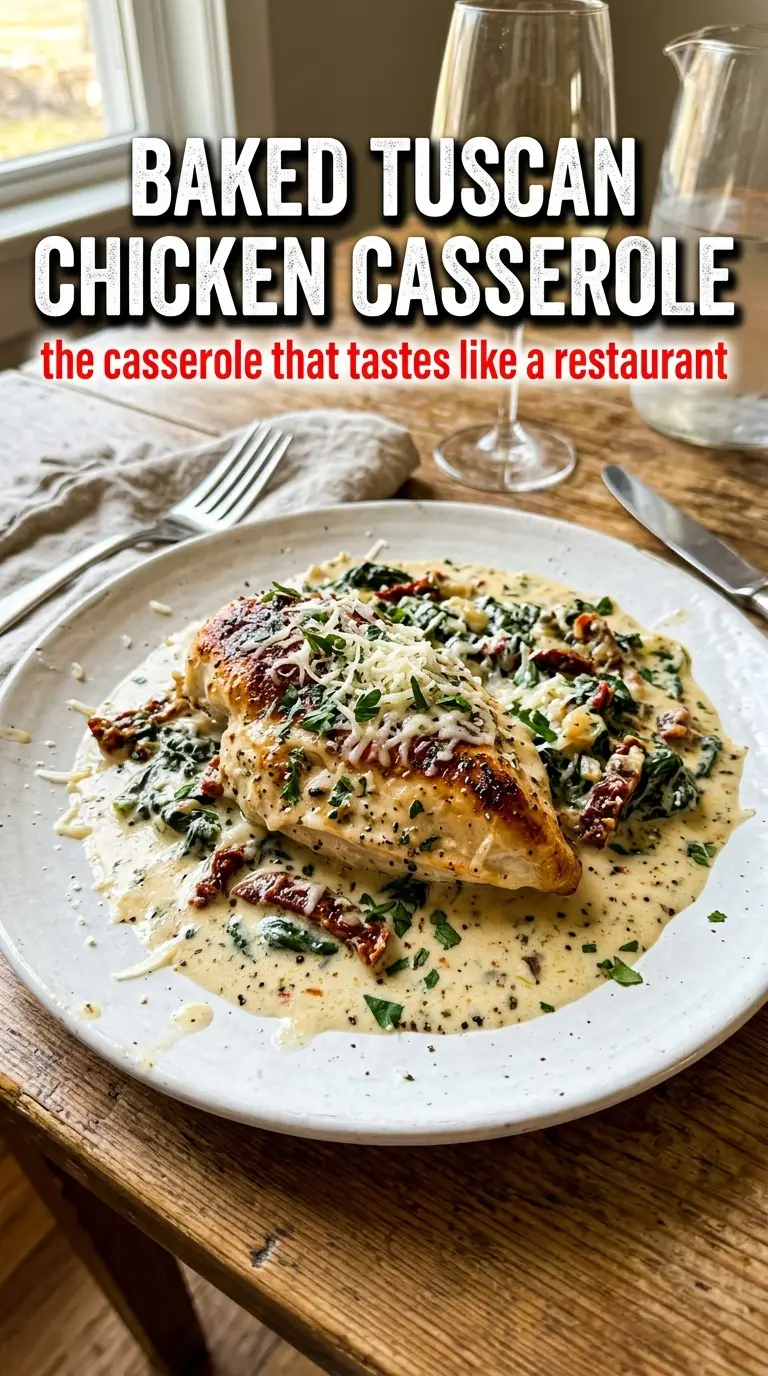
Baked Tuscan chicken casserole turns into the kind of dinner people hover around the stove for, with crisp chicken skin on top and a creamy sauce underneath that clings instead of flooding the plate. The sun-dried tomatoes bring concentrated sweetness, the spinach softens into the sauce without disappearing, and the Parmesan gives everything that savory, slightly salty finish that keeps you going back for another spoonful.
The part that makes this version work is the order. Searing the chicken first builds a browned base in the pan, and that fond gets pulled into the sauce when the broth goes in. I also keep the sauce a little looser before it bakes; the oven and the chicken juices finish the thickening, so it ends up silky instead of heavy.
Below, I walk through the sear, the sauce, and the one small detail that keeps the cream from turning grainy. If you’ve ever had a casserole come out watery or flat, this method fixes both problems.
The chicken skin stayed crisp even under the sauce, and the cream thickened up beautifully after baking. I used the sauce on bread the next day because none of it went to waste.
Baked Tuscan chicken casserole is the kind of one-pan dinner that keeps the sauce glossy, the chicken juicy, and the sun-dried tomatoes front and center.
The Sear That Keeps the Chicken from Going Soft
The biggest mistake with a casserole like this is rushing the chicken into the oven without giving the skin time to brown. That first sear does two jobs: it renders some fat from the skin, and it creates the deep savory flavor that carries through the sauce. If the chicken goes in pale, the whole dish tastes flatter and the skin turns rubbery under the cream.
Use medium-high heat and leave the thighs alone on the first side until they release easily and the skin looks deep golden, not just lightly colored. If the pan starts smoking aggressively, the heat is too high and the skin will burn before it renders. The goal is a firm, crisp surface that can finish in the oven without losing its texture.
What the Cream, Parmesan, and Sun-Dried Tomatoes Are Really Doing
- Bone-in, skin-on chicken thighs — These stay juicier than breasts and give you enough fat and flavor to support the sauce. Boneless thighs work too, but they cook faster, so start checking them early.
- Sun-dried tomatoes in oil — The oil-packed kind bring a softer texture and deeper tomato flavor than dry-packed tomatoes. Drain them before slicing, but don’t rinse them; that little bit of oil helps them fry briefly with the garlic.
- Heavy cream — This is what makes the sauce finish silky instead of thin. Half-and-half can work in a pinch, but it won’t thicken the same way and is more likely to look split after baking.
- Parmesan — Grate it finely so it melts into the sauce instead of clumping. Pre-shredded cheese often contains anti-caking agents that can make the sauce grainy.
- Baby spinach — It looks like a lot at first, but it collapses fast into the hot sauce. Add it at the end so it stays green and tender instead of turning dull and overcooked.
Building the Sauce in the Same Pan Without Breaking It
Seasoning and Searing the Chicken
Pat the chicken thighs dry before seasoning them so the skin can actually crisp. A dry surface browns; a damp one steams. Season both sides well, then sear skin-side down until the fat renders and the color turns deep golden brown. If the thighs stick when you try to lift them, give them another minute — they’ll release when the crust is ready.
Making the Base in the Fond
Keep the same pan on the stove and add the garlic and sun-dried tomatoes right into the rendered fat. Stir for about a minute, just until the garlic smells sweet and the tomatoes start to sizzle. Pour in the broth and scrape the bottom of the pan well; those browned bits are the backbone of the sauce. If the pan looks dry at this point, the sauce will taste thin no matter how much cream you add.
Finishing the Cream Sauce Before It Bakes
Lower the heat before adding the cream and Parmesan. High heat is what makes creamy sauces separate or turn grainy. Stir until the cheese melts and the sauce looks glossy, then return the chicken skin-side up so the top stays above the liquid. Bake uncovered so the sauce can reduce slightly and the skin can stay firm instead of getting soggy.
Wilting the Spinach at the End
Stir the spinach in after the chicken comes out of the oven or near the very end of baking. It only needs a minute or two to wilt in the hot sauce. If you add it too early, the leaves break down into a dark, muddy tangle and the casserole loses that fresh green contrast.
Three Ways to Adjust the Casserole Without Losing What Makes It Good
Make It Gluten-Free Without Changing the Texture
This recipe is already gluten-free as written, so the main job is keeping cross-contact out of the kitchen if that matters for your table. Use a broth you trust and check the Parmesan label if you’re cooking for someone with a strict gluten-free need.
Swap in Boneless Chicken Thighs or Breasts
Boneless thighs keep the dish rich but cut the bake time a little. Chicken breasts work if that’s what you have, but they need gentler baking and a closer eye so they don’t dry out; pull them as soon as they hit 165°F and rest them before serving.
Dairy-Free Version
Use full-fat canned coconut cream and a good dairy-free Parmesan-style substitute. The sauce will taste a little less savory and a little more coconut-forward, so keep the garlic, herbs, and sun-dried tomatoes bold enough to balance it.
Storage and Reheating
- Refrigerator: Store in an airtight container for up to 4 days. The sauce will thicken as it chills.
- Freezer: It freezes, but the cream sauce can separate a little on thawing. If you plan to freeze it, cool completely and freeze portions for up to 2 months.
- Reheating: Reheat gently on the stove or in the oven at low heat with a splash of broth. Microwaving on high can make the sauce oily and the chicken tough.