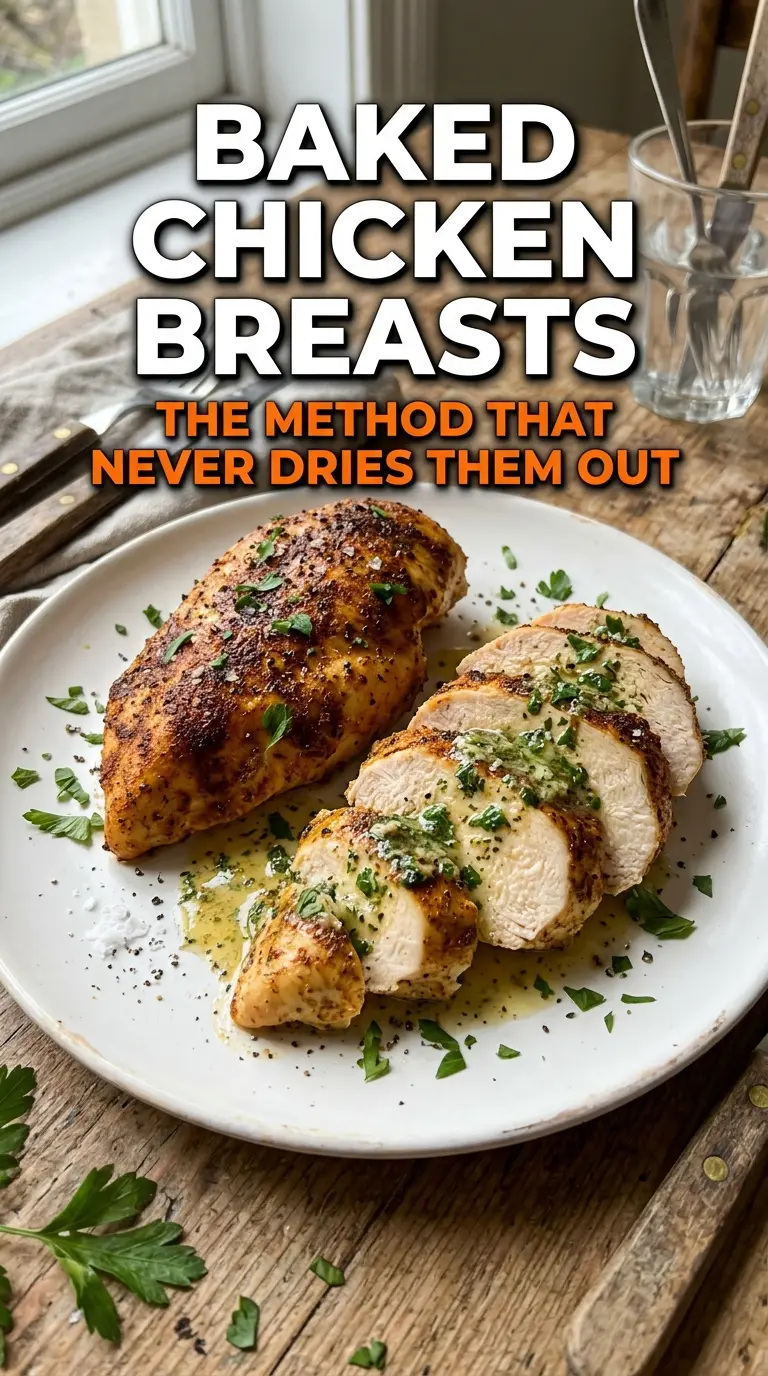
Juicy baked chicken breasts live or die by two things: even thickness and stopping the bake at the right moment. Get those right, and the meat stays tender with a lightly caramelized herb crust that slices cleanly instead of shredding into dry fibers. The olive oil and spice rub do more than season the surface; they help the top brown at a high oven temperature without turning the chicken leathery.
This version keeps the seasoning simple on purpose. Garlic powder, onion powder, smoked paprika, and Italian seasoning build a savory crust without burning the way fresh garlic often can at 425°F. Pounding the breasts to the same thickness matters just as much as the spice blend, because the thin end won’t dry out while the thick end finishes cooking.
Below, I’ll walk through the small details that keep baked chicken moist, plus a few smart swaps and storage tips for the nights when you want dinner handled ahead of time.
Pounding the chicken to even thickness made all the difference. The crust turned out golden, and the center stayed juicy instead of drying out at the edges.
Save these baked chicken breasts for a fast dinner with a golden herb crust and a juicy center.
The Step That Keeps Chicken Breasts Juicy Instead of Stringy
Most baked chicken goes wrong before it even hits the oven. Uneven breasts cook unevenly, which means the thinner ends dry out while the thicker centers are still catching up. Pounding the chicken to a steady 3/4-inch thickness gives you the same doneness across the whole piece, and that matters more here than piling on extra seasoning.
The second trap is baking until the chicken looks finished instead of checking the temperature. Chicken breasts keep cooking after they come out of the oven, so pulling them at 165°F and resting them for five minutes keeps the juices in the meat instead of running onto the cutting board. If the crust is bronzed but the center is still underdone, give it a few more minutes and check again rather than guessing.
What Each Seasoning Is Doing on the Chicken
- Olive oil — This helps the spices cling and encourages browning on the surface. You can use avocado oil instead if that’s what you keep on hand; the main job is coating the chicken evenly so the seasoning doesn’t fall off in the pan.
- Garlic powder, onion powder, and smoked paprika — This trio gives you savory depth without wet ingredients that can steam the chicken. Fresh garlic isn’t the right swap here because it can scorch at 425°F and turn bitter before the chicken is done.
- Italian seasoning — This adds the herb note that makes the crust smell like it has been cooking much longer than 22 minutes. If your blend is heavy on rosemary, crush it between your fingers first so the flavor spreads more evenly.
- Chicken breasts — Buy breasts that are close in size if you can. If one is much thicker, slice it horizontally or pound it gently; otherwise one piece will be dry before the other is ready.
- Lemon wedges and parsley — These aren’t just for looks. The lemon brightens the chicken after baking, and the parsley keeps the finished dish from tasting flat.
Building the Crust Before the Oven Does the Work
Getting the Pan Ready
Start by preheating the oven to 425°F and lightly greasing the baking dish. That higher heat gives the outside enough energy to brown before the chicken dries out, which is why this method works better than a gentler bake for thin breasts. If the dish is overloaded, the chicken steams instead of roasts, so leave a little space around each piece.
Seasoning for Even Coverage
Brush the chicken with olive oil on both sides, then rub on the spice mix as evenly as you can. The coating should look thin but complete, not clumpy in one spot and bare in another. If the seasoning sits in damp patches, it tends to slide off and leaves pale spots behind, so press it onto the meat with your fingertips.
Baking to Temperature, Not Guesswork
Bake for 18 to 22 minutes, depending on the thickness of the breasts. The tops should be golden and fragrant, and the thickest part should hit 165°F on an instant-read thermometer. If the surface is browning too quickly before the center is done, loosely tent the dish with foil for the last few minutes instead of dropping the oven temperature.
Resting Before the Slice
Let the chicken rest for five minutes before cutting into it. That pause lets the juices settle back through the meat instead of flooding out the second you slice it. Cut across the grain for the cleanest texture, and use a sharp knife so the crust stays intact.
How to Adjust These Baked Chicken Breasts Without Losing the Juiciness
Dairy-Free and Naturally Gluten-Free
This recipe already lands in both lanes as written, which is part of why it’s such an easy weeknight main. Keep the oil-based seasoning rub as-is and you’ll still get a crisp, seasoned exterior without needing any breading or dairy.
Using Chicken Thighs Instead
Boneless skinless thighs work if you want a richer, more forgiving cut. They usually need a little longer in the oven, and the final texture will be juicier and less lean than breasts, so check for doneness near the thickest part rather than relying on the clock alone.
Making It Spicier
Add 1/4 to 1/2 teaspoon cayenne or a pinch of red pepper flakes to the seasoning mix. That gives the crust more heat without changing the baking time, but keep the smoked paprika in place because it rounds out the spice instead of making the chicken taste sharp.
Storage and Reheating
- Refrigerator: Store sliced or whole chicken in an airtight container for up to 4 days. It stays moist best if you leave the slices a little thick.
- Freezer: Freeze for up to 2 months, wrapped tightly and packed with as little air as possible. Thaw overnight in the refrigerator so the texture doesn’t turn stringy from a fast thaw.
- Reheating: Reheat gently in a 300°F oven with a splash of broth or covered in a skillet over low heat. High heat is the fastest way to dry out lean chicken breast, so keep the warming slow and stop as soon as it’s hot through.
Answers to the Questions Worth Asking

Baked Chicken Breasts
Ingredients
Equipment
Method
- Preheat the oven to 425°F and lightly grease a baking dish.
- Pound the chicken breasts to an even 3/4-inch thickness if they vary in size.
- Brush both sides of each chicken breast with olive oil.
- Mix garlic powder, onion powder, smoked paprika, Italian seasoning, salt, and cracked black pepper; rub evenly over both sides of the chicken.
- Bake at 425°F for 18-22 minutes until the internal temperature reaches 165°F and the tops are golden; do not overbake.
- Rest for 5 minutes before slicing; garnish with fresh parsley and lemon wedges (golden exterior with juicy interior visible at the cut).