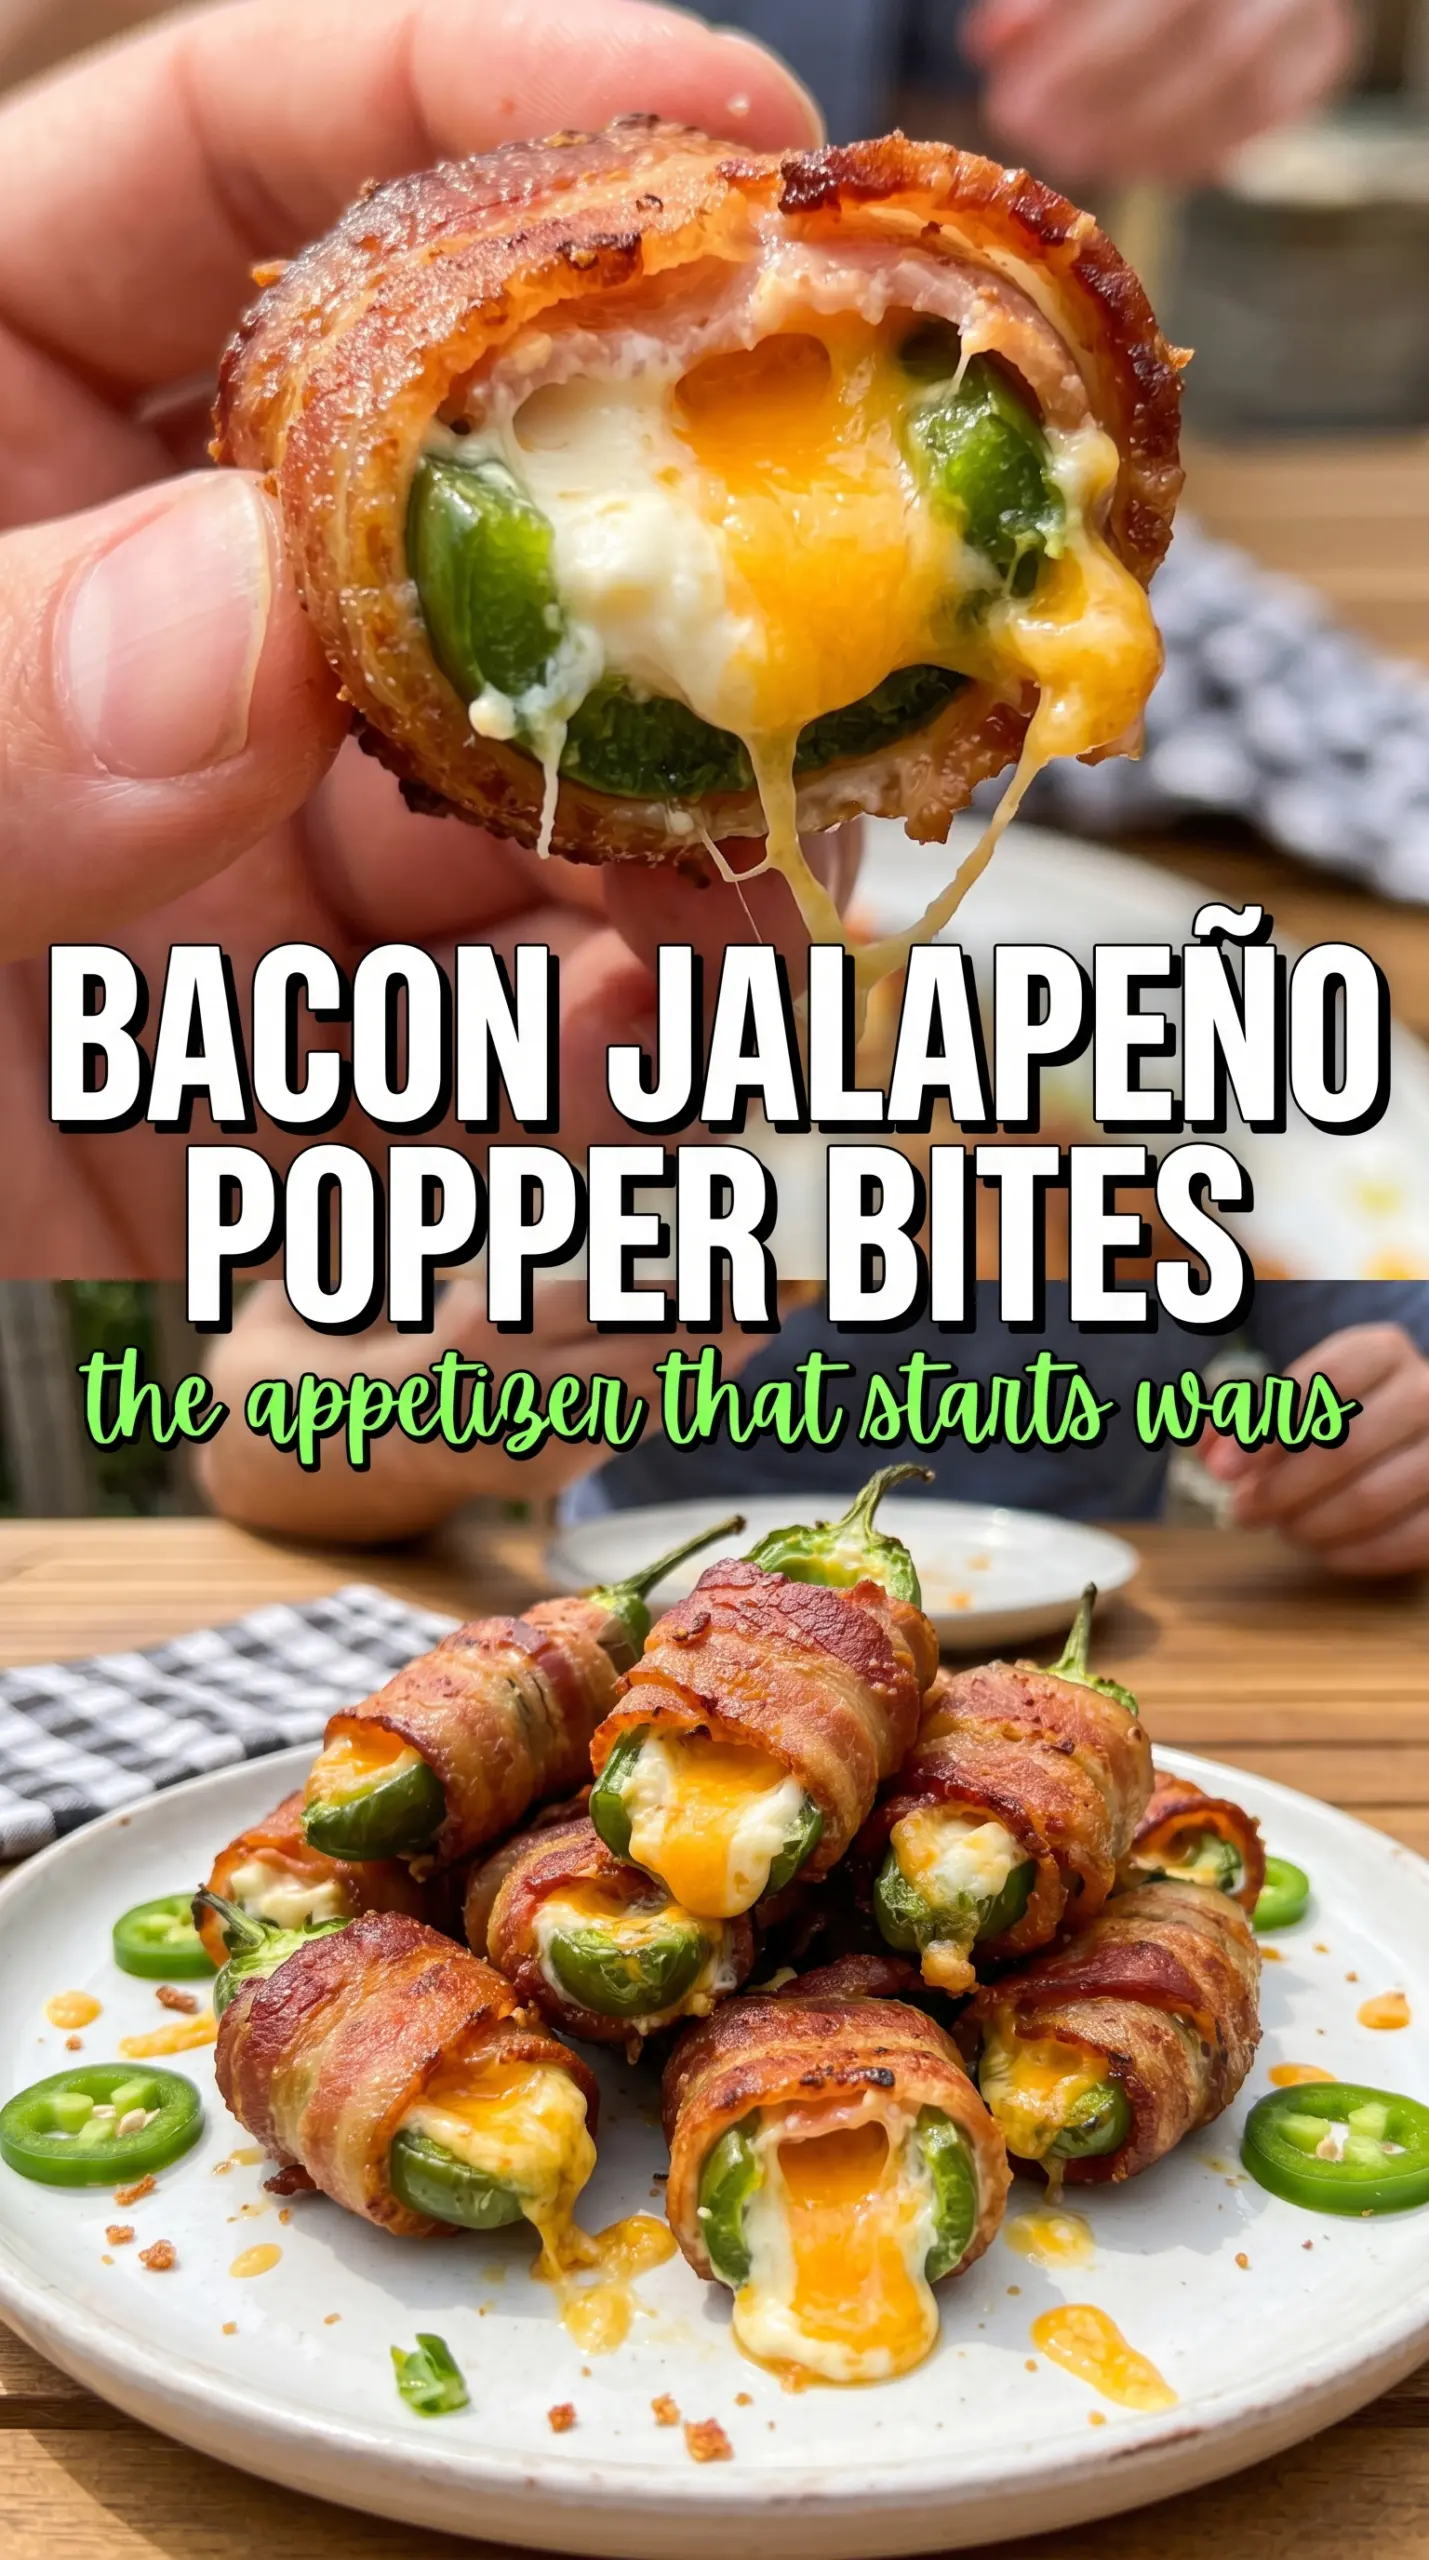
These bacon jalapeño popper bites bake up with crisp edges, smoky bacon, and a creamy center that stays rich instead of turning greasy. The jalapeños soften just enough to take the bite out of their heat, while the cheddar and cream cheese melt together into a filling that holds its shape when you pick one up. When they come out of the oven hot and bubbling, they disappear fast.
The trick is starting with softened cream cheese and mixing in the cheddar thoroughly so the filling bakes evenly. A wire rack matters here, because it lets the bacon render instead of steaming in its own fat. Thin-cut bacon is the better choice too; it wraps snugly and crisps in the same time it takes the peppers to tenderize.
Below, I’ve included the small details that keep the bacon crisp and the filling from leaking out. The honey drizzle is optional, but it’s the little sweet finish that makes these poppers stand out.
The bacon got crisp, the cheese stayed in place, and the honey on top was the perfect finish. I baked them on a rack like you said and didn’t end up with a greasy pan full of soggy bottoms.
Love the crispy bacon and creamy jalapeño filling? Save these bacon jalapeño popper bites for your next game day appetizer spread.
The Bacon Wrap Trick That Keeps the Filling From Leaking
The biggest mistake with popper bites is overstuffing them and wrapping the bacon too loosely. When the filling mounds up past the pepper edges, it has nowhere to go once it heats, so it pushes out the sides and onto the pan. Keep the filling generous but level with the pepper, then pull the bacon snug so it overlaps itself a little. That overlap helps the strip shrink and tighten as it bakes.
Another thing that matters here is the rack. If the poppers sit directly on a baking sheet, the bacon steams in the rendered fat before it has a chance to crisp. The rack lifts them up and lets hot air circulate underneath, which gives you browned bacon and a better bite on the bottom side too.
What Each Ingredient Is Doing in These Popper Bites
- Jalapeños — These give the bite its shape and heat. Seed them well if you want a milder appetizer, but leave a little membrane behind if you want more kick, because that’s where most of the spice lives.
- Cream cheese — This is the base that keeps the filling lush and stable. It has to be softened first so it blends smoothly; cold cream cheese stays lumpy and won’t coat the cheddar evenly.
- Sharp cheddar — Cheddar adds salt, tang, and a little stretch when the poppers are hot. Pre-shredded works in a pinch, but freshly shredded melts cleaner and mixes into the cream cheese without the grainy coating that bagged cheese sometimes brings.
- Thin-cut bacon — Thin-cut bacon is the right choice because it finishes crisp at the same time the peppers soften. Thick-cut bacon often leaves you with browned pepper bites before the bacon has rendered enough.
- Honey — The drizzle isn’t essential, but it changes the whole bite. A little sweetness against the smoke and heat makes these taste more complete, especially if your jalapeños run hot.
Getting the Bacon Crispy Before the Peppers Go Mushy
Mix the filling until it’s uniform
Stir the cream cheese, cheddar, garlic powder, and smoked paprika until the mixture looks evenly speckled and smooth. If the cream cheese still has cold streaks, the filling won’t spread cleanly and you’ll get pockets of plain cream cheese inside the poppers. A spoon works, but a sturdy spatula or even a hand mixer on low makes the mixture easier to portion.
Fill the jalapeños with a light mound
Spoon the filling into each pepper half so it sits generously in the center without spilling over the sides. Too much filling peeks out and melts onto the rack before the bacon is done. If you want faster assembly, pipe it in with a zip-top bag and snip the corner; that gives you cleaner, more even portions.
Wrap and secure the bacon tightly
Lay a halved bacon strip across each stuffed pepper and wrap it snugly, overlapping the ends underneath. A toothpick keeps the wrap from unraveling while it bakes, especially as the bacon shrinks. If the bacon seems loose at first, that usually means it wasn’t pulled tight enough to begin with, and it will slide once the fat starts rendering.
Bake until the bacon shatters at the edges
Slide the rack into a 400°F oven and bake until the bacon is crisp and the filling is bubbling at the sides. The bacon should look deeply browned with some darker edges, and the cheese should be visibly hot, not just soft. If the peppers are tender but the bacon is still pale, give them a few more minutes; undercooked bacon is the one thing that ruins the texture here.
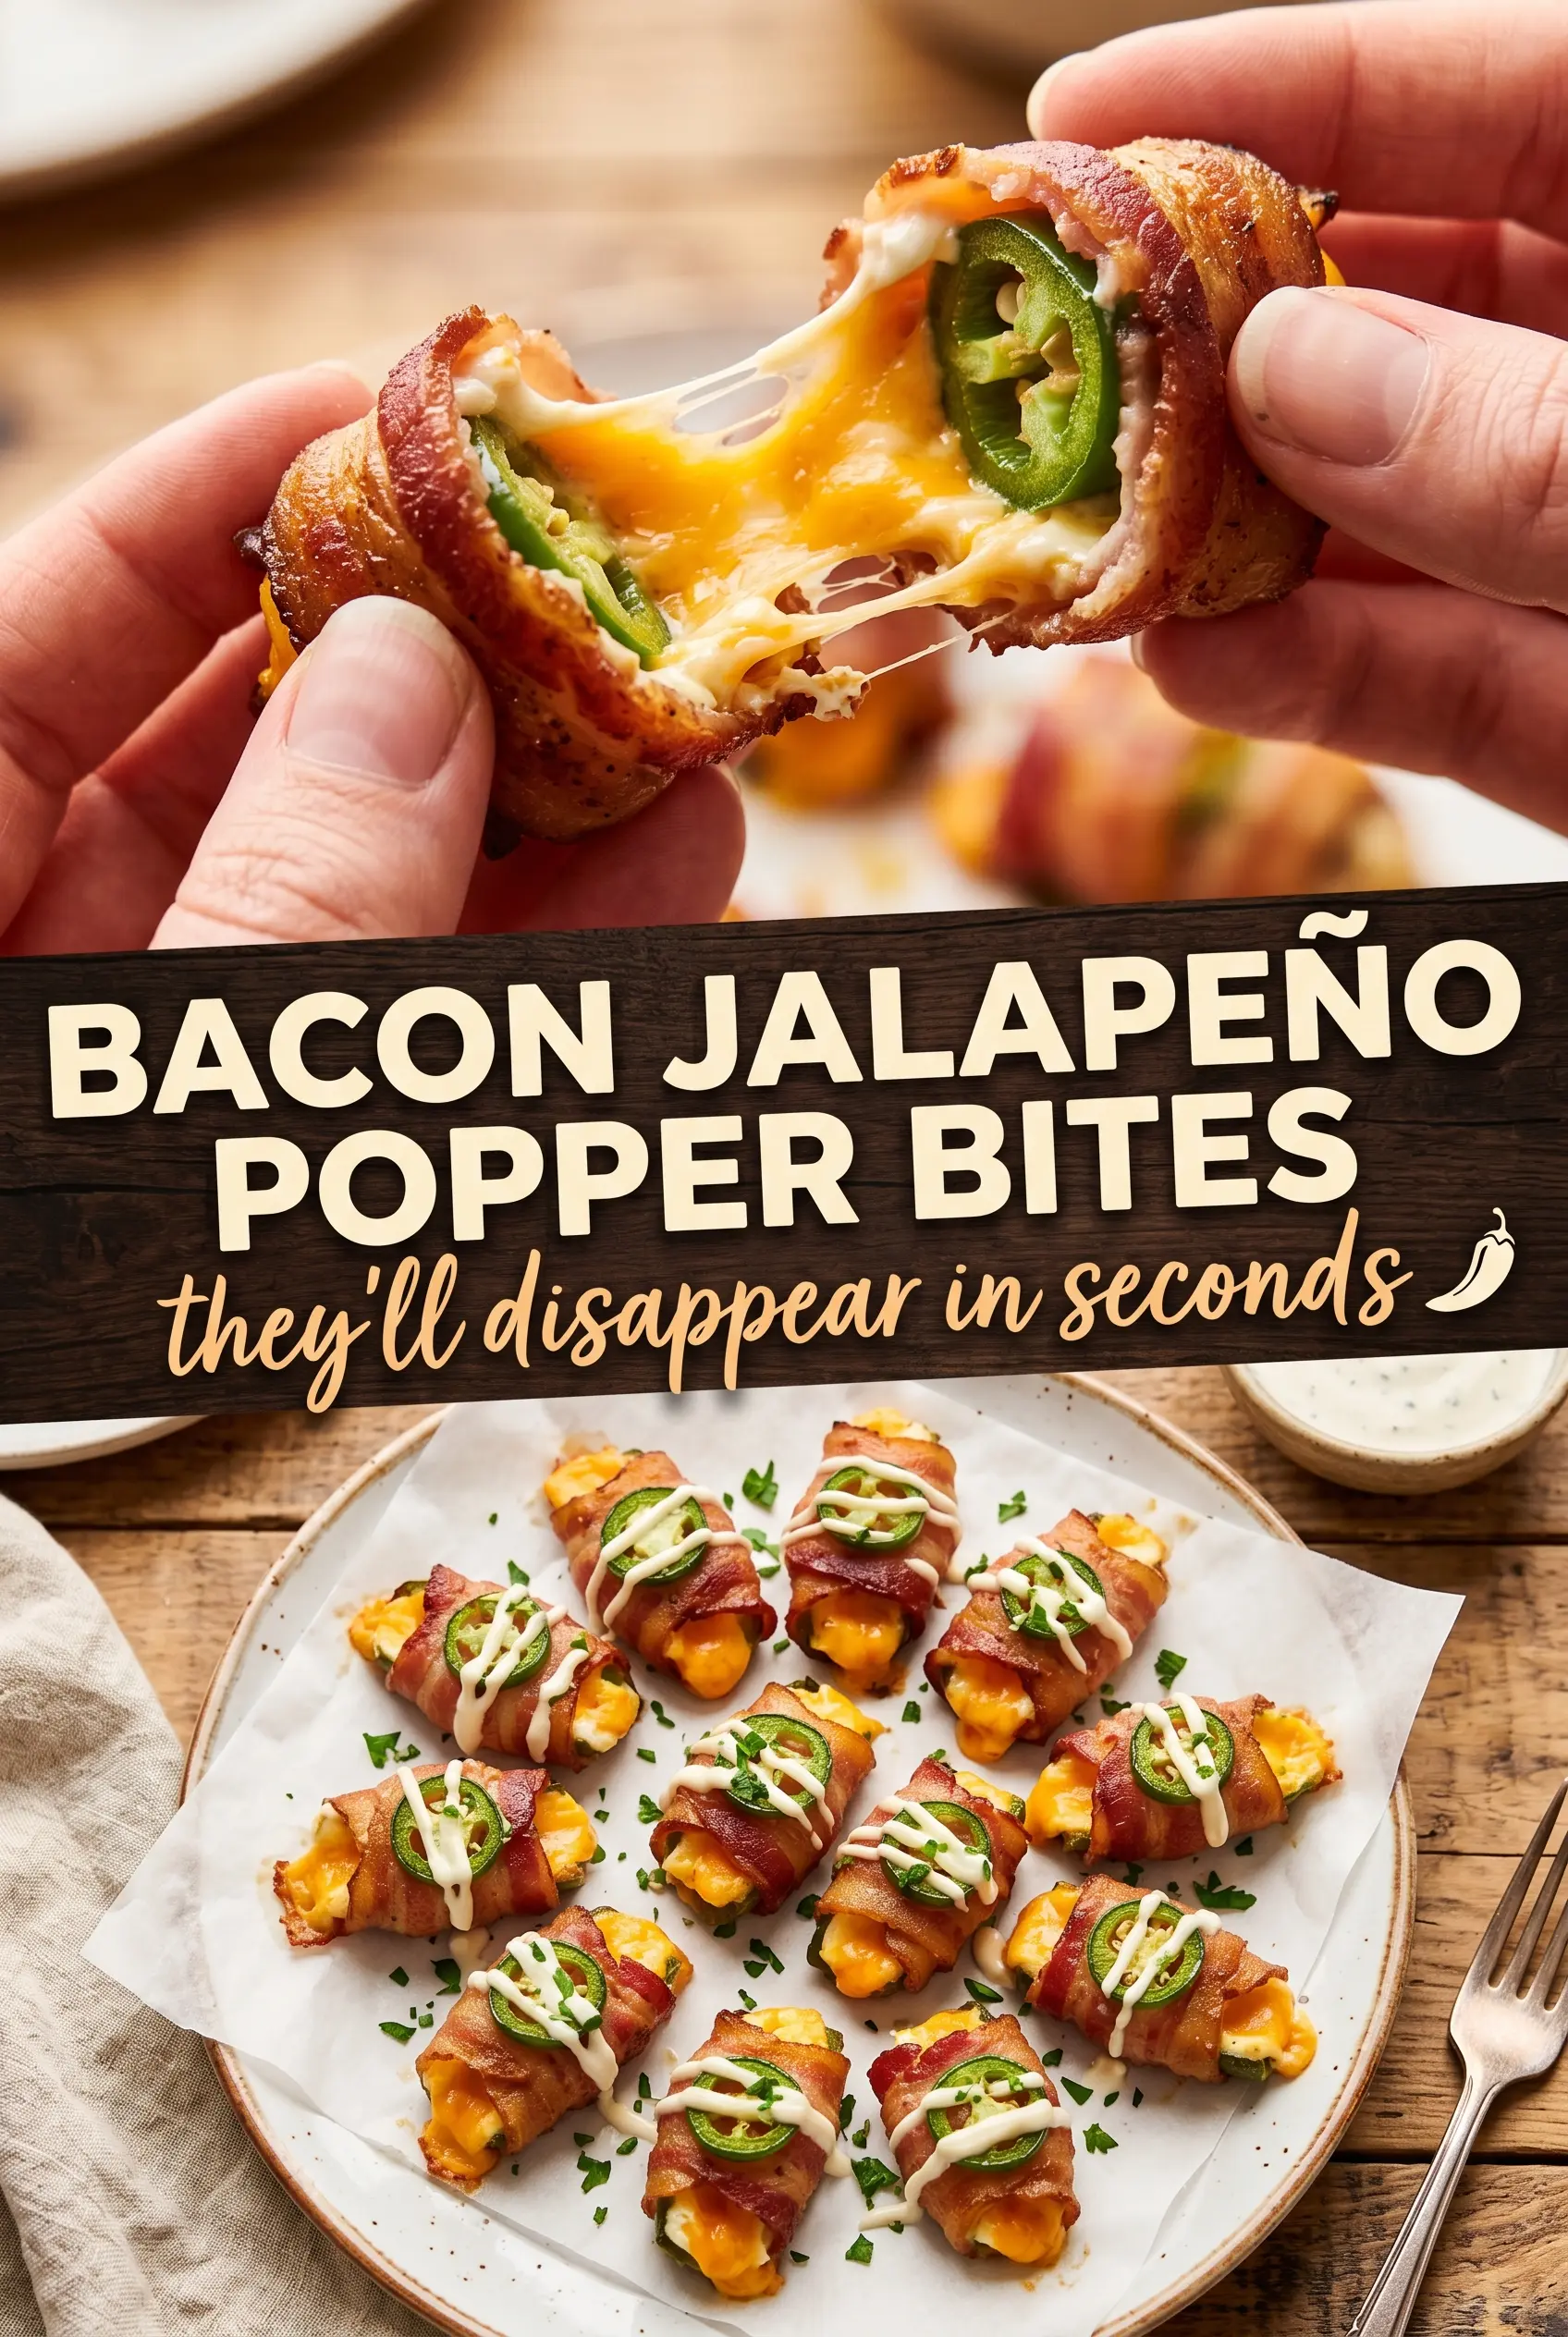
Finish with honey while they’re still hot
Drizzle the honey over the poppers right before serving so it clings to the bacon instead of soaking in. The heat helps it melt into a thin glaze, which gives you that sweet-salty finish in every bite. Serve them immediately, while the cheese is still creamy and the bacon is at its crispiest.
How to Make These Work for a Bigger Crowd or a Different Diet
Make them less spicy without losing the jalapeño flavor
Remove every seed and scrape out the white membrane inside each jalapeño half. That keeps the pepper flavor but cuts the heat way down, which is the best move if you’re serving people who like the idea of poppers more than the burn.
Swap the bacon for a vegetarian version
Use a plant-based bacon strip or skip the wrap and broil the stuffed peppers for the last minute or two to brown the filling. You’ll lose the smoky rendered-fat flavor, but the cheese filling and roasted jalapeños still give you a strong appetizer.
Make them ahead for a party
Stuff and wrap the poppers up to a day ahead, then keep them covered in the refrigerator until baking time. That saves the messy part for earlier in the day and lets you bake them fresh so the bacon stays crisp instead of softening as it sits.
Use a different cheese for a smokier bite
Swap half the cheddar for pepper jack or smoked gouda if you want a sharper finish. Pepper jack adds extra heat, while smoked gouda gives you more depth without changing the texture of the filling.
Storage and Reheating
- Refrigerator: Store leftovers in an airtight container for up to 3 days. The bacon softens a bit, but the flavor holds up well.
- Freezer: They freeze best before baking. Assemble, freeze on a tray until solid, then transfer to a bag; bake from frozen and add a few extra minutes.
- Reheating: Reheat on a rack in a 375°F oven or air fryer until the bacon crisps back up. The microwave will soften the bacon and make the filling oily, which is the fastest way to lose what makes these good.
Answers to the Questions Worth Asking
Bacon Jalapeño Popper Bites
Ingredients
Equipment
Method
- Preheat oven to 400°F and line a baking sheet with a wire rack for airflow.
- Arrange jalapeño halves cut-side up on a tray so they’re ready for filling.
- Mix cream cheese, shredded cheddar, garlic powder, and smoked paprika until fully combined and smooth.
- Fill each jalapeño half generously with the cream cheese mixture using a spoon or piping bag.
- Wrap each filled jalapeño half tightly with a half-strip of bacon and secure with a toothpick.
- Arrange the wrapped jalapeño halves on the wire rack with a little space between each bite.
- Bake at 400°F for 18–22 minutes until bacon is crispy and the filling is bubbling, with a hint of char on the edges.
- Drizzle with honey if desired, then serve hot while the cheese stays molten.