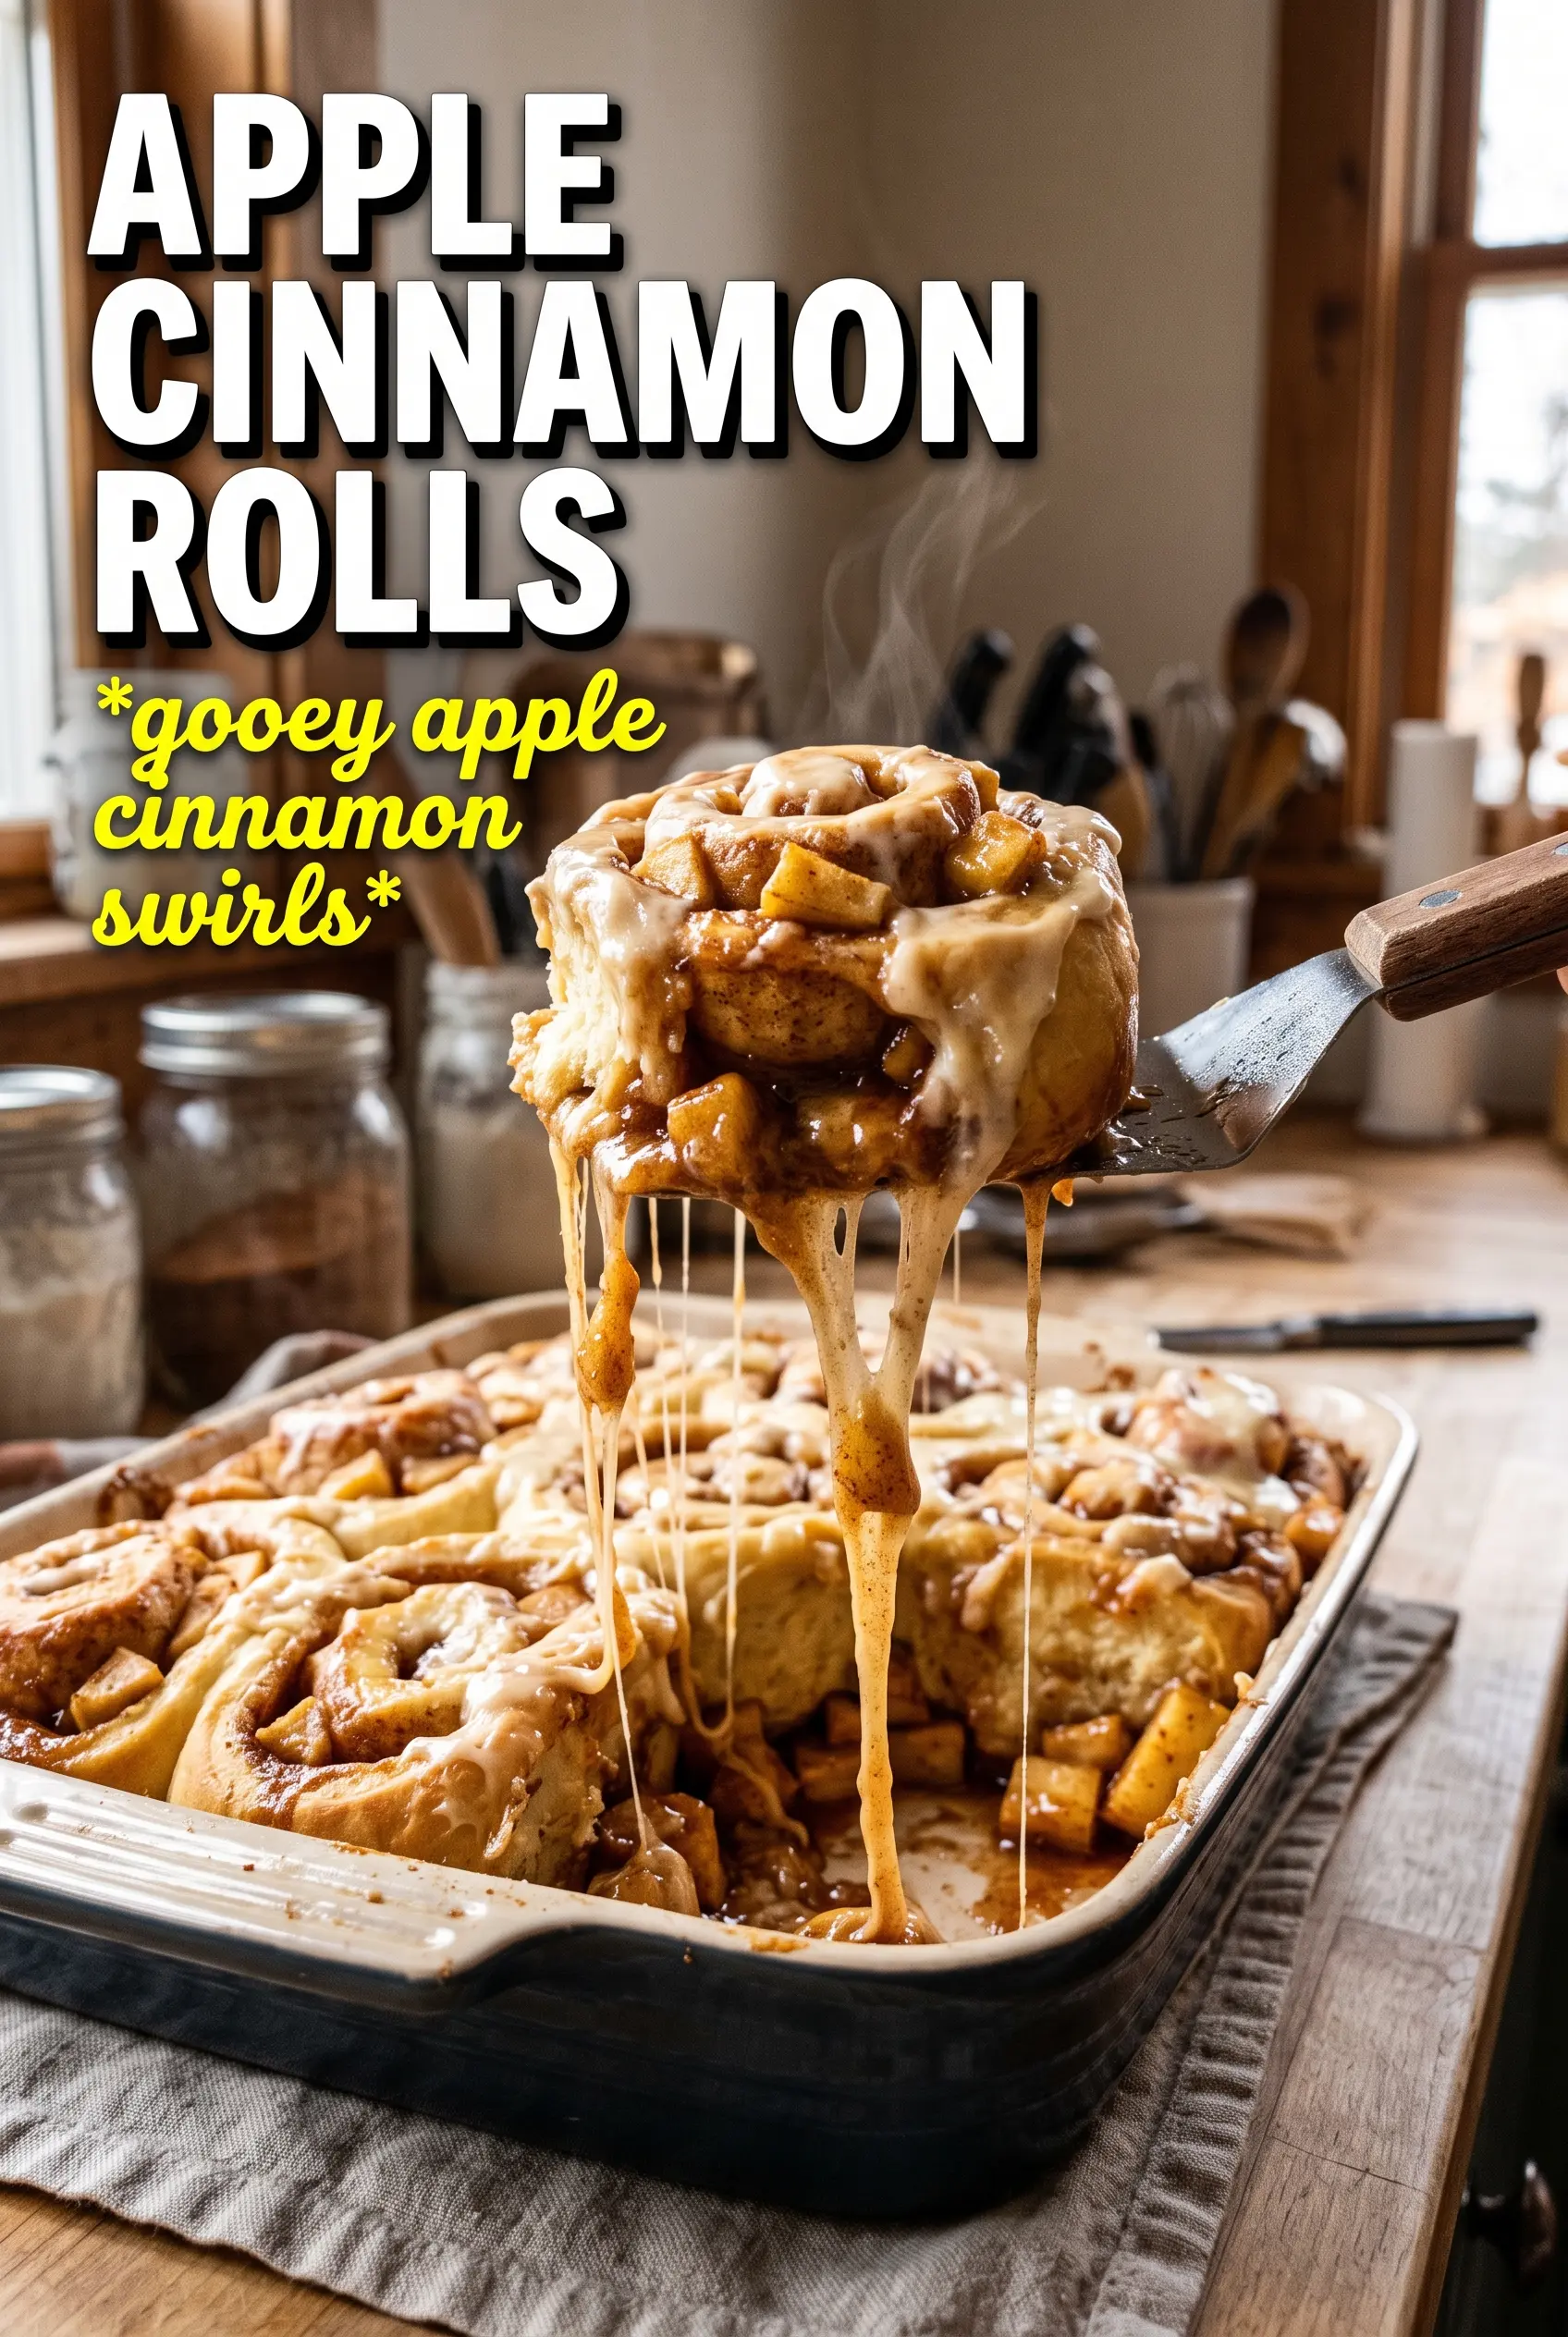
Apple cinnamon rolls bake up soft, tall, and fragrant, with buttery spirals wrapped around tender caramelized apples. The glaze melts into the warm cracks on top, and every bite gives you that mix of pillowy dough, cinnamon sugar, and just enough fruit to keep the sweetness from feeling heavy.
What makes this version work is cooking the apples first. Raw apple chunks leak too much juice in the oven and can leave the centers gummy, but a quick stovetop cook concentrates the flavor and keeps the filling tucked neatly into the swirls. The dough itself is enriched with milk, butter, and eggs, so it stays soft after baking instead of drying out around the edges.
Below you’ll find the timing that keeps the rolls fluffy, the filling from sliding out, and the glaze at just the right consistency. If you’ve ever had cinnamon rolls that baked up tight or watery in the middle, this method solves both problems.
The apples stayed tucked into the spirals and the centers baked up fluffy instead of doughy. I also loved that the glaze melted into every layer without making the rolls soggy.
Like these apple cinnamon rolls? Save them to Pinterest for the mornings when you want soft spirals, caramelized apples, and cream cheese glaze.
The Trick to Keeping the Apple Filling from Turning the Centers Wet
Apple filling can ruin cinnamon rolls faster than almost anything else. If the fruit goes in raw, it releases juice while the dough is rising and again while it bakes, which leaves you with gaps, soggy bottoms, and a filling that slides right out of the spiral.
Cooking the apples first solves that problem. The butter helps them soften, the brown sugar draws out moisture, and the cinnamon and nutmeg have a chance to coat the fruit instead of disappearing into a puddle. You want the filling cool before you spread it on the dough, because warm filling melts the dough and makes rolling messy.
- Apples — A firm baking apple holds its shape best. Peel and dice them small so they cook quickly and stay tucked into the swirls instead of poking through the dough.
- Brown sugar — This gives the filling its caramel note and helps thicken the juices in the pan. Light or dark both work; dark brown sugar will taste deeper and more molasses-heavy.
- Butter — Don’t skip it. It carries the spices and helps the apples soften evenly. If you use less, the filling can taste dry and sharp instead of round and sticky.
- Cinnamon and nutmeg — Cinnamon brings the obvious warmth, but nutmeg gives the filling that bakery-style depth. Freshly grated nutmeg is stronger, so use a light hand if yours is potent.
What Each Ingredient Is Actually Doing in This Recipe

- Primary ingredient (the star) — Quality matters most. Choose the best you can find.
- Cooking medium (oil, butter, or broth) — This carries flavors and prevents dryness.
- Seasonings (salt, pepper, spices, herbs) — Layer flavors so nothing overpowers. Build depth gradually.
- Aromatics (garlic, onion, herbs) — Cook with fat to bloom flavors. Become the foundation.
- Supporting ingredients — Complement the main ingredient without overpowering it.
- Sauce or liquid (if applicable) — Brings flavors together. Balance richness with acid.
- Acid (lemon, vinegar, wine, or other) — Brightens and prevents flat-tasting results.
- Final finish (garnish, glaze, or sauce) — Prevents one-dimensional taste and adds visual appeal.
Building Soft Rolls Without Overworking the Dough
Starting the Yeast in Warm Milk
Stir the yeast into warm milk with a little sugar and wait for it to look foamy on top. That foam tells you the yeast is alive and ready to work. If the milk is too hot, you’ll kill the yeast; if it’s too cool, the dough still rises, but it takes much longer and can bake up dense.
Mixing and Kneading to the Right Feel
Add the remaining dough ingredients and mix until the dough comes together in a soft mass. Then knead until it’s smooth and elastic, about 8 minutes. The dough should feel tacky but not sticky enough to leave a thick film on your hands; too much flour here makes the rolls dry and tight after baking.
Letting the Dough Double Without Rushing It
Set the dough in a greased bowl and let it rise until doubled in size. The dough should look puffy and airy, not just slightly larger. If your kitchen runs cool, use the oven with the light on or another draft-free spot, because a weak first rise gives you small, tough rolls that won’t fill the pan well.
Rolling, Filling, and Cutting Clean Spirals
Roll the dough into a rectangle and spread the cooled apple mixture all the way to the edges, leaving only a small strip along one long side for sealing. Roll it up tightly so the spiral doesn’t open during baking, then use a sharp knife or unflavored dental floss to cut clean slices. A dull knife compresses the dough and squashes the layers, which is how you end up with lopsided rolls instead of tall spirals.
The Final Bake and Warm Glaze
Arrange the rolls close together in the pan and let them puff again before baking. They should look noticeably fuller and touch each other at the edges, which helps them rise upward instead of spreading out. Bake until the tops are golden and the centers are set, then glaze them while they’re still warm so the cream cheese icing melts into the crevices without disappearing completely.
Three Ways to Make These Rolls Fit What You Have
Dairy-Free Rolls
Swap the milk for an unsweetened non-dairy milk and use plant-based butter in both the dough and filling. The rolls still bake up soft, but the glaze will taste a little less tangy unless you use a dairy-free cream cheese that holds its shape well.
Make Them Ahead for a Morning Bake
Shape the rolls, place them in the pan, cover tightly, and refrigerate overnight after the second rise begins. In the morning, let them sit at room temperature while the oven heats so they can finish puffing before baking. Cold dough baked straight from the fridge can leave you with an underdone center and overbrowned tops.
Using Pears Instead of Apples
Firm pears work if that’s what you have, but they soften faster than apples and can turn jammy. Cook them a minute or two less than you would apples, just until the juices thicken and the pieces still hold their shape.
Lighter Glaze With Less Sweetness
Cut the powdered sugar back a little and add just enough milk to make a drizzle. You’ll get more cream cheese tang and less of that thick bakery sweetness, but the glaze won’t cling as heavily to the rolls.
Storage and Reheating
- Refrigerator: Store covered for up to 4 days. The rolls stay soft, but the glaze firms up.
- Freezer: Freeze baked rolls without glaze for up to 2 months. Wrap them well, then thaw overnight in the fridge before warming and glazing.
- Reheating: Warm individual rolls in the microwave for 20 to 30 seconds, or cover the pan with foil and heat in a low oven until the centers are just warmed through. High heat dries the dough before the middle is hot.