Amish apple fritter bread bakes up with a tender, buttery crumb, a ribbon of cinnamon-sugar apples through the middle, and a glossy glaze that settles into the top just enough to soak in without making it soggy. The first slice holds together like a good quick bread should, but the apple pockets stay soft and jammy, which gives every bite that apple-fritter feel without the hassle of frying.
The part that makes this loaf work is how the apples are divided. Tossing half with cinnamon sugar pulls out some juice before the batter goes in, so you get that caramelized, spiced layer in the center instead of watery fruit sinking to the bottom. The rest stay fresher on top and give the loaf a little texture after baking. I also use a simple milk glaze instead of anything heavy, because it adds sweetness without burying the apple-cinnamon flavor.
Below you’ll find the layering trick that keeps the swirls distinct, plus a few swaps that help if your apples are extra juicy or you want to make the loaf a little more breakfast-friendly.
The cinnamon apples stayed right where I layered them, and the loaf came out moist without being gummy. The glaze on top set up just enough that it didn’t slide off when I sliced it warm.
Save this Amish Apple Fritter Bread for the days when you want a cinnamon-apple loaf with a bakery-style glaze and a soft, buttery crumb.
The Layering Trick That Keeps the Apples From Sinking
Most quick breads with fruit fail in the same way: the batter is too loose, the fruit is too wet, and everything drops to the bottom before the center sets. This loaf avoids that by using a fairly thick batter and by splitting the apples into two jobs. Some get tossed with cinnamon sugar so they soften just enough to cling to the batter, and the rest stay in larger pockets near the top where they can caramelize instead of disappearing.
That layering matters more than it looks on paper. If you dump all the apples into the batter at once, you end up with a dense, wet band at the bottom and not much apple flavor where you want it. The loaf slices cleaner when the fruit is staged in layers, and the cinnamon sugar gets a chance to melt into the batter as it bakes.
- Brown sugar and cinnamon — This is the swirl and the apple coating. Brown sugar brings a little molasses depth that plain white sugar can’t mimic, and it helps the fruit soften into a sticky layer.
- Apples — Use a firm baking apple if you can. Softer apples turn to mush and blur into the crumb, while firmer apples keep their shape and give you those tender little pockets throughout the loaf.
- Milk — Whole milk gives the batter enough richness to stay moist without becoming heavy. Lower-fat milk works in a pinch, but the loaf won’t taste quite as plush.
- Butter — Softened butter is what gives the bread that old-fashioned, cake-like tenderness. Melted butter won’t whip with the sugar the same way, and the crumb will come out tighter.
What Each Ingredient Is Actually Doing in This Recipe
- Primary ingredient (the star) — Quality matters most. Choose the best you can find.
- Cooking medium (oil, butter, or broth) — This carries flavors and prevents dryness.
- Seasonings (salt, pepper, spices, herbs) — Layer flavors so nothing overpowers. Build depth gradually.
- Aromatics (garlic, onion, herbs) — Cook with fat to bloom flavors. Become the foundation.
- Supporting ingredients — Complement the main ingredient without overpowering it.
- Sauce or liquid (if applicable) — Brings flavors together. Balance richness with acid.
- Acid (lemon, vinegar, wine, or other) — Brightens and prevents flat-tasting results.
- Final finish (garnish, glaze, or sauce) — Prevents one-dimensional taste and adds visual appeal.
Building the Batter So the Loaf Stays Tender, Not Gummy
The mixing order matters here because this is a quick bread, not a cake that needs long beating. Cream the butter and sugar until the mixture looks pale and fluffy, then stop as soon as the eggs and vanilla are blended in. Once the flour goes in, alternate it with the milk and mix only until you stop seeing dry streaks. Overmixing is the fastest way to get a tough loaf, and it can also make the center bake up dense instead of soft.
Creaming the Butter and Sugar
Beat the softened butter and granulated sugar until the mixture looks lighter in color and a little airy. That step traps tiny pockets of air, which help the loaf rise without becoming dry. If the butter is too cold, the sugar will just smear through it and the mixture won’t fluff up properly.
Adding the Dry Ingredients in Turns
Whisk the flour, baking powder, baking soda, and salt together before they go in. Then add the dry mixture in batches with the milk, starting and ending with flour. This keeps the batter smooth and stops you from overworking it, which is especially important once the flour is hydrated.
Layering the Apples Before Baking
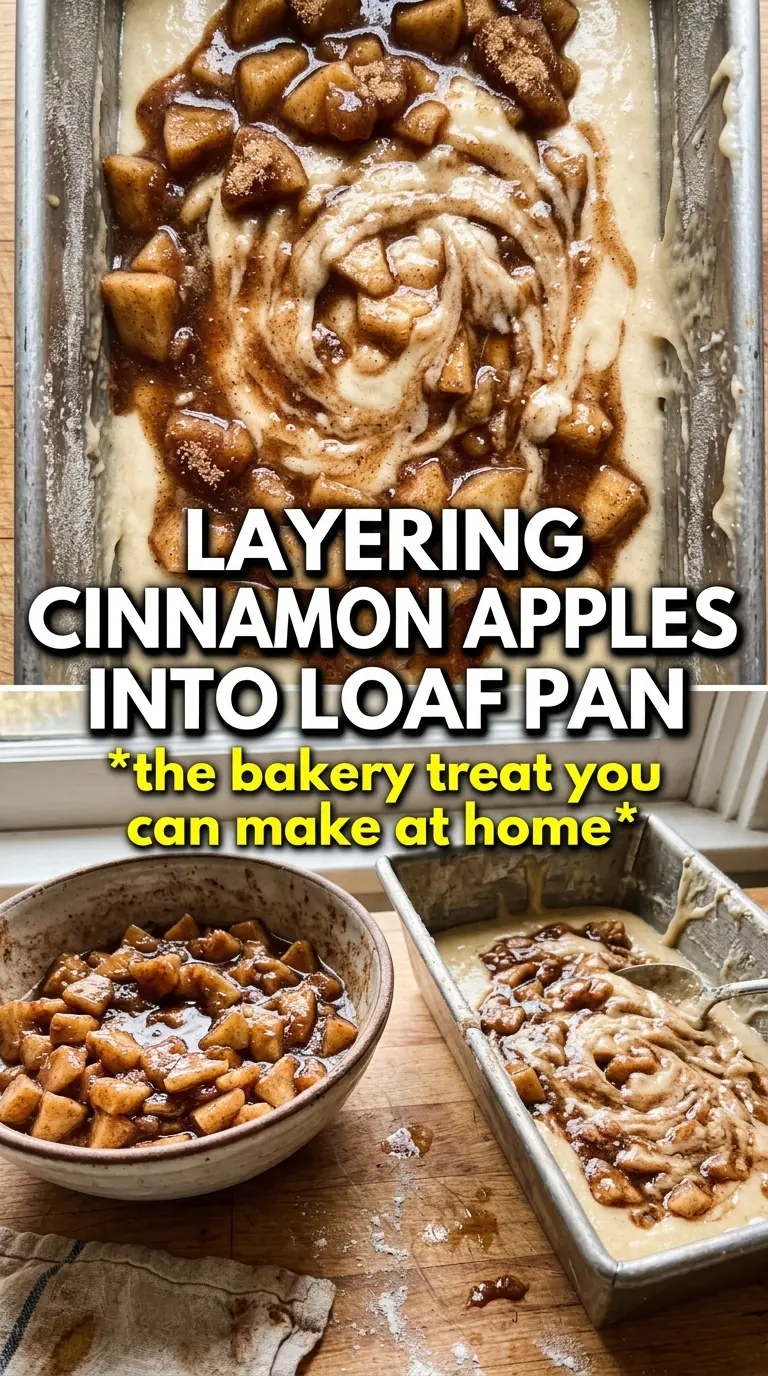
Spread half the batter into a greased 9×5 loaf pan, then add half the apples and a bit of the cinnamon sugar before covering it with the rest of the batter. Finish with the remaining apples on top. If the top looks crowded, press the apple pieces in just slightly so they anchor in place, but don’t bury them completely or you’ll lose that caramelized top.
Use Pears Instead of Apples
Firm pears can stand in for the apples if that’s what you have, but they’ll bake up softer and a little more floral. Choose pears that are still slightly firm and cut them small so they don’t disappear into the batter. The loaf will taste gentler and less tart, so the cinnamon becomes more important.
Make It Dairy-Free
Use a good plant-based butter and unsweetened non-dairy milk in the same amounts. The texture will still be soft, but you may lose a little of the buttery richness that gives this loaf its bakery-style crumb. Stick with a neutral milk like oat or almond so the apple and cinnamon stay in front.
Gluten-Free Version
A good 1:1 gluten-free baking blend works here, but the loaf will be a little more delicate when warm. Let it cool fully before slicing so the crumb can set. If your blend doesn’t include xanthan gum, choose one that does or the bread may crumble when you cut it.
Storage and Reheating
- Refrigerator: Store covered for up to 4 days. The glaze will soften a little, but the loaf stays moist.
- Freezer: Freeze slices tightly wrapped for up to 2 months. Thaw at room temperature so the crumb doesn’t turn soggy from condensation.
- Reheating: Warm slices briefly in the microwave or in a low oven. Don’t blast it on high heat or the glaze can melt off and the edges dry out before the center warms through.
The Questions That Come Up After the First Slice
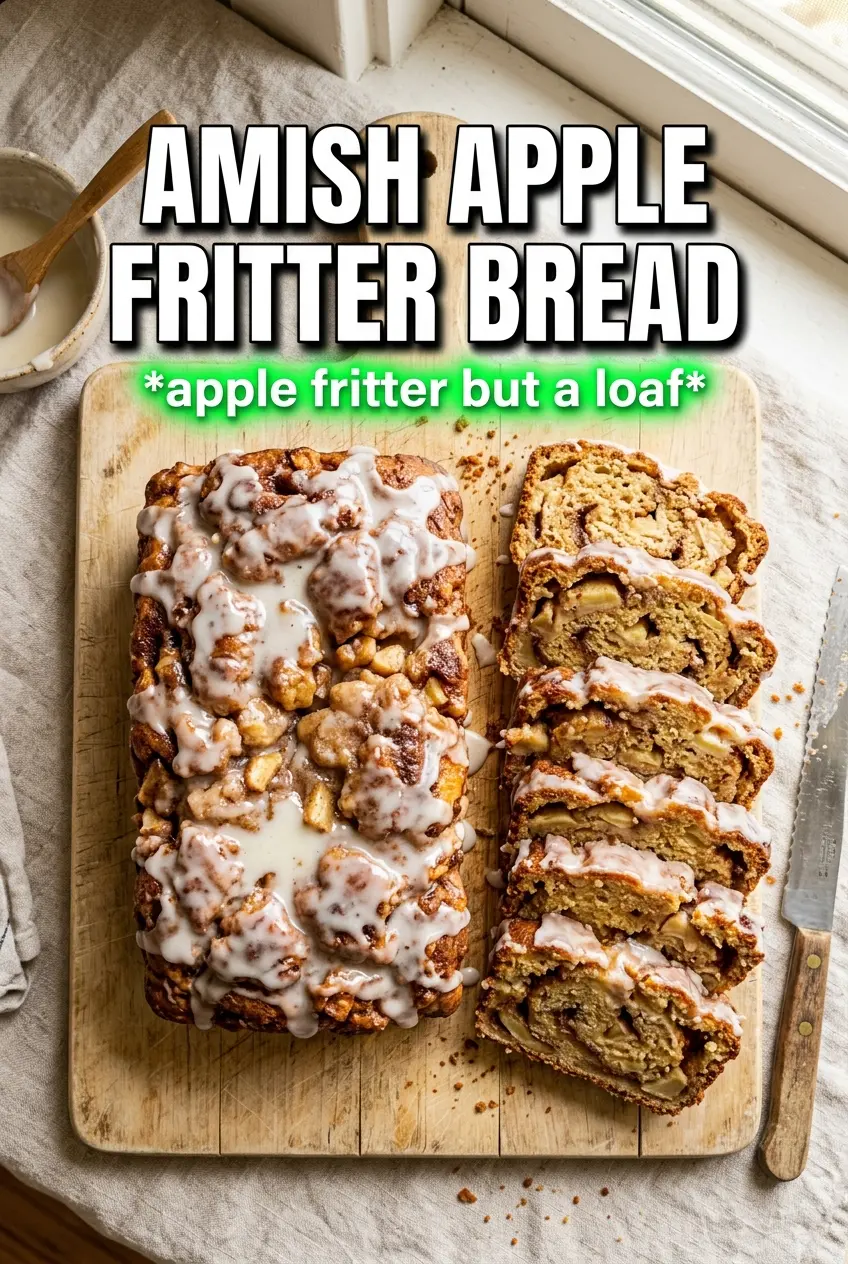
Amish Apple Fritter Bread
Ingredients
Equipment
Method
- Preheat the oven to 350°F and grease a 9x5 loaf pan.
- Mix the brown sugar with 2 teaspoons cinnamon, then toss half with the finely diced apples.
- Beat the softened butter and granulated sugar until fluffy, then add the eggs and vanilla extract and beat again until smooth.
- Whisk the all-purpose flour, baking powder, baking soda, and salt together.
- Alternate adding the dry mixture with the whole milk to the butter mixture, mixing just until the batter is combined.
- Pour half the batter into the loaf pan, then layer in half the cinnamon-sugar apples.
- Sprinkle the remaining plain cinnamon sugar over the apples as a visible top layer.
- Pour the remaining batter over the apples, then top with the remaining apples so they peek through.
- Bake for 55-60 minutes at 350°F, until a toothpick inserted in the center comes out clean.
- Stir powdered sugar with 2 tablespoons milk to make a smooth glaze.
- Drizzle the glaze over the loaf while it’s warm so it soaks slightly and looks glossy on top.