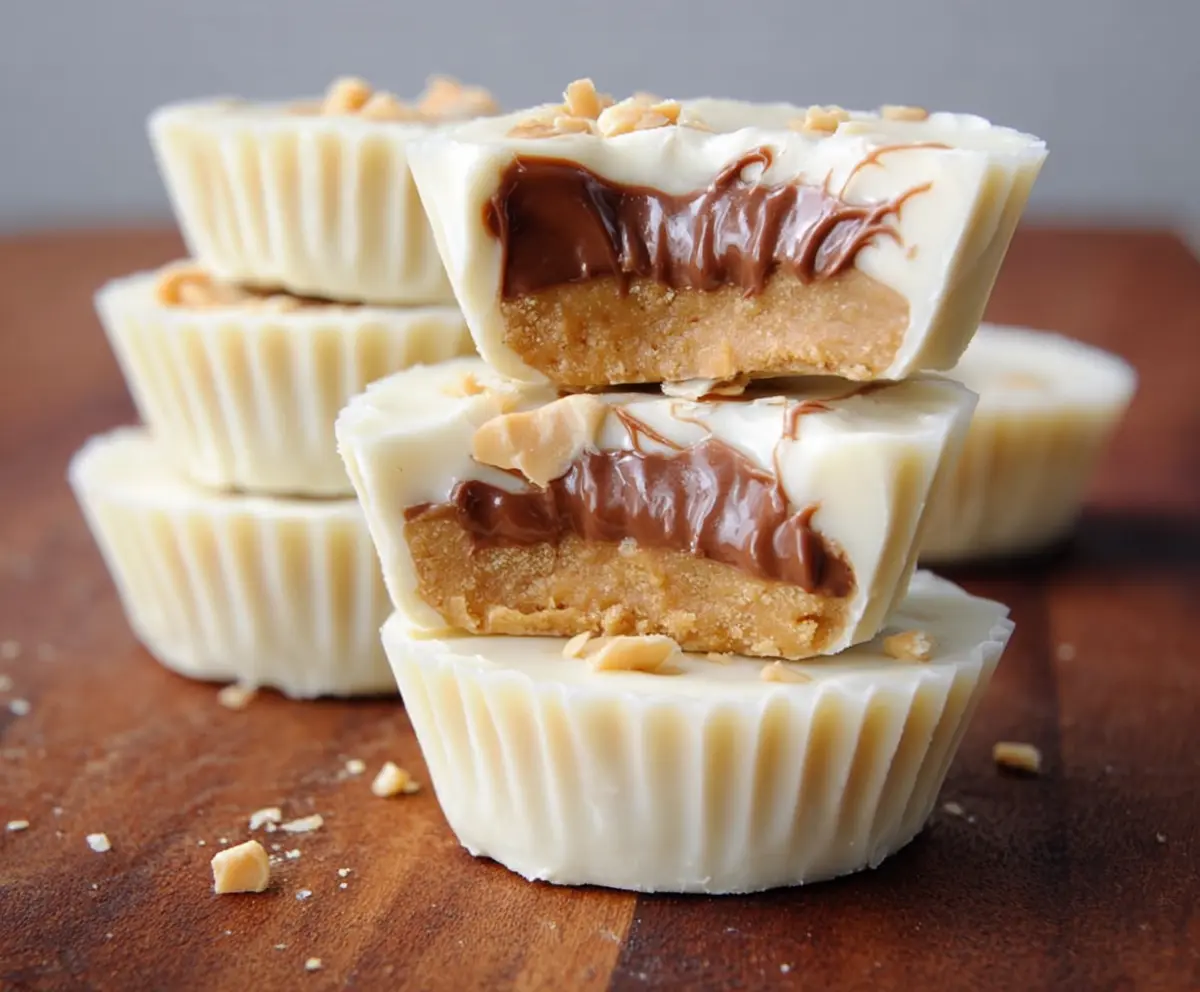
White Chocolate Peanut Butter Cups are a sweet treat that combines creamy, smooth white chocolate with rich, salty peanut butter inside a little cup. These tasty snacks are perfect for anyone who loves the classic peanut butter and chocolate mix but wants a twist with white chocolate’s gentle sweetness.
I love making these at home because they’re simple and quick to prepare. It’s fun to see the peanut butter filling come together between the layers of white chocolate, and I always make a little extra just in case someone steals one before they’re even set! A little tip: chilling them in the fridge helps keep everything nice and firm, so they don’t get messy when you bite in.
These cups are great for sharing at parties, packing in lunchboxes, or even having as a late-night snack. I find they’re just the right size to satisfy a sweet craving without going overboard. Whenever I bring them to gatherings, they disappear fast, and friends always ask me for the recipe. It’s definitely a crowd-pleaser that feels like a warm hug in every bite.
Key Ingredients & Substitutions
White Chocolate: Use good quality white chocolate chips or bars for smooth melting. If you can’t find white chocolate, you can swap it with milk chocolate or even dark chocolate for a richer taste.
Peanut Butter: Creamy peanut butter works best for an easy spread and a smooth filling. You can use natural peanut butter but add a bit more powdered sugar to help it hold together.
Powdered Sugar: This sweetens and thickens the peanut butter filling. If you prefer less sweetness, reduce it slightly or try coconut sugar as a substitute.
Butter and Vanilla Extract: These keep the filling creamy and add flavor. Unsalted butter lets you control the saltiness better. Vanilla is optional but adds nice depth.
Crushed Peanuts: These add a nice crunch as topping. You can leave them out or replace with chopped almonds or other nuts if desired.
How Do You Get Smooth, Firm Layers Without Cracking?
The big trick for perfect peanut butter cups is melting and setting the chocolate carefully. Here’s what helps:
- Melt the chocolate slowly in short bursts in the microwave, stirring often, to avoid burning and keep it smooth.
- Let each chocolate layer set firmly in the freezer before adding the next. This keeps layers distinct and stops them from mixing.
- Use paper liners so you can remove cups easily without cracking.
- Press the peanut butter layer gently to flatten but don’t press so hard it breaks the bottom chocolate layer.
- Chill the finished cups in the freezer until they’re firm, then store in the fridge to keep them solid.
Equipment You’ll Need
- Microwave-safe bowls – I use these to melt the chocolate in short, controlled bursts without mess.
- Paper muffin cups – make it easy to shape and remove the cups neatly.
- Small spoon or silicone spatula – helpful for spreading the melted chocolate evenly in the cups.
- Freezer – essential for setting each layer quickly and keeping everything firm and easy to work with.
Flavor Variations & Add-Ins
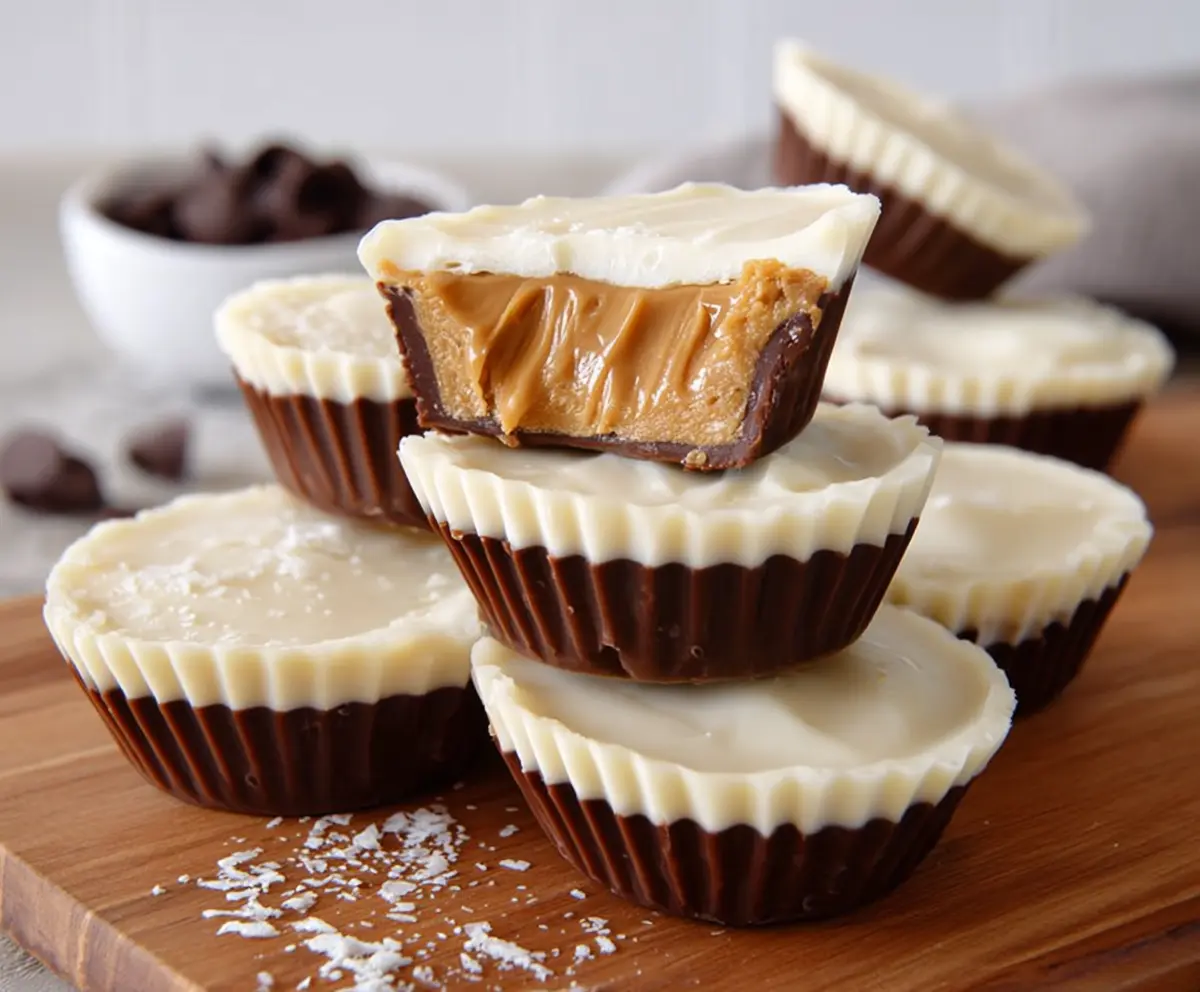
- Use dark or milk chocolate instead of white for a different flavor profile. It’s richer and less sweet.
- Add a dash of cinnamon or chili powder to the chocolate for a spicy twist—great for adults craving something different.
- Mix chopped pretzels or crispy rice into the peanut butter for extra crunch and texture.
- Swirl caramel or raspberry jam into the peanut butter layer before topping with chocolate for a fruity or caramel flavor boost.
White Chocolate Peanut Butter Cups
Ingredients You’ll Need:
- 2 cups white chocolate chips or chopped white chocolate
- 1 cup creamy peanut butter
- 1/4 cup powdered sugar
- 1/4 cup unsalted butter, softened
- 1/2 teaspoon vanilla extract
- A pinch of salt (optional)
- Crushed peanuts or chopped peanuts for garnish (optional)
- Paper muffin cups
How Much Time Will You Need?
This recipe takes about 15 minutes of preparation time, plus 40 minutes of chilling time to let the layers set well. Most of the work involves melting chocolate and mixing the peanut butter filling, with some waiting time in the freezer to make sure your cups stay firm and delicious.
Step-by-Step Instructions:
1. Prepare Your Muffin Tin:
Line a muffin tin with paper muffin cups. This helps shape your peanut butter cups and makes them easy to remove later. Set the tin aside.
2. Melt the First Half of the White Chocolate:
Place 1 cup of white chocolate chips into a microwave-safe bowl. Heat in 30-second intervals, stirring in between, until the chocolate is completely smooth and melted.
3. Add the Bottom Chocolate Layer:
Spoon about 1 tablespoon of melted white chocolate into the bottom of each muffin cup. Spread it a little up the sides to create a shell. Place the tin in the freezer for about 10 minutes to let this layer harden.
4. Make the Peanut Butter Filling:
While the chocolate cools, mix together the creamy peanut butter, powdered sugar, softened butter, vanilla extract, and a small pinch of salt in a bowl. Stir until smooth and creamy.
5. Add the Peanut Butter Layer:
Once the chocolate has set, place about 1 tablespoon of the peanut butter mixture on top in each cup. Gently press down to flatten it slightly, being careful not to break the chocolate shell beneath.
6. Melt the Remaining White Chocolate:
Microwave the rest of the white chocolate chips in the same way as before until fully melted and smooth.
7. Add the Top Chocolate Layer:
Cover the peanut butter layer completely with the melted white chocolate, spreading it evenly. If you’d like, sprinkle crushed peanuts on top for a crunchy finish.
8. Chill and Set:
Put the muffin tin back into the freezer and chill until the peanut butter cups are firm—about 30 minutes.
9. Serve and Store:
Remove the peanut butter cups from the paper liners and enjoy! Store any leftovers in an airtight container in the refrigerator to keep them fresh and firm.
Can I Use Natural Peanut Butter Instead of Creamy?
Yes, you can! Just keep in mind natural peanut butter is usually thinner and less sweet. To help the filling hold its shape, add a little extra powdered sugar and chill the mixture before assembling.
How Should I Store Leftover White Chocolate Peanut Butter Cups?
Store them in an airtight container in the refrigerator. They will keep well for up to one week. If you want to keep them longer, freeze them for up to 2 months and thaw in the fridge before enjoying.
Can I Make These Peanut Butter Cups Without a Microwave?
Absolutely! Melt the white chocolate using a double boiler on the stove over simmering water. Stir until smooth, then proceed with the recipe as usual.
What Can I Use Instead of Paper Muffin Cups?
If you don’t have paper liners, silicone mini muffin molds work great and make removing the cups easy. Just be sure to grease them lightly to prevent sticking.