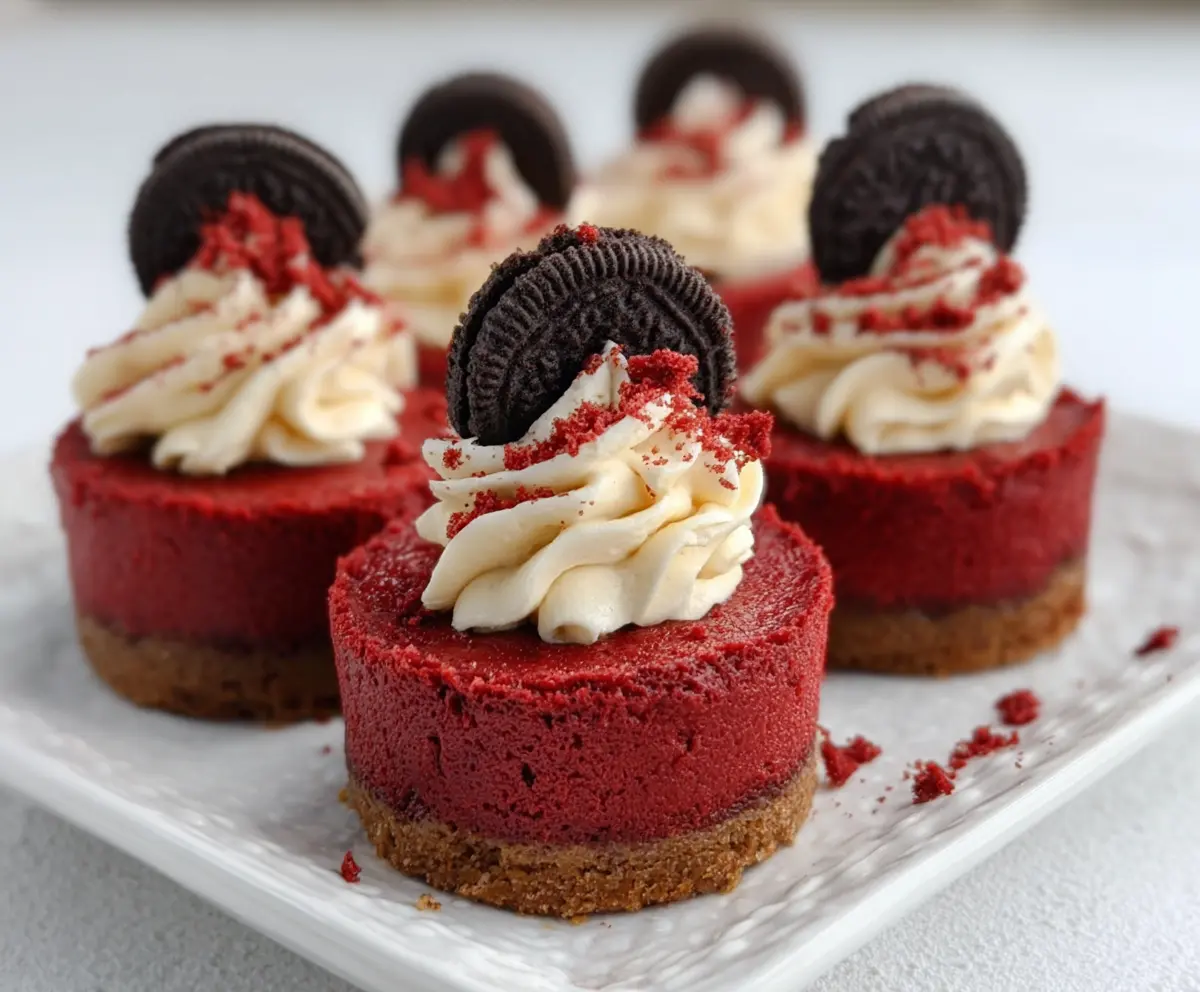
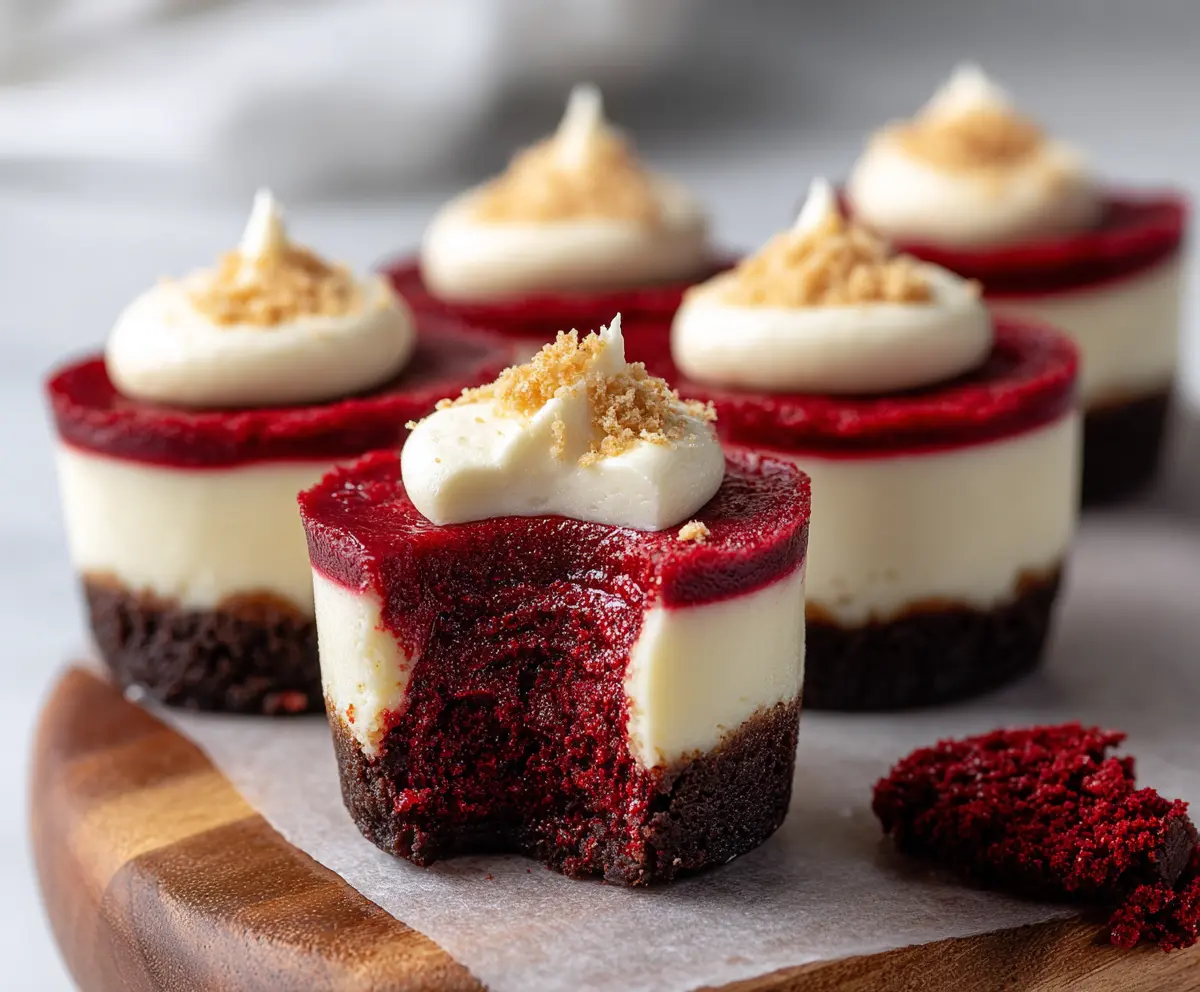
Mini Red Velvet Cheesecakes are little bites of happiness that mix the classic smoothness of cheesecake with the rich, deep flavors of red velvet cake. Each mini cheesecake is creamy, lightly tangy, and has just the right hint of cocoa, all wrapped up in a sweet, velvety base that makes every bite special.
I love making these because they’re the perfect size for sharing and you don’t have to feel guilty about eating a whole slice! Plus, topping them with a little dollop of whipped cream or a sprinkle of cocoa powder adds a simple touch that makes them look and taste even more inviting. It’s always a crowd-pleaser at parties or when you want a cozy treat.
One of my favorite things about mini cheesecakes is how easy they are to pop out of the pan without falling apart, so serving them on a pretty plate with some fresh berries feels like a little celebration every time. I find myself coming back to this recipe whenever I want a dessert that’s both elegant and super comforting, and that’s sure to put a smile on everyone’s face.
Key Ingredients & Substitutions
Cream Cheese: This is the star of the cheesecake, giving it that classic creamy texture. For a lighter version, you can use reduced-fat cream cheese, though the texture might be a bit less rich.
Graham Cracker Crust: It adds a nice crunch and slightly sweet base. If you want something different, try crushed digestive biscuits or even Oreo crumbs for a chocolatey twist.
Red Food Coloring & Cocoa Powder: The red velvet’s signature color and subtle chocolate flavor come from these. You can swap the food coloring for natural beet juice if you want to avoid artificial dyes.
Sour Cream: Sour cream helps keep the cheesecake moist and adds a gentle tang. You can substitute with plain Greek yogurt for a similar texture and flavor.
Heavy Cream for Topping: Whipped cream on top makes it light and fluffy. If dairy is a concern, coconut cream is a great non-dairy alternative.
How Do You Get Mini Cheesecakes Out of the Pan Without Breaking Them?
Removing mini cheesecakes can be tricky because they’re delicate. Here are some tips to help you get tidy, intact treats every time:
- Line your muffin pan with paper liners to make lifting them out easier and to protect the sides.
- Let the cheesecakes chill overnight. This firm setting makes removal much simpler.
- If you don’t use liners, run a thin knife around the edges before trying to remove them to loosen the cheesecake.
- Use a small spatula or spoon to gently lift them out, being careful not to bump the sides or bottoms.
- Serve on a flat surface like a plate or tray to avoid tipping.
Patience and gentle handling are key. I always chill mine well and use liners, which saves so much headache!
Equipment You’ll Need
- Mini cheesebaking pan or muffin tin – I find this makes perfectly shaped mini cheesecakes with no fuss.
- Cupcake liners or parchment paper – these make removing the cheesecakes easy and keep them looking neat.
- Mixing bowls – for mixing the crust and filling; a sturdy bowl helps mix smoothly.
- Electric hand mixer or stand mixer – makes creaming the cheese and whipping cream quick and easy.
- Spatula – for folding ingredients and spreading batter evenly.
- Measuring cups and spoons – to get the right amount of each ingredient without fuss.
Flavor Variations & Add-Ins
- Chocolate chips or chunks – fold into the batter for extra chocolatey bites.
- White chocolate or milk chocolate – swap the cocoa powder or add melted chocolate for different flavors.
- Fresh berries or fruit preserves – add on top or swirl into the filling for fruity bursts.
- Mint or almond extract – a small splash adds a new flavor dimension to the filling.
Mini Red Velvet Cheesecake
Ingredients You’ll Need:
For the Crust:
- 1 1/2 cups graham cracker crumbs
- 1/4 cup granulated sugar
- 1/2 cup unsalted butter, melted
For the Red Velvet Cheesecake Filling:
- 16 oz (450g) cream cheese, softened
- 1 cup granulated sugar
- 2 large eggs
- 1 teaspoon vanilla extract
- 2 tablespoons unsweetened cocoa powder
- 1 tablespoon red food coloring
- 1/2 cup sour cream
- 1 tablespoon all-purpose flour
For the Topping:
- 1 cup heavy cream
- 2 tablespoons powdered sugar
- 1 teaspoon vanilla extract
- Mini Oreo cookies (for garnish)
- Reserved red velvet crumbs (optional for garnish)
How Much Time Will You Need?
This recipe takes about 20 minutes to prepare, 18-20 minutes to bake, and at least 4 hours to chill in the fridge (overnight chilling is best). The total time might be around 5 hours, but most of it is hands-off chilling time.
Step-by-Step Instructions:
1. Prepare the Oven and Pan:
Preheat your oven to 325°F (163°C). Line a muffin pan with cupcake liners or get a mini cheesecake pan ready.
2. Make the Crust:
In a medium bowl, mix graham cracker crumbs, sugar, and melted butter until it’s well combined. Press about a tablespoon of this mix firmly into the bottom of each muffin cup to make the crust. Bake the crusts for 5 minutes, then take them out and set aside.
3. Prepare the Cheesecake Filling:
Using a large bowl, beat softened cream cheese until smooth and creamy. Gradually add sugar while mixing. Add eggs one at a time, beating well after each. Stir in vanilla extract, cocoa powder, and red food coloring until the color is even. Finally, add sour cream and flour, mixing just until smooth.
4. Assemble and Bake:
Pour the cheesecake batter over your crusts, filling almost to the top. Bake at 325°F (163°C) for 18-20 minutes, or until the centers are set but a little jiggly.
5. Cool and Chill:
Let the cheesecakes cool to room temperature, then refrigerate for at least 4 hours or overnight to fully set.
6. Prepare the Topping:
Whip heavy cream with powdered sugar and vanilla extract until stiff peaks form. Carefully remove the cheesecakes from their pans or liners.
7. Decorate and Serve:
Pipe or spoon the whipped cream on top of each mini cheesecake. Garnish with a mini Oreo cookie and a sprinkle of red velvet crumbs if you like. Serve chilled and enjoy your delightful mini red velvet cheesecakes!
Can I Use Frozen Cream Cheese for This Recipe?
It’s best to use cream cheese that’s fully thawed and softened for a smooth batter. Thaw frozen cream cheese overnight in the fridge or defrost it gently in the microwave in short bursts, making sure it doesn’t melt.
How Should I Store Leftover Mini Cheesecakes?
Store leftovers in an airtight container in the refrigerator. They keep well for up to 4 days. Before serving, you can let them sit at room temperature for 10-15 minutes to soften slightly.
Can I Make These Mini Cheesecakes Ahead of Time?
Absolutely! These cheesecakes actually taste better when made a day ahead as it allows the flavors to meld and the texture to set perfectly. Just keep them refrigerated until ready to serve.
What Can I Use Instead of Graham Cracker Crust?
If you don’t have graham crackers, crushed digestive biscuits or chocolate cookie crumbs work great as a substitute. Just mix with butter the same way for the crust base.