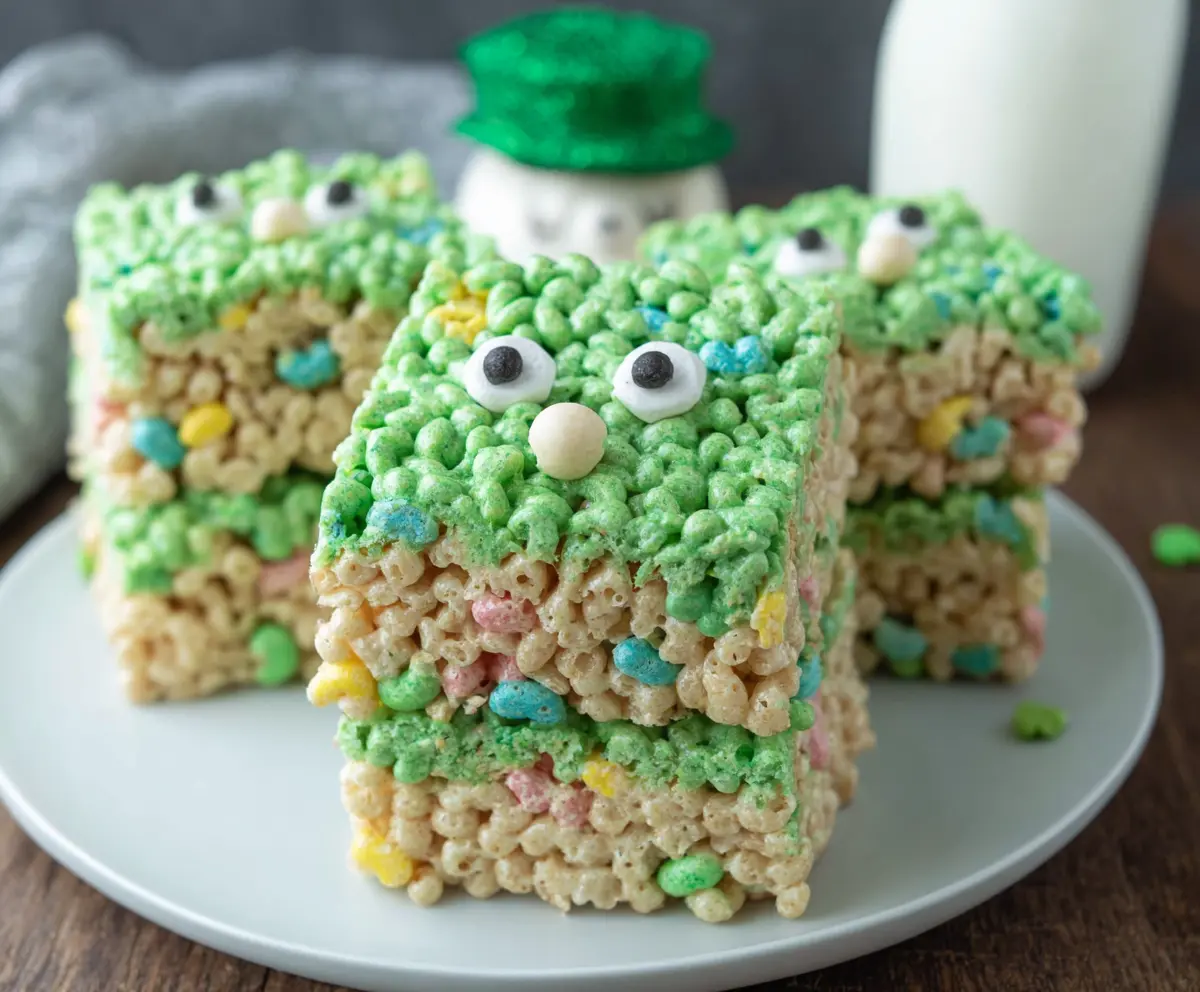
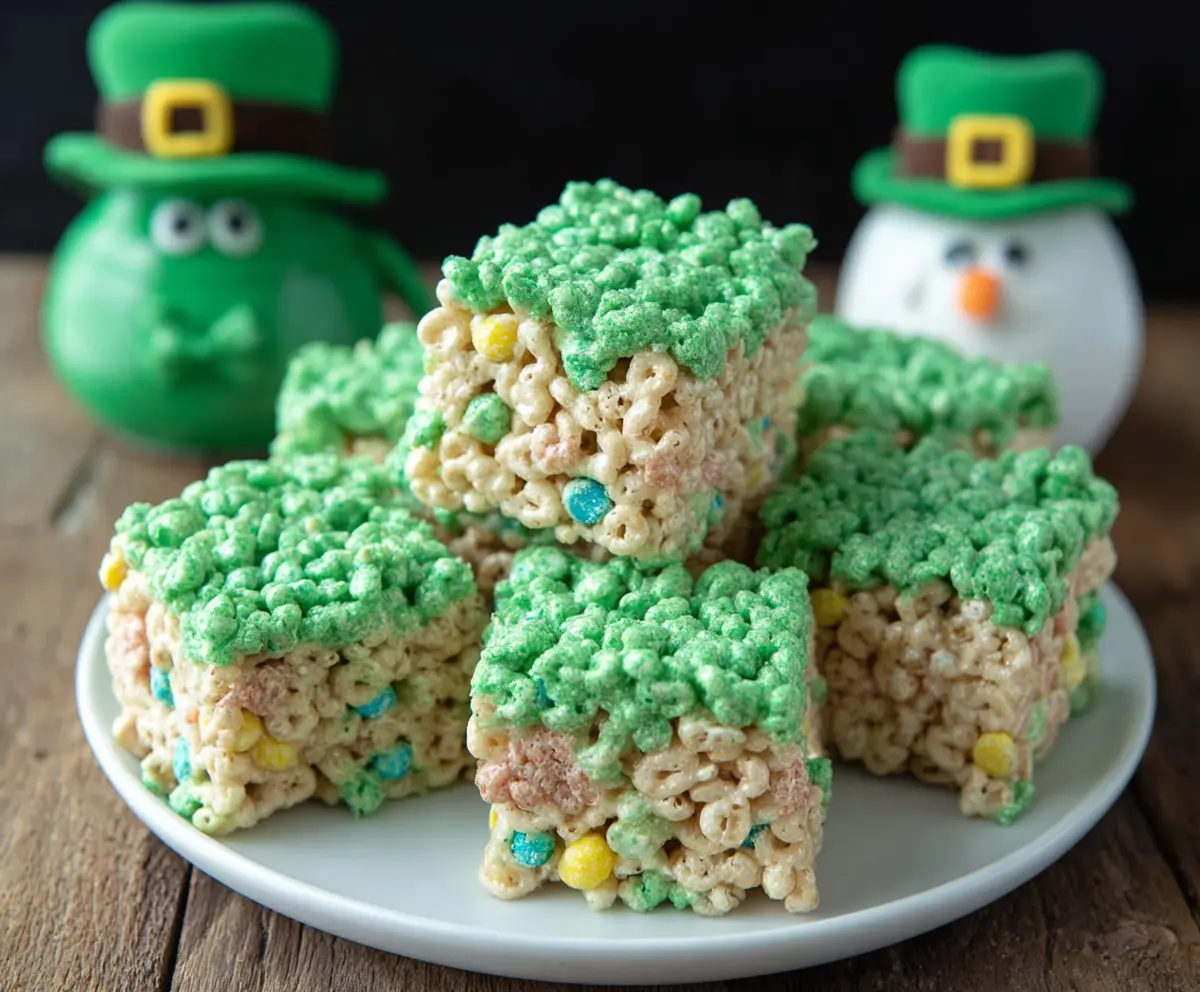
Lucky Leprechaun Rice Krispie Treats are a fun and festive twist on the classic gooey, crispy snack we all love. These treats mix the familiar crunch of Rice Krispies with colorful green and gold marshmallows or sprinkles, making them perfect for celebrating St. Patrick’s Day or just adding a little luck to your day. They’re sweet, chewy, and bright, bringing a playful pop of color to your snack table.
I love making these treats with my kids because they get to help mix in the green marshmallows and decorate with little gold candies or rainbows. It’s simple and quick, but it feels like a special activity that we all enjoy. Plus, these treats carry a little charm – maybe it’s the leprechaun colors or the hint of vanilla that makes everyone smile just a bit wider when they take a bite.
My favorite way to serve these Lucky Leprechaun Rice Krispie Treats is on a big platter with some fresh fruit on the side. They’re great for parties, school snacks, or anytime you want a sweet, cheerful treat. Honestly, they never last long in my house because they’re just that good and fun to eat. If you want to add a bit of holiday magic or just a pop of green and gold to your snack game, this is the recipe to try!
Key Ingredients & Substitutions
Rice Krispies cereal: This is the star for that classic crispy texture. If you want a gluten-free option, check the cereal packaging, as some brands are gluten-free.
Mini marshmallows: These melt easily to bind the cereal. If you’re out, regular marshmallows work too, just chop them smaller.
Butter: Unsalted is best to control saltiness, but salted butter works fine too. For a dairy-free choice, try coconut oil—it gives a slightly different flavor.
Green food coloring: Use gel food coloring for more vibrant color without watering down your mixture. Natural options like spinach powder work but may change the flavor a bit.
Candy eyes and small white candies or icing: These add character to your treats. If you don’t have candy eyes, small chocolate chips or mini M&Ms make good eyes, and white icing or a dab of melted white chocolate works well for noses.
How Can I Get the Layers Even and Not Sticky?
Success is all about timing and technique when layering.
- Use a greased spatula or wax paper to press each layer firmly and evenly into the pan; this prevents the treats from being too sticky or crumbly.
- Prepare your pan well with butter or cooking spray to make removal easier.
- Don’t try to add the second layer until the first is nicely pressed but still warm; this helps the layers stick together without blending into one.
- Work quickly because marshmallow mixtures set fast. If it cools too much, gently warm it again over low heat before spreading.
Equipment You’ll Need
- 9×13-inch baking pan – I like it because it gives enough space for the treats to set evenly.
- Large saucepan – perfect for melting butter and marshmallows smoothly.
- Rubber spatula – helps spread and press the mixture without sticking.
- Greased spatula or wax paper – for pressing layers flat and even.
- Candy eyes and small candies or icing – to decorate and give each treat character.
Flavor Variations & Add-Ins
- Chocolate chips – sprinkle some into the marshmallow mixture or press on top for a fudgy twist.
- Colored sprinkles or edible glitter – add to the green layer for extra shine and fun.
- Different candies – use mini chocolate buttons or colorful M&Ms instead of eyes for variety.
- Vanilla extract – stir a teaspoon into the melted marshmallow mixture for a richer, sweeter flavor.
Lucky Leprechaun Rice Krispie Treats
Ingredients You’ll Need:
Main Ingredients:
- 6 cups Rice Krispies cereal
- 1 (10 oz) package mini marshmallows (about 4 cups)
- 3 tablespoons unsalted butter
- Green food coloring
For Decoration:
- Candy eyes (about 12 for 6 treats)
- Small round white candies or white icing for noses (6 pieces)
- Cooking spray or butter for greasing the pan
Time Needed to Make These Treats
This recipe takes about 20 minutes to prepare and assemble, plus about 1 hour to let the treats cool and set completely. So plan for roughly 1 hour and 20 minutes from start to finish.
Step-by-Step Instructions:
1. Prep Your Pan:
Start by lightly greasing a 9×13-inch pan with cooking spray or butter. This will help the treats come out easily once they’re set.
2. Make the Green Layer:
In a large pot, melt 3 tablespoons of butter over low heat. Add half of the mini marshmallows and stir continuously until melted and smooth. Remove from heat and add a few drops of green food coloring — stir until the color spreads evenly. Pour in half of the Rice Krispies cereal and gently mix until everything is combined well.
3. Press the Green Layer:
Transfer the green cereal mixture to the bottom of the prepared pan. Use a greased spatula or wax paper to press it down firmly and evenly, creating a smooth green layer.
4. Make the Plain Layer:
Now, melt a fresh 3 tablespoons of butter over low heat in the same pot. Add the remaining marshmallows and stir until melted and smooth. Remove from heat, add the remaining Rice Krispies cereal, and stir gently until coated.
5. Add the Plain Layer:
Spread this plain cereal mixture evenly over the green layer in the pan. Press gently with a greased spatula or wax paper to create a flat top.
6. Let Set and Decorate:
Allow the treats to cool and set for about 1 hour at room temperature. Once firm, cut the treats into squares. Decorate each square by sticking two candy eyes on the green side and placing a small round candy or dot of white icing just below the eyes to create a little leprechaun face.
7. Serve and Enjoy:
Now your Lucky Leprechaun Rice Krispie Treats are ready to enjoy! They’re perfect with a glass of cold milk or as a fun, festive snack anytime.
Can I Use Regular Marshmallows Instead of Mini Marshmallows?
Yes! Just chop regular marshmallows into smaller pieces so they melt evenly. They’ll work just as well for binding the cereal together.
How Should I Store Leftover Rice Krispie Treats?
Store leftovers in an airtight container at room temperature for up to 3 days. Avoid refrigeration to keep them soft and chewy.
Can I Make These Treats Ahead of Time?
Absolutely! Prepare and decorate them a day in advance. Just keep them covered to maintain freshness before serving.
What Can I Use If I Don’t Have Candy Eyes?
No worries! You can substitute with mini chocolate chips, small colored candies, or even draw eyes using edible markers or icing pens.