Creepy Eyeball Bites are a fun and spooky snack that’s perfect for Halloween or any time you want to add a little creepy factor to your party spread. They’re made with silly-looking “eyeballs” crafted from easy snacks like mozzarella balls, olives, and maybe a hint of pepper or sauce for a bloodshot effect. The best part is how their simple ingredients come together to create a playful, eye-catching treat.
I love making these because they’re quick, no-fuss, and guaranteed to get a few giggles or surprised looks from friends and family. I usually assemble them while chatting with whoever’s around—it’s such a great way to break the ice and get everyone excited about whatever spooky event we’re having. Plus, they’re great for little helpers who want to get involved in the kitchen without too much mess.
My favorite way to serve Creepy Eyeball Bites is on a big platter with some colorful dips nearby. They look amazing surrounded by Halloween decorations, especially when paired with other fun snacks. They’re just the right size for popping in your mouth, and the mix of creamy cheese and briny olives always hits the spot. If you’re looking for a snack that’s easy, festive, and a little bit spooky, these bites are the perfect choice!
Key Ingredients & Substitutions
White Eyeballs: I love using cake pops for a soft, sweet center. If you want less sugar, try round white candies like bonbons or white chocolate truffles instead.
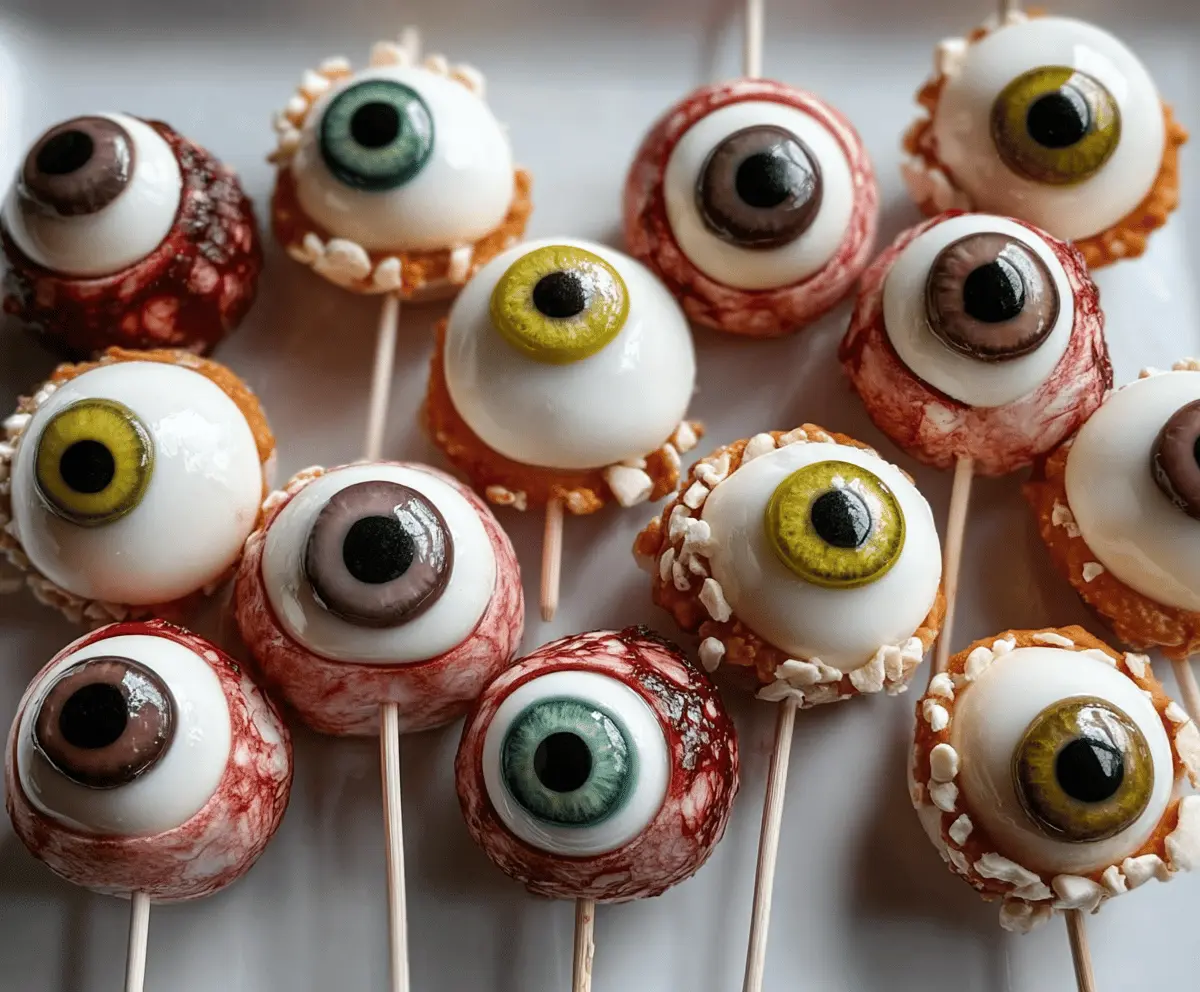
Edible Eyeball Decorations: These add the iris and pupil details. You can find sugar or wafer eyes online or in craft stores. If unavailable, make your own with colored icing or edible markers.
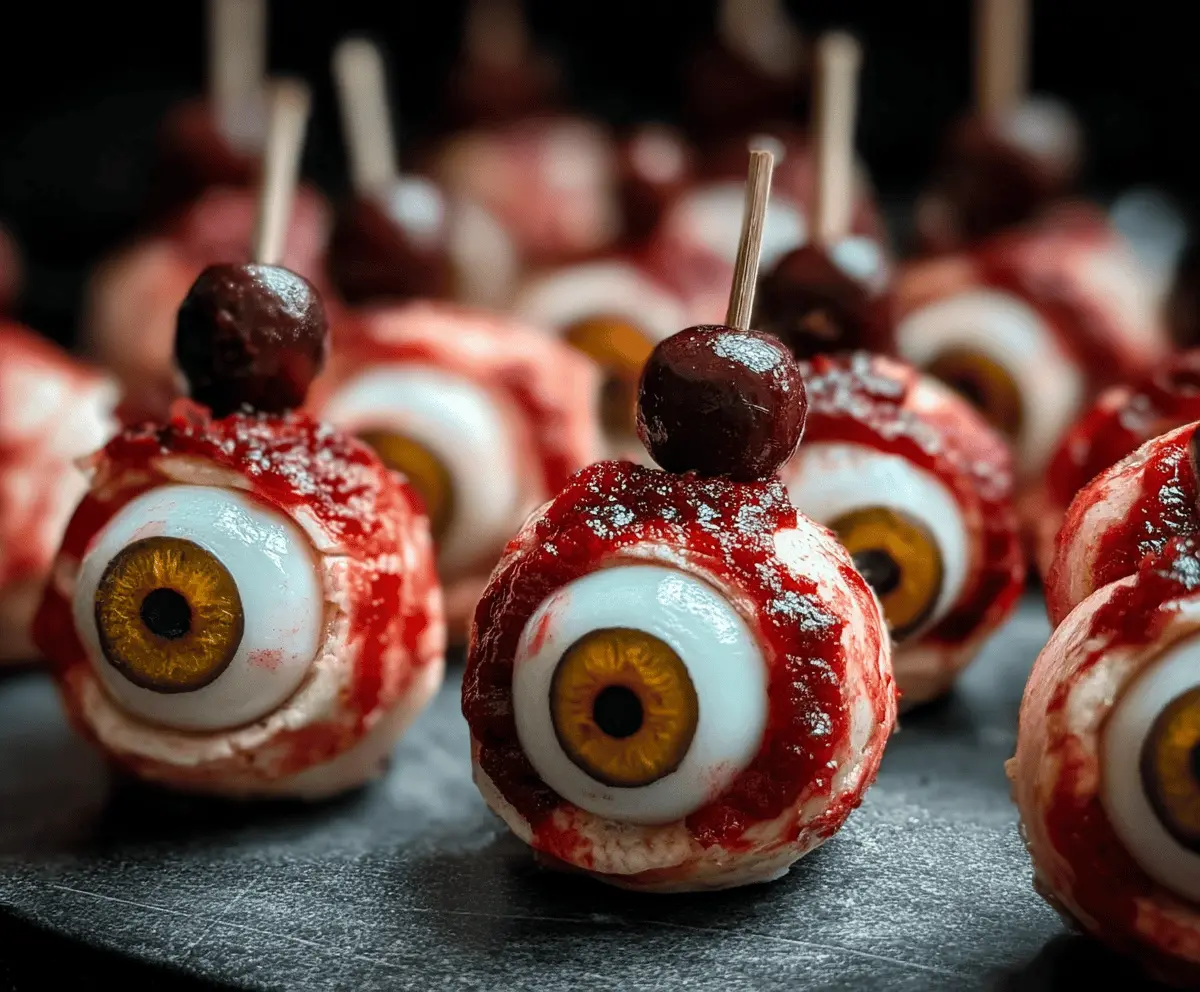
Red Food Coloring: This makes the creepy veins. Use a fine brush or toothpick to get thin, realistic lines. If you prefer, red gel icing can work better for a thicker, brighter effect.
Mini Marshmallows or Candy Pieces: These create the fleshy eye socket look at the base. If you don’t have these, crushed rice cereal or chopped nuts can add texture and keep the eye “sticky.”
How Can I Make Clear, Realistic Veins on Eyeball Bites?
The veins give your eyeballs that extra creepy, realistic touch. Here’s what I do to nail this step:
- Use a small, fine paintbrush or even a toothpick dipped in red food coloring or edible gel.
- Draw thin, random squiggles or lines radiating from the iris toward the edges.
- Work slowly and let the paint dry so lines don’t smudge.
- If you want an extra deep red vein effect, layer a couple of light strokes instead of one thick one.
- Practice on parchment paper first to get comfortable with the motion.
Taking your time here makes these eyeballs look much spookier—trust me, it’s worth the tiny extra effort!
Equipment You’ll Need
- Cookie sheet or platter – I use this to display the eyeballs attractively and keep them steady.
- Small paintbrush or toothpick – helps draw fine red veins for a realistic look.
- Scissors or craft knife – useful for trimming any decorations or making adjustments to edible eyeballs.
- Mixing bowls – for stirring and preparing any homemade elements like frosting or colored gels.
- Refrigerator – to keep the eyeballs firm and fresh until ready to serve.
Flavor Variations & Add-Ins
- Chocolate coating instead of fondant or icing can give a richer, more decadent look and taste.
- Add small edible glitter or shimmer dust for a bloodshot or eerie shiny effect on the eyes.
- Use flavored candies or filled chocolates (mint, caramel) for an unexpected flavor twist inside the eyeballs.
- Incorporate different colored candies or chocolates for iris variety—blue, green, or even glowing neon hues for extra spookiness.
Creepy Eyeball Bites
Ingredients You’ll Need:
Eyeball Base:
- 10 large white cake pops or large round white candies (to serve as the eyeballs)
- Lollipop sticks or skewers
Eyeball Decorations:
- Edible wafer or sugar eyeball decorations (varied colors for iris: green, brown, blue, yellow)
- Red food coloring or red edible gel for veins
- Miniature marshmallows or white candy pieces for eye socket texture
- Optional: small amount of corn syrup or edible glue to attach decorations
How Much Time Will You Need?
This recipe takes about 30 minutes of active prep time. If making cake pops, you’ll need additional chilling time—about 1 hour or more—to let them firm up before decorating. Once assembled, just keep them refrigerated until you’re ready to serve.
Step-by-Step Instructions:
1. Prepare the Eyeball Base:
If making cake pops, combine your favorite cake mix and frosting, then shape the mixture into round balls. Chill them in the fridge until firm. Alternatively, simply use large round white candies or pre-made cake pops.
2. Insert Sticks:
Push a lollipop stick or skewer gently but firmly into each eyeball base to create your “eyeball bites” on sticks.
3. Attach the Iris:
Place an edible wafer or sugar eyeball decoration in the center of each white eyeball base. If needed, use a tiny dab of corn syrup or edible glue to keep it secure.
4. Add Creepy Veins:
Using a small paintbrush or toothpick, lightly paint thin, random red lines (using red food coloring or edible gel) around the white of each eyeball. This gives a spooky, bloodshot effect.
5. Create Eye Socket Texture:
Dip or press the base of each eyeball bite into miniature marshmallows or small white candy pieces. This mimics the fleshy eye socket and adds a fun texture.
6. Arrange and Chill:
Place your finished eyeball bites upright on a serving tray or plate with the sticks down. Refrigerate until you’re ready to serve to keep them fresh and firm.
Equipment You’ll Need
- Cookie sheet or platter (for displaying the eyeball bites)
- Small paintbrush or toothpick (for drawing veins)
- Mixing bowls (if making cake pops)
- Scissors or craft knife (for trimming decorations if needed)
- Refrigerator (to chill and set the eyeballs)
Flavor Variations & Add-Ins
- Use chocolate coating for the eyeballs instead of cake pops for a richer taste and darker tone.
- Add edible glitter or shimmer dust on the inks for shiny, bloodshot eyes.
- Try flavored fillings inside your cake pops, like mint or caramel, for a tasty surprise.
- Use brightly colored or neon candy eyes for extra spooky effects.
Can I Use Store-Bought Cake Pops for This Recipe?
Yes! Store-bought white cake pops work perfectly and save time—just add the edible eyeball decorations and veins to customize them.
How Should I Store Creepy Eyeball Bites?
Keep them refrigerated in an airtight container for up to 2-3 days. Chill them until serving to keep the shape and freshness intact.
What Can I Use If I Don’t Have Edible Eyeball Decorations?
If you don’t have ready-made eyes, you can create your own with white fondant or icing for the base and use edible markers or colored icing to draw the iris and pupil.
Can I Make These Ahead of Time?
Absolutely! Prepare and assemble the eyeball bites a day ahead, then store them in the fridge until your party or event.