Creepy Deviled Eggs are a fun and spooky twist on the classic party favorite. These eggs look eerie with their unique decorations that give them a ghoulish, Halloween vibe. The creamy, tangy filling stays true to the traditional deviled egg flavor, but the eye-catching creepy details make them a hit at any themed gathering.
I love making these when friends come over for Halloween because they’re an easy way to add some festive spirit to the table. Plus, the best part is how simple it is to turn ordinary deviled eggs into something playful and unexpected. I usually get a little creative with olives, paprika, and food coloring to make eyes, veins, or other spooky designs that always get a laugh.
One tip I swear by is prepping everything ahead of time—boil the eggs, mix the filling, and have your decorating tools ready. That way, you can enjoy the process without rushing, and your eggs come out perfectly creepy every time. They’re great as finger food, and I find everyone loves them because they’re both tasty and a little silly. It’s a perfect combo for a fun night with friends and family.
Key Ingredients & Substitutions
Eggs: Fresh large eggs work best for firm whites and rich yolks. Older eggs peel easier if you’re worried about the shell sticking.
Mayonnaise: It adds creaminess to the filling. You can swap it with Greek yogurt for a lighter version or vegan mayo if you prefer dairy-free.
Dijon Mustard: Gives tang and depth. Yellow mustard can be a milder alternative if you don’t have Dijon.
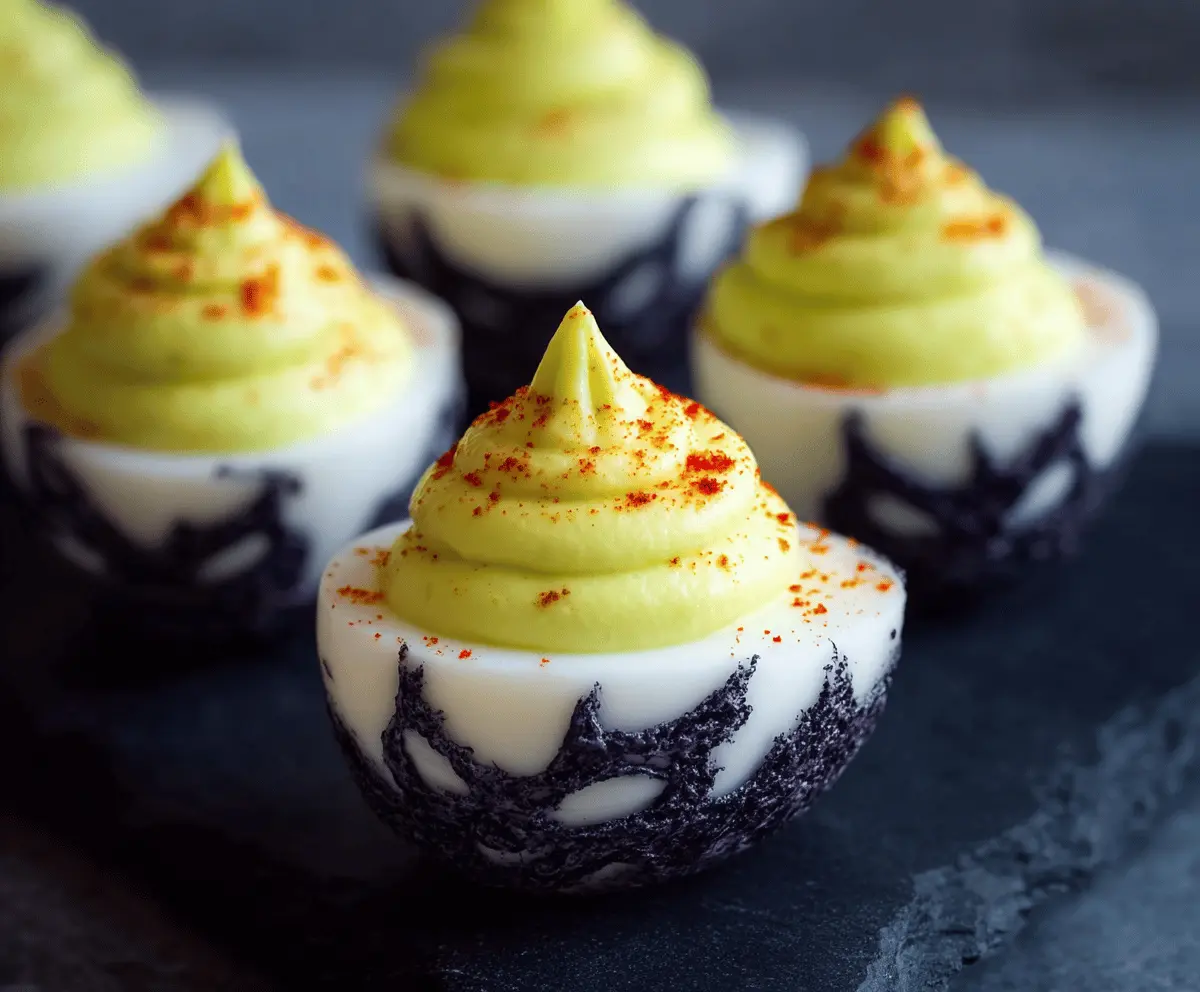
Black Food Coloring or Edible Marker: Essential for the creepy decoration. If you can’t find black food coloring, melted dark chocolate piped carefully makes a fun option too.
Lace or Spiderweb Stencil: This helps create neat patterns, but if you don’t have one, hand-drawing freeform spiderwebs or veins with a fine brush or toothpick works just as well.
How Do You Get Perfectly Smooth and Creamy Deviled Egg Filling?
Creating smooth yolk filling can be tricky, but these tips help:
- Drain yolks well before mashing to avoid watery filling.
- Mash yolks with a fork or use a food processor for extra smoothness.
- Add mayonnaise and mustard gradually to control texture.
- Taste and adjust seasoning (salt, pepper, vinegar) as you go for balanced flavor.
- If filling feels dry, add a little more mayo or a splash of milk for softness.
Using a piping bag or zip-top bag with a corner cut off makes filling the whites easy and neat, giving a pretty swirl shape. This also helps keep the presentation clean and professional-looking.
Equipment You’ll Need
- Small saucepan – I like it because it evenly cooks the eggs and small size makes handling easier.
- Ice bath – keeps the eggs cool fast so they peel easily.
- Sharp knife or egg cutter – helps slice eggs in half neatly.
- Mixing bowl – for mashing yolks with ingredients.
- Piping bag or spoon – for filling the egg whites smoothly and evenly.
- Small brush or toothpick – to decorate with black food coloring or to draw spiderwebs.
- Plate or platter – for arranging your creepy eggs attractively.
Flavor Variations & Add-Ins
- Swap mayonnaise with Greek yogurt or vegan mayo for a lighter filling.
- Mix in chopped olives, pickles, or jalapeños for extra flavor and texture.
- Use different spices like smoked paprika, cayenne, or cumin in the yolk mixture for a smoky or spicy twist.
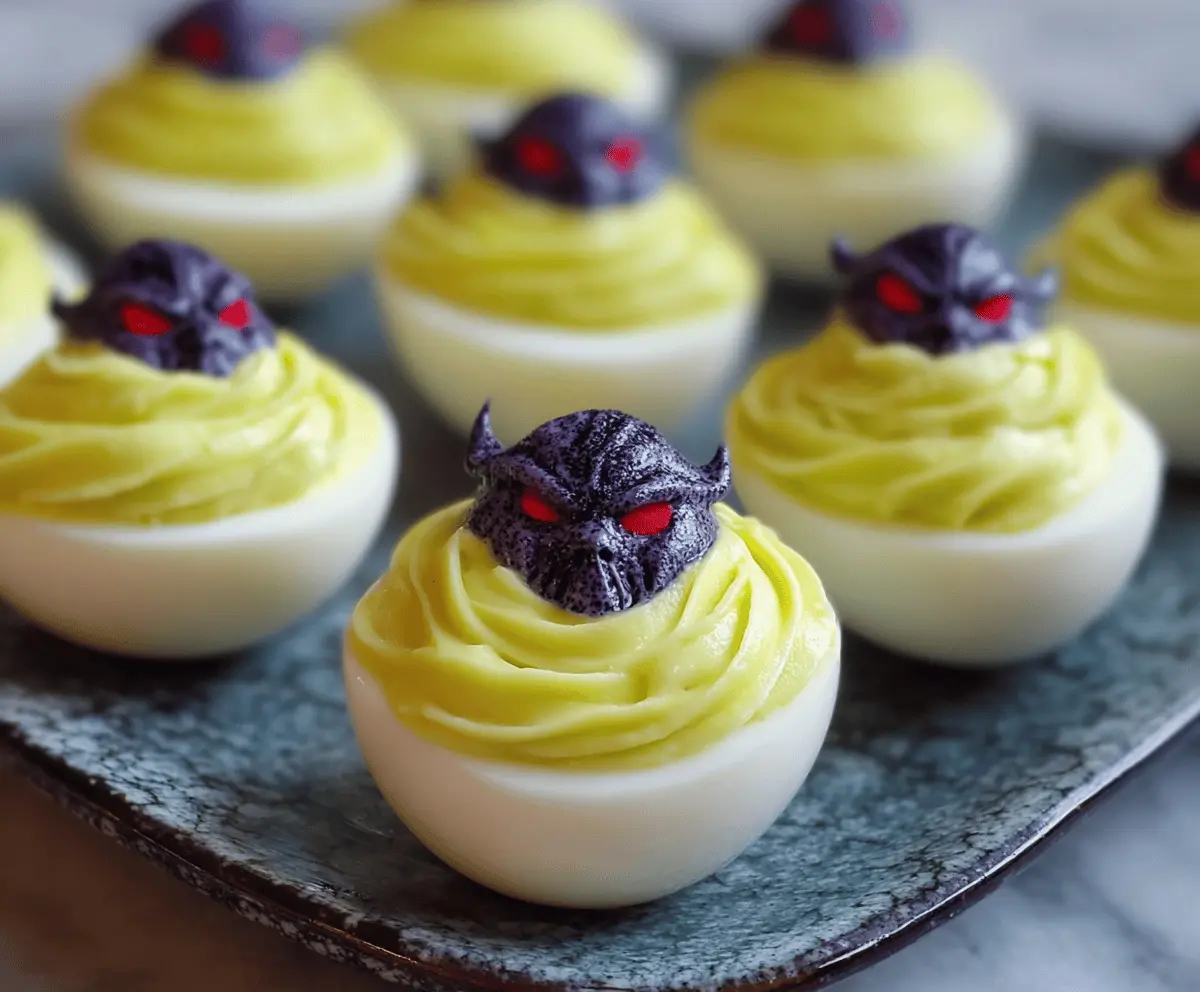
- Decorate the eggs with googly eyes, small plastic bugs, or green food coloring for more creepy effects.
Creepy Deviled Eggs
Ingredients You’ll Need:
- 6 large eggs
- 3 tablespoons mayonnaise
- 1 teaspoon Dijon mustard
- 1 teaspoon white vinegar
- Salt and pepper, to taste
- Paprika, for garnish
- Black food coloring or black edible marker (for decorating)
- Small piece of lace or spiderweb stencil for painting (optional)
How Much Time Will You Need?
This recipe takes about 20 minutes of total time: 12 minutes cooking and resting the eggs, 5 minutes to prepare the filling, and a few extra minutes to decorate and assemble your creepy deviled eggs.
Step-by-Step Instructions:
1. Boil and Cool the Eggs:
Place the eggs in a single layer in a saucepan and cover them with water about one inch above. Bring the water to a boil over medium-high heat. Once boiling, cover the pan and remove it from the heat. Let the eggs sit for 10 to 12 minutes. Then, drain the hot water and transfer the eggs to an ice bath to cool completely.
2. Prepare the Filling:
Carefully peel the cooled eggs and cut them in half lengthwise. Gently scoop out the yolks into a medium bowl. Mash the yolks with mayonnaise, Dijon mustard, white vinegar, salt, and pepper until smooth and creamy.
3. Fill and Decorate the Eggs:
Spoon or pipe the creamy filling back into the egg white halves, swirling the top decoratively. Lightly sprinkle each filled egg with paprika for a pop of color. For the spooky look, place a small piece of lace or a spiderweb stencil on the egg white and gently dab or paint black food coloring around it to create spiderweb-like patterns. Let the coloring dry completely before serving to avoid smudging.
4. Serve and Enjoy:
Arrange your creepy deviled eggs on a platter and get ready to impress your guests with this spooky and tasty treat!
Can I Use Hard-Boiled Eggs That Are Already Peeled?
Yes, pre-peeled hard-boiled eggs work fine! Just make sure they are fresh and firm so they hold their shape during filling and decorating.
How Do I Store Leftover Deviled Eggs?
Store leftovers in an airtight container in the fridge for up to 2 days. Keep the decoration separate if possible to avoid smudging, and add paprika right before serving.
Can I Make These Ahead of Time?
Absolutely! You can prepare the filling and fill the eggs a day in advance. Wait to add the black food coloring decoration until just before serving to keep designs fresh-looking.
What If I Don’t Have Black Food Coloring?
No worries! Use a black edible marker, or try melted dark chocolate carefully piped on for a similar creepy effect.