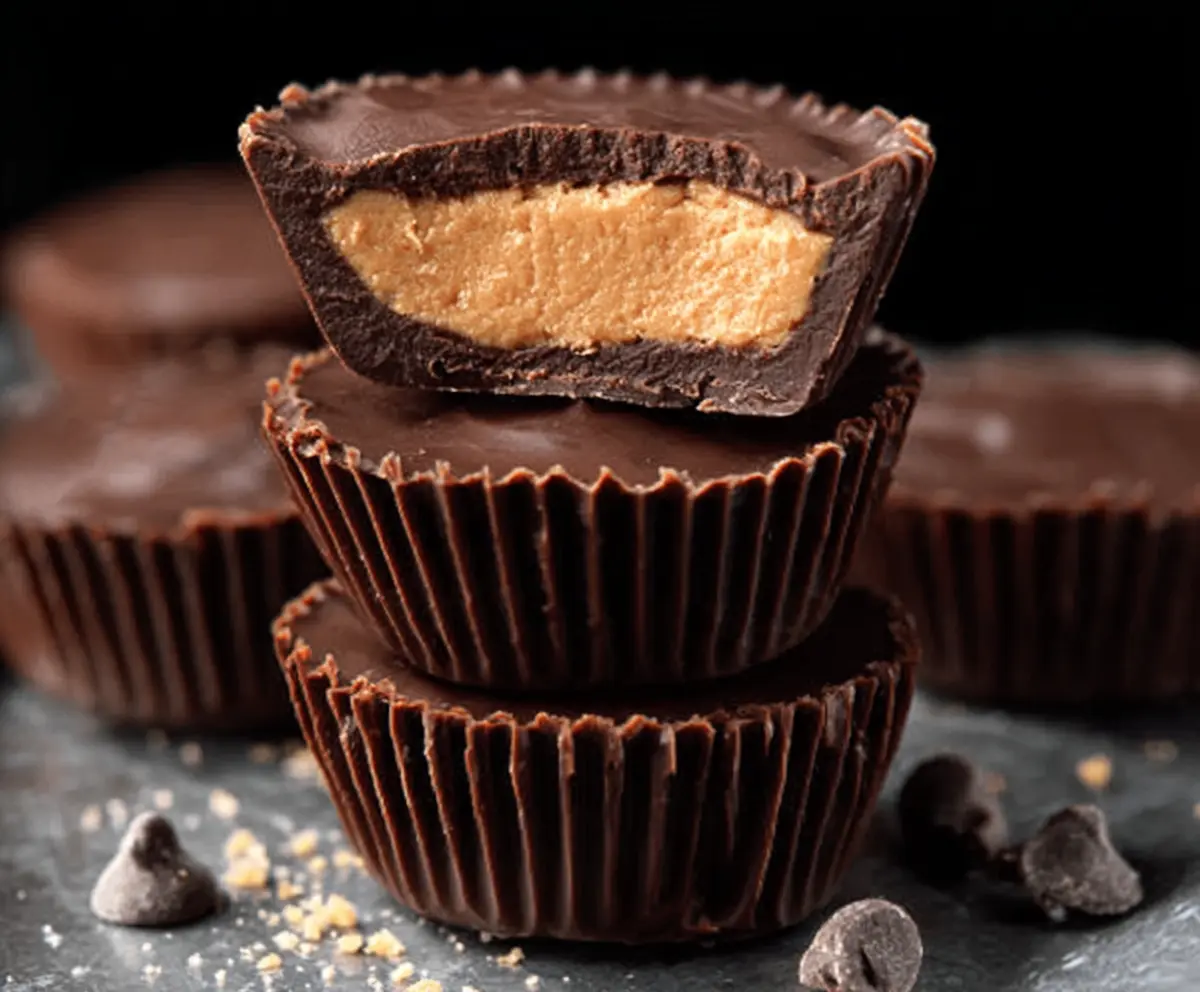
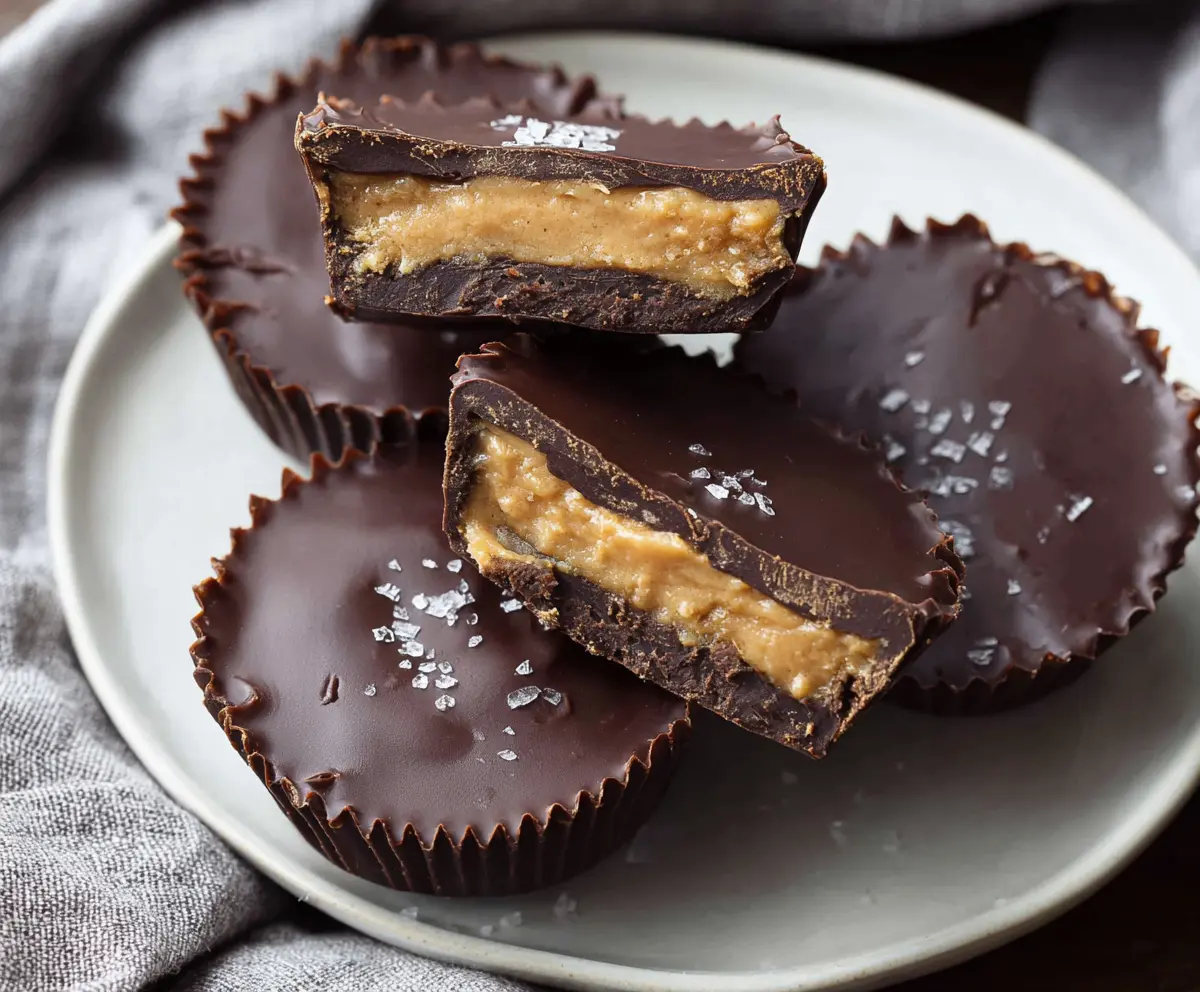
Classic Homemade Reese’s Peanut Butter Cups are a delightful treat that perfectly combines creamy peanut butter with rich milk chocolate. The smooth, slightly salty peanut butter filling is wrapped in a thick layer of melted chocolate, creating a deliciously satisfying contrast in every bite. These cups look just like the store-bought ones but taste even better because you make them yourself.
I love making these at home because it’s fun and simple, and you can adjust how sweet or salty the peanut butter filling is to fit exactly what you like. I usually add a little bit of powdered sugar to get that perfect texture—soft but firm enough to hold its shape. Plus, they’re perfect for making ahead and sharing with friends or family. I find that homemade treats always feel a bit more special and personal.
When I serve these peanut butter cups, I like to pop them in the fridge for a while so they’re nice and firm, then let them soften just a bit before eating. They’re great for a little pick-me-up snack or as a fun homemade gift around the holidays. Making them always brings back happy memories of sharing sweet moments with loved ones, and I’m sure you’ll enjoy them just as much as I do!
Key Ingredients & Substitutions
Chocolate chips: Semi-sweet chocolate gives a nice balance to sweet peanut butter. Milk chocolate works too for a sweeter treat. For a richer taste, try dark chocolate. If dairy-free, use vegan chocolate chips.
Peanut butter: Creamy and smooth peanut butter is best for that classic texture. Natural peanut butter works well but may need a pinch of salt. You can use almond or cashew butter for a different flavor or if you have allergies.
Powdered sugar: Adds just enough sweetness and helps firm the filling. If you want to reduce sugar, try a bit less, but the texture might be softer.
Butter: Unsalted butter adds richness and helps bind the filling. You can substitute coconut oil for a dairy-free option, but the flavor will change slightly.
How Do I Get the Perfect Peanut Butter Filling and Chocolate Coating?
Making the filling smooth and firm enough to hold its shape is key. Mix the peanut butter, powdered sugar, and butter well until thick. Don’t rush melting your chocolate; microwave gently in short bursts and stir often to avoid burning.
- Spread melted chocolate evenly in liners so the base isn’t too thin and breaks easily.
- Freeze the chocolate before adding peanut butter to help layers set nicely without mixing.
- Tap the muffin tin after adding the final chocolate layer to remove air bubbles and get smooth tops.
- Chill well in the fridge to firm up the cups for easy removal and perfect slices.
Equipment You’ll Need
- Muffin tin & cupcake liners – I recommend using paper liners for easy cleanup and neat edges.
- Microwave-safe bowl – makes melting the chocolate quick and simple.
- Small spoon or offset spatula – helps spread the melted chocolate evenly in the liners.
- Mixing bowl – for combining the peanut butter filling.
- Measuring cups and spoons – to measure ingredients accurately.
- Refrigerator or freezer – for setting the chocolate and firming up the cups.
Flavor Variations & Add-Ins
- Use dark or white chocolate instead of semi-sweet for a different look and taste.
- Add a pinch of cinnamon or cayenne to the peanut butter mixture for a spicy twist.
- Mix in crushed pretzels, crumbled cookies, or chopped candy for added crunch and texture.
- Swirl in a little caramel or fudge on top before the final chocolate layer for extra decadence.
Classic Homemade Reese’s Peanut Butter Cups
Ingredients You’ll Need:
- 1 1/2 cups semi-sweet chocolate chips (or milk chocolate chips)
- 1 cup creamy peanut butter (preferably natural or lightly salted)
- 1/4 cup powdered sugar
- 2 tablespoons unsalted butter, softened
- 1/2 teaspoon vanilla extract
- Pinch of salt (optional, if using unsalted peanut butter)
- Paper cupcake liners
How Much Time Will You Need?
This recipe takes about 15 minutes to prepare plus about 40 minutes to chill and set the peanut butter cups in the freezer and refrigerator. The freezing and chilling help make the layers firm and perfect for enjoying.
Step-by-Step Instructions:
1. Prepare Your Work Station:
Line a muffin tin with paper cupcake liners and have everything ready for easy assembly.
2. Melt the Chocolate:
Place 1 cup of chocolate chips in a microwave-safe bowl. Heat in 30-second intervals, stirring between each until fully melted and smooth. Set aside to cool slightly.
3. Make the Peanut Butter Filling:
In a medium bowl, combine peanut butter, powdered sugar, softened butter, vanilla extract, and a pinch of salt (if using). Mix well until smooth and thick enough to hold its shape.
4. Add Chocolate Base:
Spoon about 1 tablespoon of melted chocolate into the bottom of each lined cup. Spread it evenly to cover the base. Place the tray in the freezer for about 10 minutes so the chocolate firms up.
5. Add Peanut Butter Layer:
Take the muffin tin out of the freezer and add about 1 tablespoon of the peanut butter filling on top of the hardened chocolate. Press it down gently to flatten and spread it evenly.
6. Cover with Chocolate:
Melt the remaining 1/2 cup of chocolate chips in the microwave until smooth. Pour this melted chocolate over the peanut butter layer, making sure it’s completely covered.
7. Smooth and Chill:
Gently tap the muffin tin on the counter a few times to smooth out the chocolate and remove any air bubbles. Place the peanut butter cups in the refrigerator for at least 30 minutes until the chocolate is firm.
8. Serve and Store:
Once set, peel off the cupcake liners and enjoy! Store any leftovers in an airtight container in the fridge for up to a week.
Can I Use Natural Peanut Butter for This Recipe?
Yes! Natural peanut butter works well but may be thinner, so adding the powdered sugar helps firm up the filling. If your peanut butter is unsalted, add a small pinch of salt to balance the flavors.
Can I Substitute the Chocolate?
Absolutely! You can use milk chocolate, dark chocolate, or even white chocolate chips depending on your preference. Just be sure to melt them gently to avoid burning.
How Should I Store Homemade Peanut Butter Cups?
Store them in an airtight container in the refrigerator for up to one week. If you want to keep them longer, you can freeze them for up to a month—just thaw in the fridge before eating.
What If I Don’t Have a Muffin Tin?
No problem! You can use silicone molds or shape the cups by hand and place them on a parchment-lined baking sheet. Just be sure to chill them well so they hold their shape.